Dryer Taking Too Long to Dry? Troubleshooting Guide for Bend, OR Homes
A dryer that runs but takes two or three cycles to finish a load is rarely a dead appliance — it is usually an airflow problem hiding between the lint trap and the outside vent. This guide walks you through the most common causes, safe checks you can do yourself, and how to tell when it is time to call a local technician.
Start Here: What to Check When Your Dryer Takes Too Long
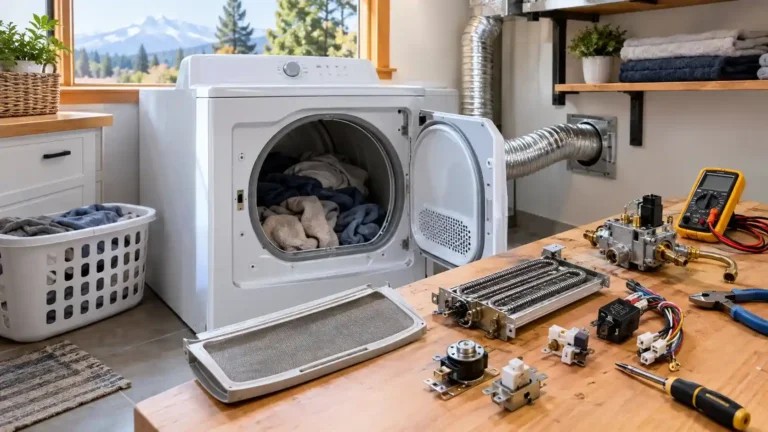
When your dryer is taking too long to dry clothes, the first instinct is often to blame the heating element — and to assume an expensive repair is coming. In practice, the majority of slow-drying dryers we see are dealing with restricted airflow somewhere between the lint trap and the outside vent cap, not a failed heating part. The dryer can be producing heat perfectly normally while the moist air simply has nowhere to go, so clothes come out damp and the cycle has to run again.
That is why this guide starts with airflow, not parts. Most of the causes below are checks you can do yourself in minutes: a lint screen coated with invisible dryer-sheet film, a vent hose crushed when the dryer was pushed back after cleaning, or an exterior vent cap blocked by a bird nest or snow. They are ordered from simplest to most involved, so you rule out the easy wins before considering a technician.
This guide is written for homeowners in Bend, Oregon and the surrounding Central Oregon area. It covers how a dryer actually dries clothes, the eight most common reasons drying time stretches out, a step-by-step diagnosis you can follow in order, and clear guidance on when professional dryer repair in Bend is the right move.
Table of Contents — Tap to Jump to a Section
- 01 Introduction
- 02 Why Drying Takes So Long
- 03 How a Dryer Dries Clothes
- 04 8 Common Causes
- 05 Clogged Lint Filter
- 06 Blocked Vent Hose
- 07 Blocked Exterior Vent
- 08 Dirty Moisture Sensor
- 09 Weakening Heat System
- 10 Overloading the Drum
- 11 Worn Blower or Drive Parts
- 12 Long or Restrictive Vent Run
- 13 Step-by-Step Diagnosis
- 14 Tools & Time Estimates
- 15 Diagnose by Symptom
- 16 Safety First
- 17 Central Oregon Factors
- 18 Prevention
- 19 DIY or Pro?
- 20 When to Call a Pro
- 21 FAQ
- 22 Bend & Redmond Service
- 23 Final Takeaway
Why Is My Dryer Taking So Long to Dry Clothes?
The most common reasons a dryer takes too long to dry are:
- The lint filter is clogged — including invisible residue from dryer sheets that a quick brush-off does not remove.
- The vent hose behind the dryer is crushed, kinked, or packed with lint, especially after the machine has been moved.
- The exterior vent cap is blocked by lint, a bird nest, snow, or debris — the most overlooked spot on the whole system.
- The moisture sensor is coated with residue and misreads how dry the clothes are, keeping the cycle running.
- The heating element (electric) or igniter and gas valve coils (gas) are weakening, producing heat but not enough of it.
- The drum is overloaded, so clothes cannot tumble freely and moisture stays trapped inside the bundle.
- The blower wheel is clogged or worn, so air barely moves even with clean vents.
- The vent run is too long or too restrictive — long runs through attics and crawlspaces need periodic cleaning.
In most cases, restricted airflow is the culprit, not a dead heating part. Start with the lint filter and the vent path before assuming the worst.
How a Dryer Actually Dries Your Clothes
A clothes dryer removes moisture through three things working together: heat, airflow, and tumbling. The heating element (or gas burner) warms the air, the blower pushes that hot air through the tumbling drum, and the exhaust vent carries the moisture-laden air out of the house. Drying only works when all three keep moving — interrupt any one of them and the whole process slows down.
Drying stalls when airflow stalls: trapped hot air makes the thermostat cut heat to protect the machine — which is why a blocked vent can make the cabinet feel hot outside while clothes stay damp inside.
While you wait, look for the usual reasons drying slows gradually: lint accumulating in the vent, residue building on the sensor, or the hose behind the dryer getting compressed a little more each time the machine is moved. When the dryer suddenly struggles after you pulled it out, moved it, or stuffed in an oversized load, the cause is usually mechanical and immediate.
8 Common Reasons a Dryer Takes Too Long to Dry
The sections below walk through each cause in detail, ordered from the simplest checks to the problems most likely to need a technician. Work through them in order — do not skip ahead to part replacement before ruling out the airflow problems.
| Common Cause | Main Symptom | Difficulty |
|---|---|---|
| Clogged lint filter | Gradually longer cycles, clothes damp | Easy — 5 minutes |
| Blocked or crushed vent hose | Weak heat reaching clothes, long cycles | Easy — 20 minutes |
| Blocked exterior vent cap | Dryer hot outside, clothes damp, burning smell | Easy — 15 minutes |
| Dirty or failing moisture sensor | Cycles run far longer than needed, clothes over-dry or stay damp | Easy — 10 minutes |
| Weakening heating element or gas igniter | Dryer feels warm, not hot; drying time creeps up over months | Moderate to pro |
| Overloaded drum | Only heavy loads struggle; clothes balled up | Easy — immediate |
| Worn blower wheel or drive parts | Weak airflow even with clean vents, rattling or squealing | Professional |
| Long or restrictive vent run | Slow drying from day one in this home, lint-heavy vent | Moderate to pro |
1. The Lint Filter Is Clogged — Even When It Looks Clean
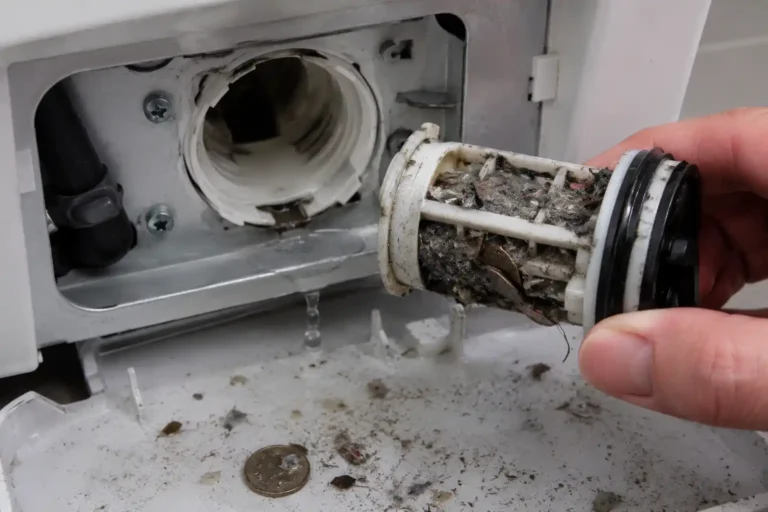
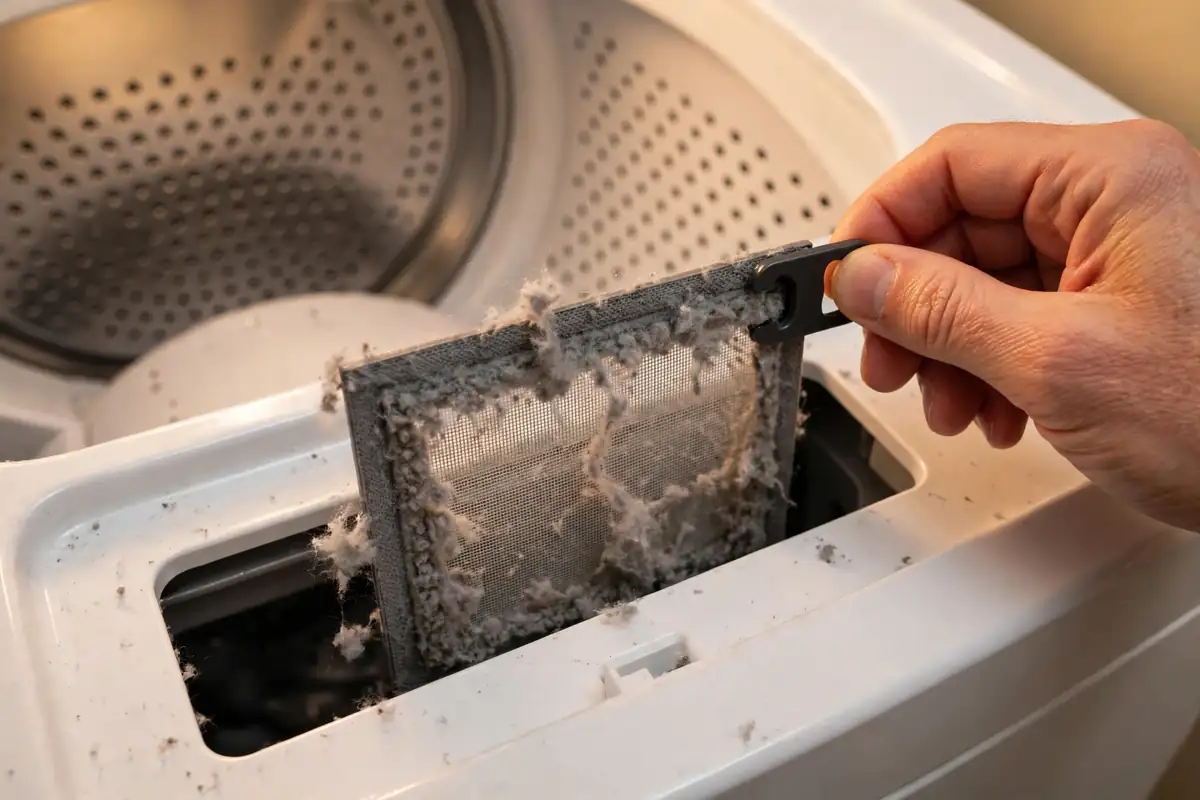
This is the most common — and most underestimated — cause of slow drying, which is exactly why it is worth checking first. Everyone knows to clean the lint screen after each load, but a screen that looks clean can still be restricting airflow thanks to an invisible film left behind by dryer sheets and liquid fabric softeners.
Test it: run the screen under the faucet. If water pools on top instead of flowing straight through the mesh, that film is there — and it can reduce airflow enough to add twenty or thirty minutes to every cycle. The fix takes five minutes: scrub the screen with warm, soapy water and an old toothbrush, rinse it, and let it air-dry completely before putting it back. Do this every few months, not just when drying times get bad.
Also check the lint trap housing — the slot the screen slides into. Lint compacts in that cavity over the years, and a vacuum nozzle with a crevice attachment pulls out an astonishing amount. A clean trap is the single cheapest performance upgrade your dryer can get.
2. The Vent Hose Behind the Dryer Is Blocked or Crushed
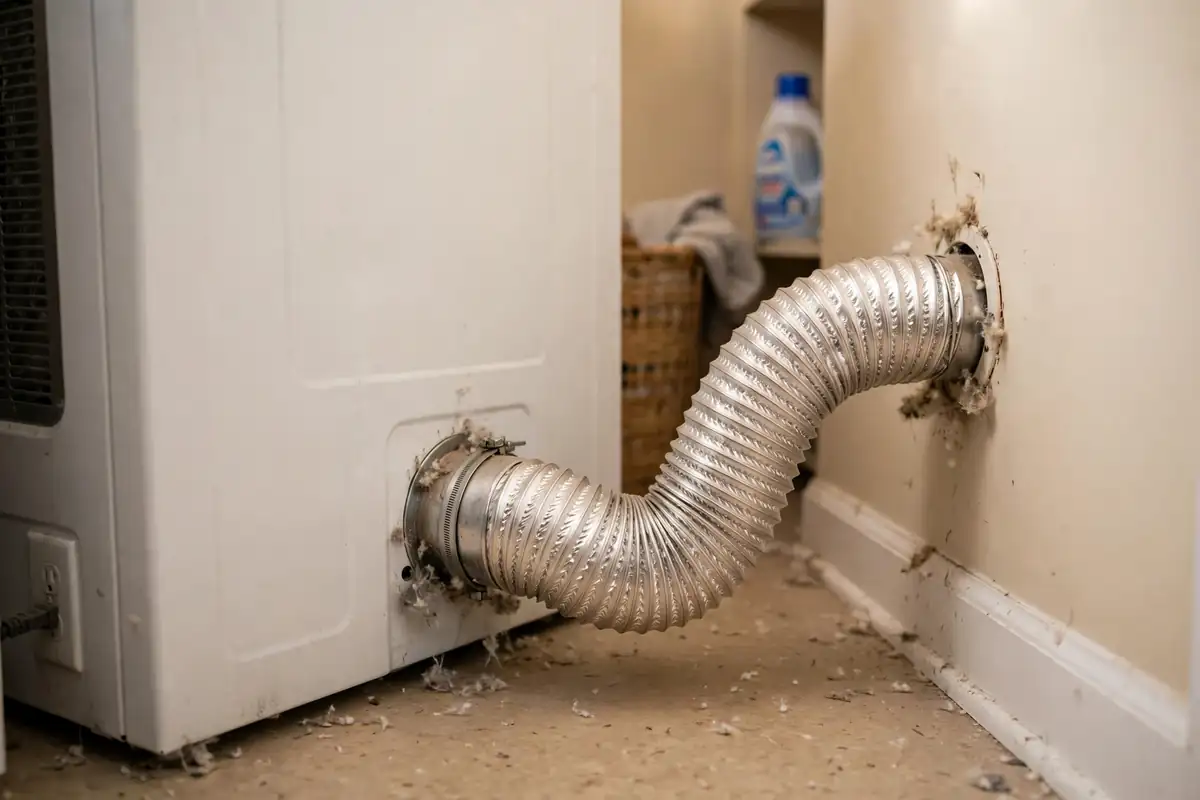
The flexible vent hose that carries moist air from the back of the dryer to the wall is a notorious trouble spot. Pull the dryer forward carefully and inspect the full length of the hose. What you are looking for: crushed or kinked sections where the dryer has been pushed too tightly against the wall, sagging low points in flexible foil or plastic ducting where lint collects, and lint-packed connections at both ends.
Crushed hose sections are especially common after the dryer has been moved — for cleaning, during a move, or when a new appliance was delivered and the installer pushed the unit back without checking the hose. The plastic and thin-foil accordion hoses are the worst offenders; they crush easily and never quite spring back. If your hose is that style, consider replacing it with rigid or semi-rigid metal ducting, which holds its shape, traps less lint, and is the only material most modern fire codes want to see.
While the dryer is pulled out, vacuum lint from around the exhaust outlet, the wall connection, and the floor underneath. When you push the dryer back, leave enough room that the hose keeps gentle, wide bends with no pinching.
3. The Exterior Vent Cap Is Blocked
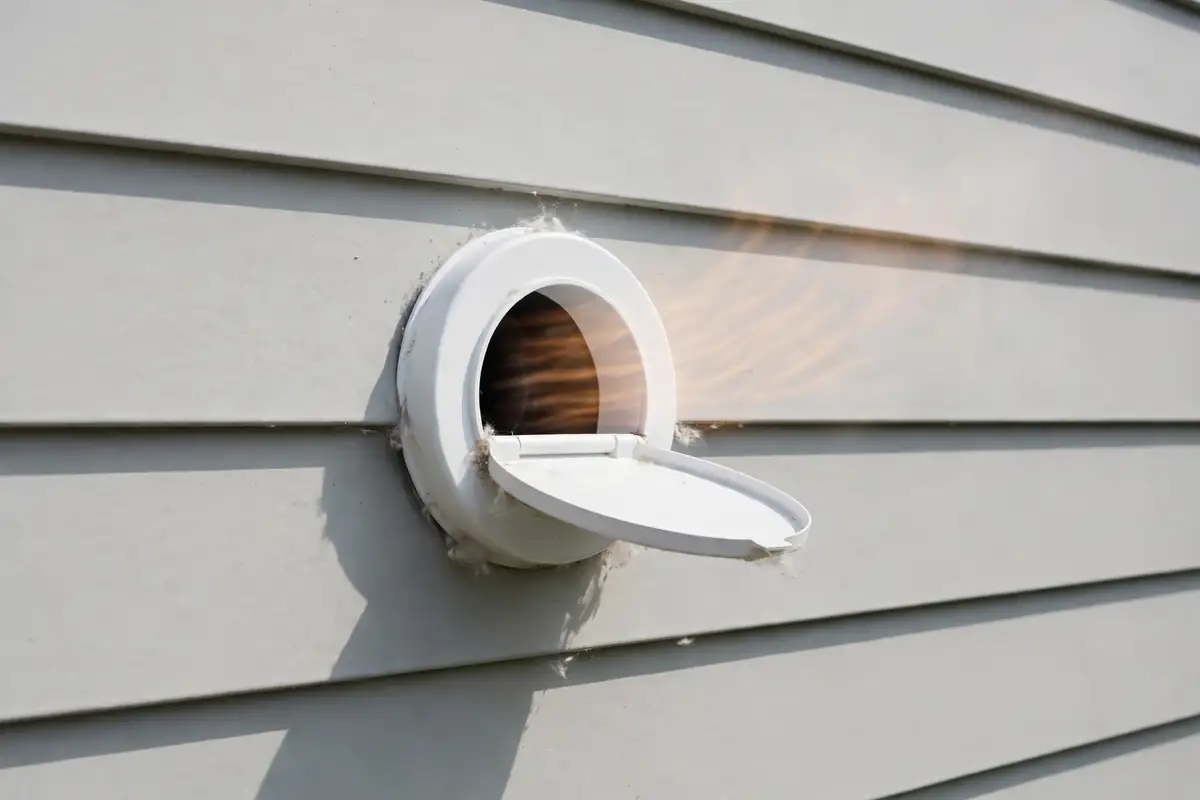
Even with a perfectly clean indoor path, the system can choke at the very end. Walk outside and find the dryer vent cap on your exterior wall — it is the small louvered or flap-style cover, usually a few feet off the ground. Run the dryer and check whether the flap opens freely and pushes out a strong, warm flow of air. Hold your hand in front of it: weak or absent airflow here means the vent line is restricted somewhere along its length.
Common blockers at the cap include lint matted around the louvers, bird nests (birds love the warm, sheltered opening), wasp nests in summer, and snow or ice in winter — a real factor during Central Oregon winters when drifting snow can seal a low vent shut. If the cap has a screen over it, check whether it is packed solid; those screens catch lint constantly and need cleaning several times a year.
Do not stop at the cap: if the vent run goes up through an attic or across a crawlspace, the whole path is suspect. A vent brush kit — a long, flexible brush that attaches to a drill — scrubs lint from the inside of the duct all the way to the exit. When you finish, recheck the airflow outside: strong and steady means you have likely solved the problem and removed a genuine fire hazard.
4. The Moisture Sensor Is Dirty or Failing
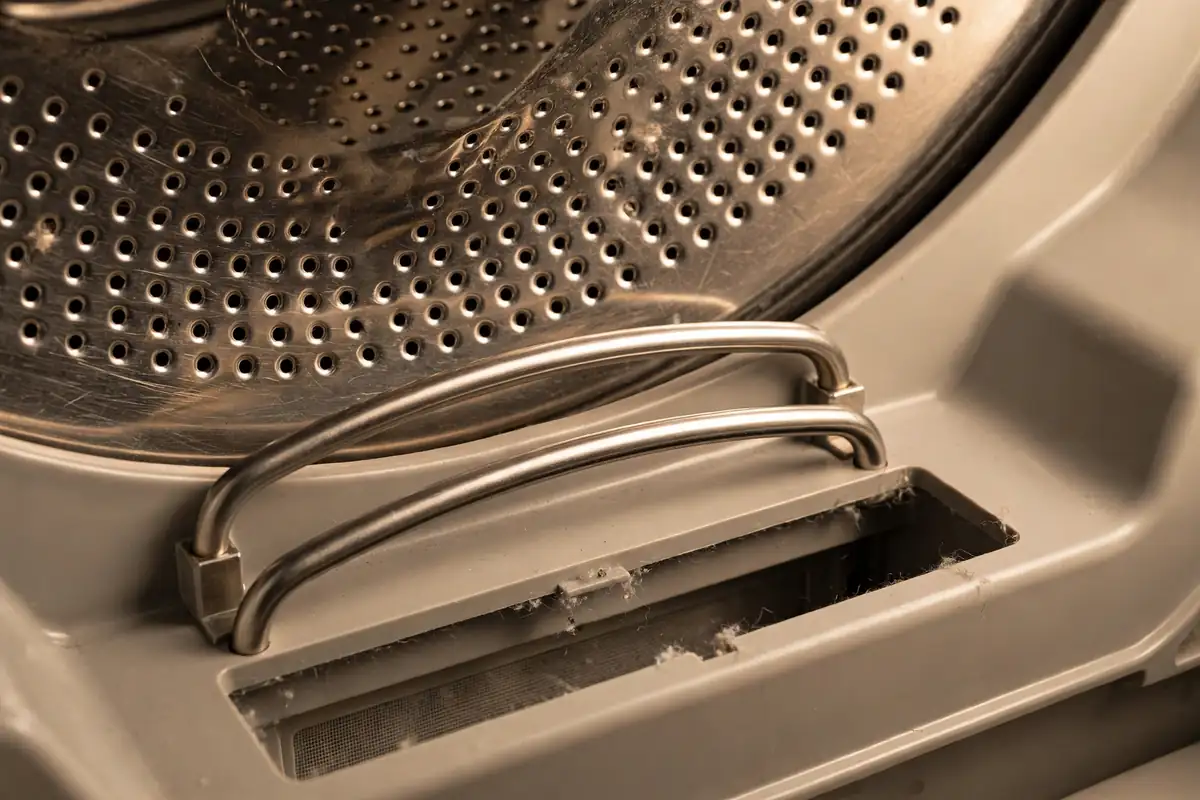
Most modern dryers decide when to stop using moisture sensor bars — two curved metal strips mounted inside the drum, usually near the lint filter. As wet clothes tumble against them, the sensor reads electrical conductivity and tells the control board the load is still damp. The system works well until the sensor bars get coated with the same dryer-sheet residue and softener film that clogs lint screens.
A coated sensor misreads the load: sometimes it reads dryer than reality and ends the cycle early, leaving damp clothes; other times a failing sensor keeps the machine running far longer than needed. Either way, the signature is automatic cycles whose timing feels wrong — ending way too early or running nearly twice as long as they used to for the same load.
Cleaning takes two minutes: locate the sensor bars (two stainless strips, usually near the lint filter), wipe them firmly with a soft cloth dampened with rubbing alcohol, and let them dry. Avoid abrasive pads, which scratch the metal and make future buildup worse. If cleaning does not restore normal timing, the sensor or its wiring needs professional testing.
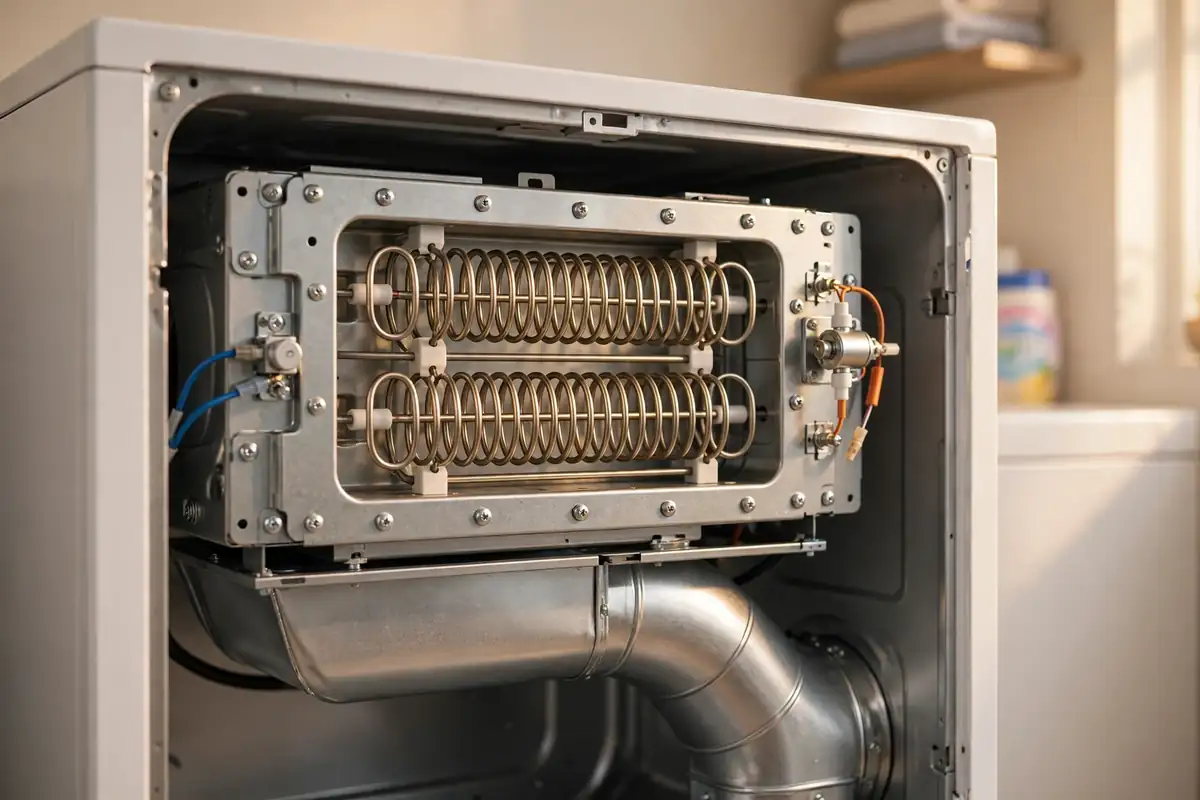
5. The Heating Element or Gas Ignition System Is Weakening
A heating element does not always fail all at once. On electric dryers, the element can weaken over time — still producing heat, but not enough of it — so the dryer feels warm rather than hot and every load takes noticeably longer than it used to. Drying time that has crept up gradually over several months, rather than changing suddenly, is the classic signature of a weakening heat system.
On gas dryers, the equivalent components are the igniter, flame sensor, and gas valve coils. A failing igniter may glow but never light the gas; worn valve coils may light the burner initially but drop out mid-cycle, so heat comes and goes. In either type, the thermal fuse and thermostats matter too: a blown thermal fuse kills the heat entirely, and it almost always blows because of overheating — so a fuse replacement must be paired with vent cleaning, or the new fuse will blow again.
Confirming a heat problem: run the dryer on high heat for a few minutes, open the door, and feel the drum. Hot throughout means the heat system is probably fine and the problem is airflow or load size; lukewarm or cool points to the element, igniter, coils, or fuse. Testing those requires a multimeter and safe access to live connections — if you are not comfortable around 240-volt wiring or gas, this is where a professional visit makes sense.
6. The Drum Is Overloaded
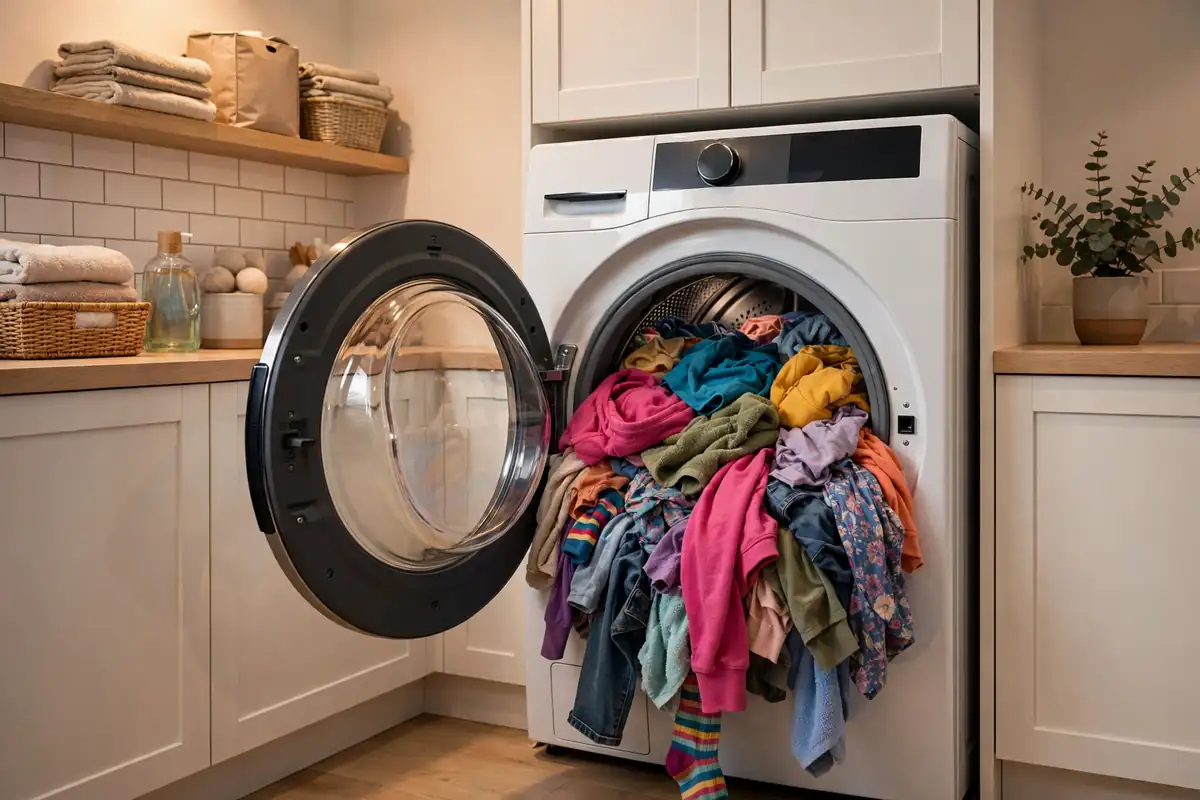
The drum needs air space. When clothes are packed too tightly, they cannot tumble freely — they clump together, heated air cannot circulate between them, and moisture stays trapped inside the bundle. Drying time can double or triple with an overloaded drum, even on a dryer that is in perfect mechanical condition.
Here is the diagnostic clue: if only heavy or full loads struggle while smaller loads dry normally, overloading is almost certainly the issue. The fix is immediate: fill the drum to roughly three-quarters full, so clothes can fall and tumble. Heavy items like towels and jeans deserve smaller loads; bulky items like comforters go in alone. Also check the washer’s spin cycle — if clothes come out dripping, no dryer can compensate efficiently.
Overloading does more than waste time and energy. Constant heavy loads strain the rollers, belt, and motor, and they press the moisture sensor bars less evenly, confusing automatic cycles. Splitting loads means faster cycles, lower energy bills, and longer machine life.
7. The Blower Wheel Is Clogged or Worn — or the Drum Is Not Tumbling Right
The tell-tale sign: weak airflow at the exterior vent even after the vent path is clean. If you have scrubbed the whole duct and the cap still barely breathes, the blower wheel is the next suspect. A loose wheel sometimes rattles or thumps as it wobbles on the shaft.
Related to airflow is tumbling. If the drum turns slowly, unevenly, or not at all, clothes cannot rotate through the warm air. Worn drum rollers and a stretched belt are the usual culprits — you will often hear squealing or thumping, and clothes may come out with creases pressed in one spot. The rollers, idler pulley, and belt are wear parts; on a dryer ten or more years old with heavy use, they are common replacements.
Both live inside the cabinet. Accessing them means removing panels, disconnecting the belt, and working around sharp sheet-metal edges — genuinely professional territory for most homeowners. A technician can check belt tension, roller wear, and the blower in one visit and replace worn parts together, which is cheaper than doing them one at a time.
8. The Vent Run Is Too Long or Too Restrictive
Sometimes the problem is not a blockage at all — it is the vent run itself. Dryers are designed around exhaust runs with practical limits: long runs through attics and crawlspaces, runs with multiple tight 90-degree elbows, and runs made of flexible foil or plastic ducting all restrict airflow far more than a short, straight metal run. If your dryer has always been a slow dryer in this home — since the day it was installed — the duct routing is a strong suspect.
This is especially common in larger ranch-style homes around Bend, where the laundry room sits far from an exterior wall and the vent travels fifteen, twenty, or more feet before exiting. Each elbow adds the equivalent of several feet of straight duct in restriction, and flexible ducting multiplies friction along its ridges. Long runs also collect lint faster, so the whole system degrades more quickly between cleanings.
The fixes range from routine to structural. Start with a thorough professional-grade vent cleaning. If drying is still slow, the upgrade path is replacing flexible ducting with rigid metal duct, swapping sharp 90s for gradual sweeps, and shortening the run where possible. For unavoidable long runs, a booster fan in the vent line can restore proper airflow. A technician can measure the effective length and tell you which option actually makes sense for your home.
How to Diagnose a Dryer That Takes Too Long to Dry
Follow these steps in order. Most slow-drying dryers reveal their problem by step four — resist the urge to order parts before you get there.
Step 1: Split the load and run a timed test
Fill the drum only three-quarters full with similar-weight items (all cottons, for example) and run a normal timed cycle — not an automatic sensor cycle — for 40 minutes. Check whether the clothes are fully dry. If a normal load dries fine in a timed cycle, your problem is load size, a misbehaving moisture sensor, or automatic-cycle settings — not heat or vents.
Step 2: Clean the lint filter properly
Brush the screen, then run it under the faucet to test for dryer-sheet film. Scrub with warm soapy water if water pools on the mesh, let it dry completely, and vacuum the trap housing with a crevice tool. Re-run your timed test after this step.
Step 3: Check the outside vent while the dryer runs
Go outside during the cycle. The vent cap flap should be open with a strong, steady flow of warm air. Weak or absent airflow here is your single most valuable diagnostic data point — it tells you the restriction is somewhere between the drum and the cap, and steps 4 through 6 will find it.
Step 4: Inspect the hose behind the dryer
Unplug the dryer (and shut off the gas valve if it is a gas model). Pull the machine forward carefully and check the vent hose for crushing, kinks, sagging sections, and lint-packed connections. Straighten or replace the hose, vacuum both connections, and leave enough slack that pushing the dryer back does not re-crush it.
Step 5: Clean the entire vent run
Use a vent brush kit to scrub from the dryer outlet all the way to the exterior cap. Pull out everything the brush dislodges — expect a surprising amount on a first cleaning. Reconnect, go outside, and recheck the airflow. Strong now? You have likely solved it.
Step 6: Clean the moisture sensor bars
Wipe the two metal sensor strips inside the drum with a cloth dampened with rubbing alcohol. Run a sensor cycle (automatic dry) and see whether timing returns to normal. If cycles still end too early or run far too long, the sensor or its wiring needs professional testing.
Step 7: Check the heat
Run the dryer on high heat for several minutes, then open the door and feel the drum. Hot throughout points back to airflow or load issues; lukewarm or cool points to the heating element, igniter, gas coils, or thermal fuse. Heat problems involving electrical or gas components are technician territory unless you are trained and comfortable with 240-volt circuits or gas lines.
Step 8: Decide between repair and a service call
If everything is clean and drying is still slow, listen during the cycle: squealing or thumping suggests drum rollers and belt; rattling suggests a loose blower wheel; a barely-turning drum suggests drive problems. These are all repairable — but the repair lives inside the cabinet, which is exactly what a professional dryer repair visit is for.
Tools Needed and Time Estimates per Fix
| Fix | Tools | Time |
|---|---|---|
| Wash the lint filter and vacuum the trap housing | Toothbrush, dish soap, vacuum with crevice tool | 10 minutes |
| Inspect and straighten the vent hose | None; screwdriver if replacing clamps | 20 minutes |
| Clean the exterior vent cap | Gloves, brush or vacuum | 15 minutes |
| Clean the full vent run | Vent brush kit (drill attachment) | 45–60 minutes |
| Wipe the moisture sensor bars | Soft cloth, rubbing alcohol or vinegar | 10 minutes |
| Replace flexible foil hose with rigid metal duct | Metal duct, clamps, foil tape, tin snips | 1–2 hours |
| Replace heating element, fuse, or thermostats | Multimeter, nut drivers — technician recommended | 30–60 minutes (pro) |
| Replace drum rollers, belt, or blower wheel | Specialty tools — technician recommended | 45–90 minutes (pro) |
Dryer Drying Slowly: Troubleshooting by Symptom
| Symptom | Most Likely Cause | First Check |
|---|---|---|
| Takes 2–3 cycles to dry everything | Restricted vent or clogged filter | Outside vent airflow test |
| Dryer cabinet feels very hot, clothes damp | Blocked vent trapping heat | Exterior vent cap, full vent run |
| Drum warm, not hot | Weakening heating element or gas ignition | Heat test on high; then a technician |
| No heat at all | Blown thermal fuse, dead element, or gas issue | Vent cleaning first (the fuse likely blew from overheating) |
| Only heavy loads struggle | Overloading | Three-quarter-fill timed test |
| Cycle ends while clothes are still damp | Dirty moisture sensor | Wipe sensor bars; run sensor cycle |
| Squealing, thumping, or rattling | Worn rollers, belt, or blower wheel | Technician — inside the cabinet |
| Burning smell while running | Lint overheating in vent or cabinet | Stop the dryer; clean the vent path before using it again |
| Slow drying since the dryer was installed | Long or restrictive vent run | Evaluate duct routing; consider rigid duct upgrade |
Safety Warnings Before You Start
- Unplug electric dryers before pulling them out. Electric dryers run on 240 volts — double the voltage of a standard outlet. Unplug before inspecting the hose or rear panel, and never work around exposed wiring or terminals.
- Shut off the gas before touching a gas dryer. If yours is a gas model, close the gas supply valve before moving it, and never attempt to service the igniter, flame sensor, or gas valve coils yourself. Gas leaks and open-flame ignition are not DIY territory.
- Take a burning smell seriously. If the dryer smells like something is scorching, stop it immediately, do not restart it, and clean the vent path before the next load. Lint is highly flammable, and a hot, restricted dryer is exactly how lint fires start.
- Do not run the dryer with the vent disconnected. Disconnecting the vent to “test” without exhausting the moisture somewhere blows gallons of humid air — and lint — into your home, inviting mold and a dust hazard.
- Give panels and parts time to cool. Test the heat only briefly, and let the machine cool before reaching into the drum or touching the rear panel. The element housing and exhaust duct stay hot long after the cycle stops.
Central Oregon Factors That Make Dryers Work Harder
Dryers in Garages and Cold Laundry Rooms
Many Central Oregon homes put the laundry in a garage, mudroom, or unheated space. In winter, a dryer pulling in near-freezing air works harder to heat it before evaporation starts — so drying times stretch from November through March. If your garage laundry slows every winter and recovers in spring, cold intake air is the likely explanation, not a failing machine.
High-Desert Dust in Vents and Machines
Central Oregon’s fine dust gets everywhere, including inside dryers and vent runs. Dust coats lint with an extra layer of fine particles that packs tighter, and it accumulates around the dryer’s internal blower and motor housing. Vacuuming behind and beneath the dryer once a year matters more here than in less dusty climates — and garage installations should be on a shorter vent-cleaning schedule.
Long Vent Runs in Ranch-Style Homes
Bend and Redmond have plenty of single-story ranch homes where the laundry room sits far from an exterior wall. Twenty-foot vent runs through attics and crawlspaces are common, and every foot of run and every elbow adds restriction. If your home has this layout and the dryer has always been mediocre, a professional vent evaluation is worthwhile — shortening or straightening the run often transforms performance.
Snow Blocking Low Exterior Vents
During heavy snow events, drifting can seal off a low-mounted vent cap completely — a problem that appears overnight and disappears with the melt. After a storm, check the cap before running laundry. Homes with ground-level vent exits should consider having the cap relocated higher on the wall.
How to Keep Your Dryer Drying Fast
- Clean the lint screen every load — and wash it with soap and water every three months to remove dryer-sheet film. Test with the faucet: water should flow straight through the mesh.
- Clean the full vent run once a year — more often with daily laundry, a long vent run, or a dusty garage. Brush the duct, clear the cap, and confirm strong airflow outside.
- Wipe the moisture sensor every few months. A quick swipe with a rubbing-alcohol-dampened cloth keeps automatic cycles accurate and prevents wasteful over-drying.
- Leave breathing room behind the dryer. Every time the machine is moved, check the hose before pushing it back — wide, gentle bends only, no kinks.
- Do not overload. Three-quarters full is the limit. Sort heavy and light fabrics, give bulky items their own load, and let the washer’s spin cycle do its job first.
- Check the exterior cap seasonally. A two-minute look each fall and spring catches nests, matted lint, and winter ice before they become full blockages.
Dryer Taking Too Long to Dry: DIY or Professional Service?
The honest answer: most slow-drying dryers are fixed with a vacuum, a vent brush, and fifteen minutes of attention — all of it DIY-safe. The lint filter, the trap housing, the hose, the exterior cap, the full vent run, the sensor bars, and the load size are all squarely in homeowner territory. If this guide’s first six steps solved the problem, you are done — and you have also removed one of the most common household fire risks.
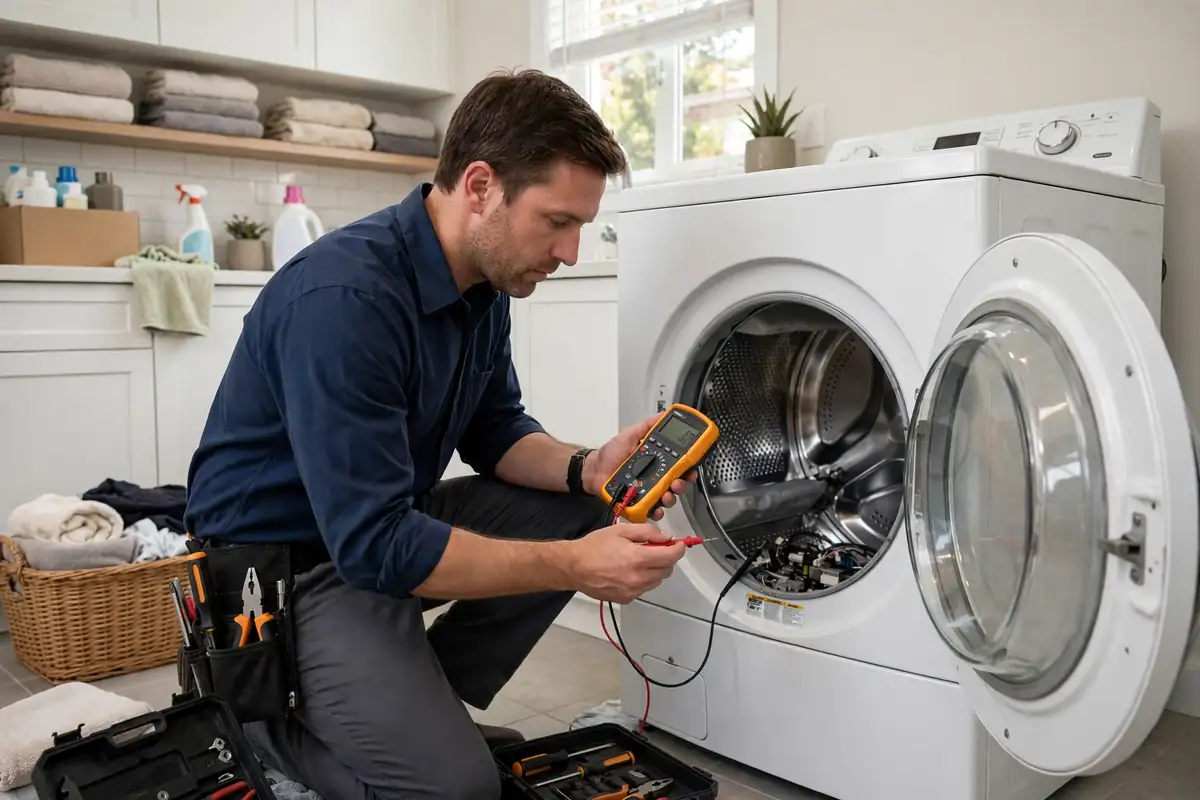
Call a professional when the problem moves inside the cabinet or behind a wiring connection. Heating elements on 240-volt circuits, thermal fuses and thermostats, gas igniters and valve coils, drum rollers and belts, and blower wheels all require opening the machine and working around sharp edges, live wiring, or gas. A trained technician diagnoses these in one visit — by testing continuity and airflow rather than swapping parts blindly — and replaces worn parts together.
One more consideration: if the dryer is more than ten years old and needs a major repair, ask the technician for an honest repair-versus-replace assessment. An older dryer with a worn element, stretched belt, and tired rollers is often a series of repairs waiting to happen.
When Should You Call a Dryer Repair Technician?
Stop troubleshooting and schedule a visit if any of these are true:
- You have cleaned the filter, hose, vent run, and sensor bars, and drying is still slow.
- The drum produces no heat at all — especially after a burning smell, which suggests a blown thermal fuse.
- You smell gas near a gas dryer, or the burner will not stay lit.
- The dryer makes squealing, grinding, or thumping sounds, or the drum tumbles slowly or stops mid-cycle.
- Automatic cycles still end with soaked clothes or run far too long after sensor cleaning.
- You are not comfortable working around 240-volt wiring, gas connections, or inside the cabinet.
Frequently Asked Questions About Dryers Taking Too Long to Dry
Why is my dryer running but the clothes stay damp?
This almost always means heat is being produced but moisture cannot escape — restricted airflow is the cause in most cases. Check the lint filter, the vent hose behind the dryer, and the exterior vent cap. If the outside cap barely breathes while the dryer runs, the vent path is blocked somewhere along its length.
How do I know if my dryer vent is clogged?
Run the dryer and go outside to the vent cap: a healthy vent pushes out a strong, steady flow of warm air with the flap fully open. Weak or absent airflow, a dryer cabinet that feels unusually hot, drying that takes two or three cycles, and a burning smell are all classic signs of a clogged vent.
Can a dryer sheet really slow down my dryer?
Yes. Dryer sheets leave a waxy film on the lint screen and on the moisture sensor bars inside the drum. On the screen, the film restricts airflow; on the sensors, it causes misreads that end cycles early or run them too long. Wash the screen with soap and water every few months and wipe the sensor bars with rubbing alcohol.
How often should I clean my dryer vent?
At least once a year for a typical household — more often if you do laundry daily, have a long vent run, or keep the dryer in a dusty garage. Make it a seasonal habit and check the exterior cap every fall and spring for nests, lint mats, and winter ice.
Why does my dryer take longer in winter?
Two reasons. Cold intake air takes longer to heat to drying temperature — especially for dryers in garages or unheated spaces — and snow or ice can partially block a low exterior vent cap. If winter slowness disappears in spring, cold air and snow are the explanation, not a failing part.
Is it dangerous to keep using a dryer that takes too long?
It can be. Slow drying is often caused by lint restricting the vent, and lint is highly flammable — a hot, restricted dryer is exactly how lint fires start. Treat a burning smell as an emergency: stop the dryer, do not restart it, and clean the vent path before the next load.
How long should a normal dryer cycle take in Bend, OR?
A medium cotton load in a healthy dryer should finish in roughly 35 to 50 minutes on a timed medium-heat cycle. Consistently needing an hour and a half or multiple cycles means something in this guide needs attention — start with the outside vent airflow test.
Dryer Repair in Bend, OR
A dryer that keeps needing extra cycles is usually trying to tell you something early — restricted airflow, a weakening heat system, or worn moving parts. Catching it now usually means a simpler repair than waiting for the thermal fuse to blow or the drum rollers to give out completely.
We serve homeowners throughout Bend — including Northwest Crossing, Awbrey Butte, Boyd Acres, Larkspur, River West, Mountain View, Summit West, Orchard District, and Southern Crossing — as well as appliance repair in Redmond, Oregon and surrounding Central Oregon communities. If you have already worked through the checks above, tell us what you found when you call — knowing the vent is clean and the heat is weak, for example, helps the technician bring the right parts and often finish the job in a single visit.
Final Takeaway
A dryer taking too long to dry is usually an airflow problem, not a dead appliance. Start with the lint filter — washed, not just brushed — then test the outside vent while the dryer runs. Weak airflow there means a blockage between the drum and the cap: hose, vent run, or exterior cap. Clean the moisture sensor, watch the load size, and test the heat before suspecting parts.
Treat burning smells as an emergency, leave gas and 240-volt work to a professional, and keep up with yearly vent cleanings. When the simple checks do not resolve it, professional diagnosis is the sensible next step.
Dryer Still Taking Too Long to Dry?
If the troubleshooting steps haven’t solved the problem, our technicians can diagnose the actual cause — vent restriction, sensor, heating element, or worn drum parts — and give you a clear, upfront repair estimate before any work begins.