Refrigerator Leaking Water? 7 Causes and Fixes for Bend, OR Homes
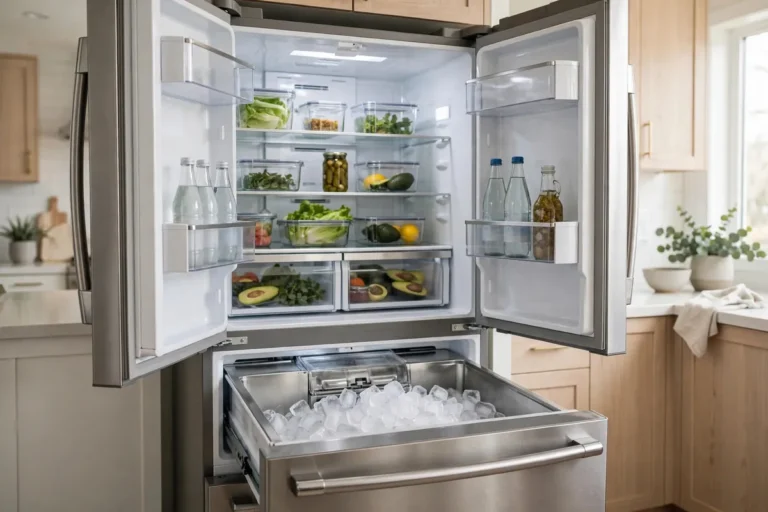
A puddle in front of the fridge — or water pooling inside it — is more than a nuisance: left alone, it warps wood floors, feeds mould, and can signal a failing water valve or ice maker. This guide walks you through the seven most common reasons a refrigerator leaks water, how to find the source, safe fixes you can try, and when to call a local technician.
Start Here: What to Do When Your Fridge Is Leaking Water
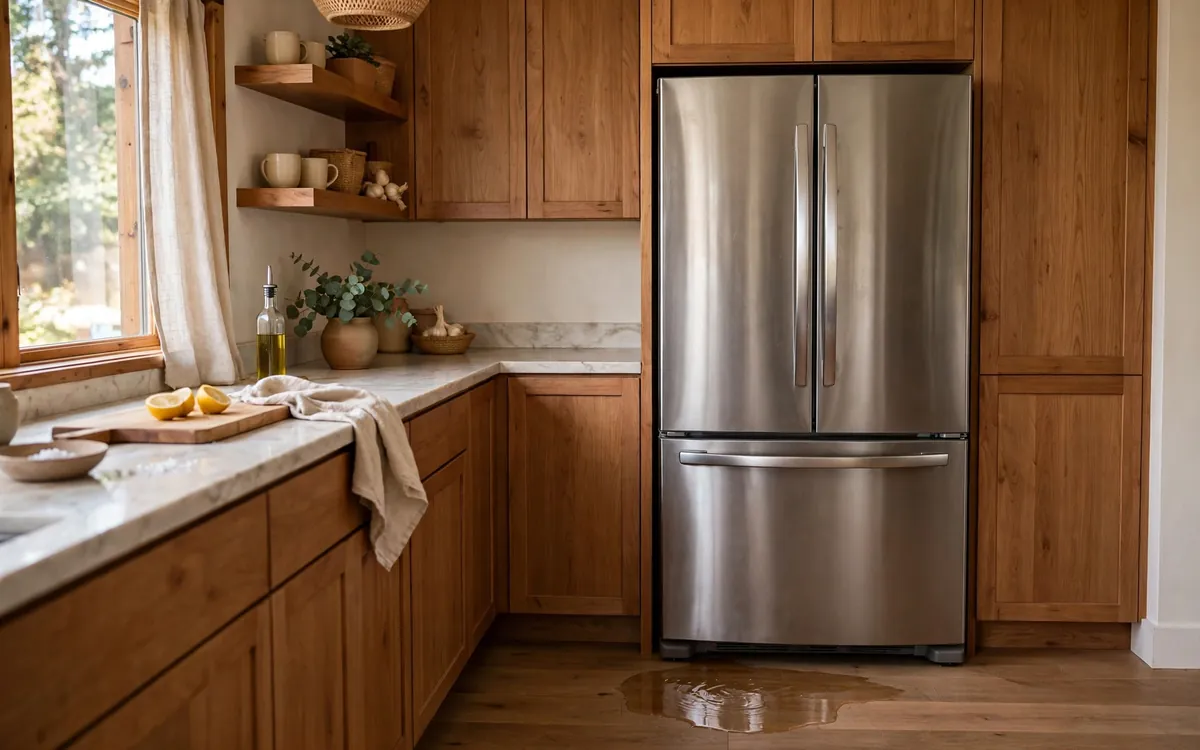
Finding water where it should not be — under the crisper drawers, on the freezer floor, or in a puddle at the base of your refrigerator leaking water onto the kitchen floor — is one of the most common appliance complaints we see. The good news: most leaks trace back to a short list of causes, and several of them are straightforward to check and fix yourself.
The single most important first step is figuring out where the water is coming from. Water inside the fresh-food compartment almost always points to the defrost drain. Water behind the refrigerator points to the supply line or inlet valve. Water underneath points to the drain pan. A quick localisation saves you from replacing parts blindly.
This guide is written for homeowners in Bend, Oregon and the surrounding Central Oregon area. It covers how water normally moves through a frost-free refrigerator, the seven most common reasons it escapes, a step-by-step diagnostic routine, and when professional refrigerator repair in Bend is the right move.
Table of Contents — Tap to Jump to a Section
- 01 Introduction
- 02 7 Common Causes
- 03 Where the Water Comes From
- 04 Clogged Defrost Drain
- 05 Frozen Drain Tube
- 06 Cracked Drain Pan
- 07 Supply Line or Inlet Valve Leak
- 08 Leaking Ice Maker
- 09 Faulty Water Filter
- 10 Worn Door Gasket
- 11 Diagnose by Leak Location
- 12 Step-by-Step Diagnosis
- 13 Tools & Time Estimates
- 14 Safety First
- 15 Central Oregon Factors
- 16 Prevention
- 17 DIY or Pro?
- 18 When to Call a Pro
- 19 FAQ
- 20 Bend & Redmond Service
- 21 Final Takeaway
Why Is My Refrigerator Leaking Water?
The most common reasons a refrigerator leaks water are:
- A clogged defrost drain — the number-one cause. Food debris or ice blocks the small drain at the back of the freezer, so meltwater backs up into the fresh-food compartment and pools under the crisper drawers.
- A frozen defrost drain tube — the drain path itself ices over, and meltwater overflows into the fridge or freezer instead of reaching the drain pan.
- A cracked, misaligned, or overfull drain pan — the shallow pan under the appliance that catches defrost water can crack or shift, spilling water onto the floor beneath the fridge.
- A leaking water supply line or inlet valve — on models with an ice maker or dispenser, a loose connection, cracked line, or valve that seeps instead of sealing drips water behind the refrigerator.
- A leaking ice maker — a misaligned ice tray, overflowing fill cycle, or cracked mould housing can send water into the freezer or down the back of the fridge.
- A cracked or poorly seated water filter — a damaged filter housing or a cartridge that is not locked fully into place leaks inside the refrigerator compartment.
- A worn door gasket — torn or flattened seals admit warm, moist air, which condenses on cold surfaces and drips as water inside the fridge.
Also worth ruling out: a refrigerator that is not level (water runs to one side instead of the drain), and normal condensation during humid spells. Start with where the water is and the list above narrows quickly.
First response: mop up standing water promptly, especially on wood or laminate flooring, which can warp if water sits. Then slide the refrigerator out just enough to check whether the floor behind it is wet — that single check separates supply-line leaks from drain problems in seconds.
Where Does the Water in a Refrigerator Normally Go?
To find an abnormal leak, it helps to know the normal water paths inside a frost-free refrigerator. There are two: the defrost system and the ice-maker water system.
The defrost cycle. Every frost-free refrigerator runs a defrost cycle several times a day. A small heater melts frost off the evaporator coils, and the meltwater flows down a narrow defrost drain at the back of the freezer floor, through a drain tube, into a shallow drain pan near the compressor. Compressor waste heat then evaporates that water over the course of the day. You should never normally see this water — it only becomes visible when something interrupts the path.
The ice-maker water system. On models with an ice maker or water dispenser, household water enters through a supply line at the back of the fridge, passes through a water inlet valve, flows through the water filter, and continues to the ice maker or dispenser. Every joint, fitting, and valve in that path is a potential leak point.
Nearly every leak in this guide is one of those two paths going wrong. Once you know which path is involved, you know where to look.
Water Paths and Their Failure Points
| Water Path | Normal Destination | Where It Escapes |
|---|---|---|
| Defrost drain | Down the drain tube to the drain pan | Backs up into the fridge when the drain clogs or freezes |
| Drain pan | Evaporated by compressor heat | Spills underneath if cracked, misaligned, or overfull |
| Supply line | To the inlet valve | Drips behind the fridge if kinked, loose, or cracked |
| Inlet valve | Opens and closes for each fill | Seeps continuously if worn; leaks at fittings |
| Ice maker mould | Freezes into cubes, ejects into bin | Overflows if the fill is uncontrolled or the tray misaligns |
| Water filter housing | Filtered water to dispenser and ice maker | Drips inside the fridge if cracked or poorly seated |
| Door seals | Keep humid air out | Condensation forms and drips if seals are worn |
7 Reasons Your Refrigerator Is Leaking Water
The sections below walk through each cause in detail, roughly ordered from most common to least common. Each includes the signature symptoms and the fix, so you can match your leak to its cause quickly.
| Common Cause | Where You See Water | Typical Fix Difficulty |
|---|---|---|
| Clogged defrost drain | Inside, under crisper drawers | Easy — 15–20 minutes |
| Frozen defrost drain tube | Freezer floor, then inside fridge | Moderate — needs a thaw |
| Cracked or misaligned drain pan | Underneath the fridge | Easy to moderate |
| Leaking supply line or inlet valve | Behind the fridge | Moderate; pro recommended |
| Leaking ice maker | Freezer interior, under the fridge | Moderate |
| Cracked or poorly seated water filter | Inside the fridge compartment | Easy — 10 minutes |
| Worn door gasket | Inside walls and shelves | Easy to moderate |
1. Clogged Defrost Drain
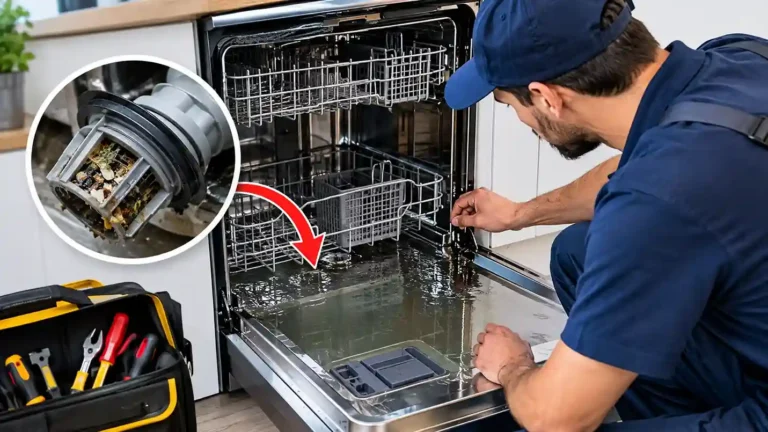
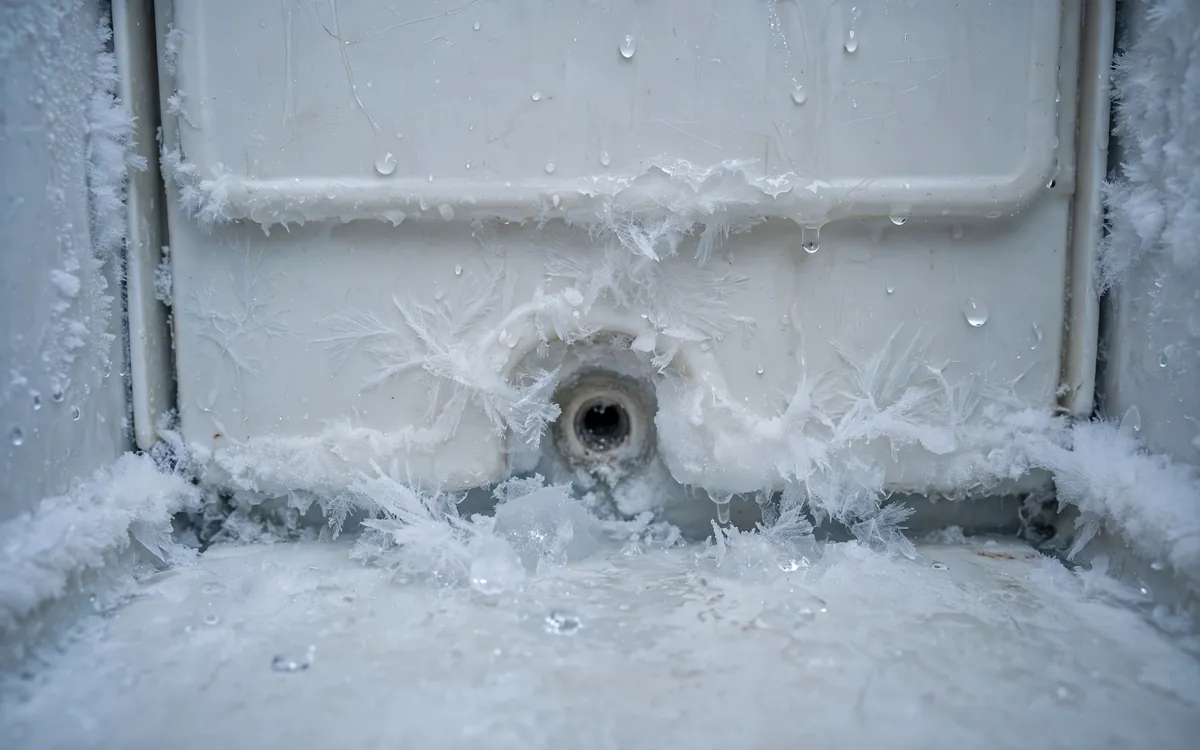
A clogged defrost drain is the number-one reason refrigerators leak water inside the fresh-food compartment. The drain hole sits at the bottom of the freezer — on many models a small hole at the back of the freezer floor, sometimes behind a removable panel. When food particles, mould, or refrozen ice plug that narrow opening, defrost meltwater has nowhere to go but back into the refrigerator, where it pools under the crisper drawers and eventually runs out onto the floor.
The telltale signs are distinctive: water collecting under the fruit and vegetable drawers, a recurring puddle that returns after you wipe it dry, and often a thin sheet of ice on the very back wall or floor of the freezer near the drain.
How to fix it. Unplug the refrigerator first. Locate the drain hole — check your owner’s manual for its position, since it varies by brand — and remove any visible debris with a soft cloth or cotton swab. Then flush the drain with warm (not boiling) water using a turkey baster or small funnel; you may need several rounds. A pipe cleaner or straightened soft wire can gently dislodge stubborn buildup — never use a knife or anything sharp, which can damage the plastic liner or the drain tube. When water flows freely to the drain pan below, the clog is cleared.
If the same drain clogs again within weeks, the problem is deeper in the drain tube or tied to a freezing issue (see cause 2) rather than a simple debris clog, and a technician should inspect it.
2. Frozen Defrost Drain Tube
Sometimes the blockage is not debris but ice. If the drain tube freezes — or the drain opening refreezes between defrost cycles — meltwater overflows into the freezer or drips into the refrigerator section. The signature symptom is a sheet of ice on the bottom of the freezer, with water that appears every few days right after a defrost cycle, then seems to stop.
How to fix it. Unplug the refrigerator and clear the freezer of food (use coolers or insulated bags). Let the drain area thaw completely — this can take several hours — then flush the drain with warm water to confirm it flows freely. Do not chip at the ice with sharp tools, and do not pour boiling water into the drain.
A drain that keeps freezing is telling you something. A one-time freeze can follow a power outage or a door left ajar, but a drain that refreezes repeatedly usually points to a deeper issue: a failing defrost heater or thermostat, poor airflow, or a model-specific drain design problem that may need a manufacturer service fix. If you thaw the drain and it freezes again within days or weeks, have a technician diagnose the defrost system rather than thawing it a third time.
3. Cracked, Misaligned, or Overfull Drain Pan
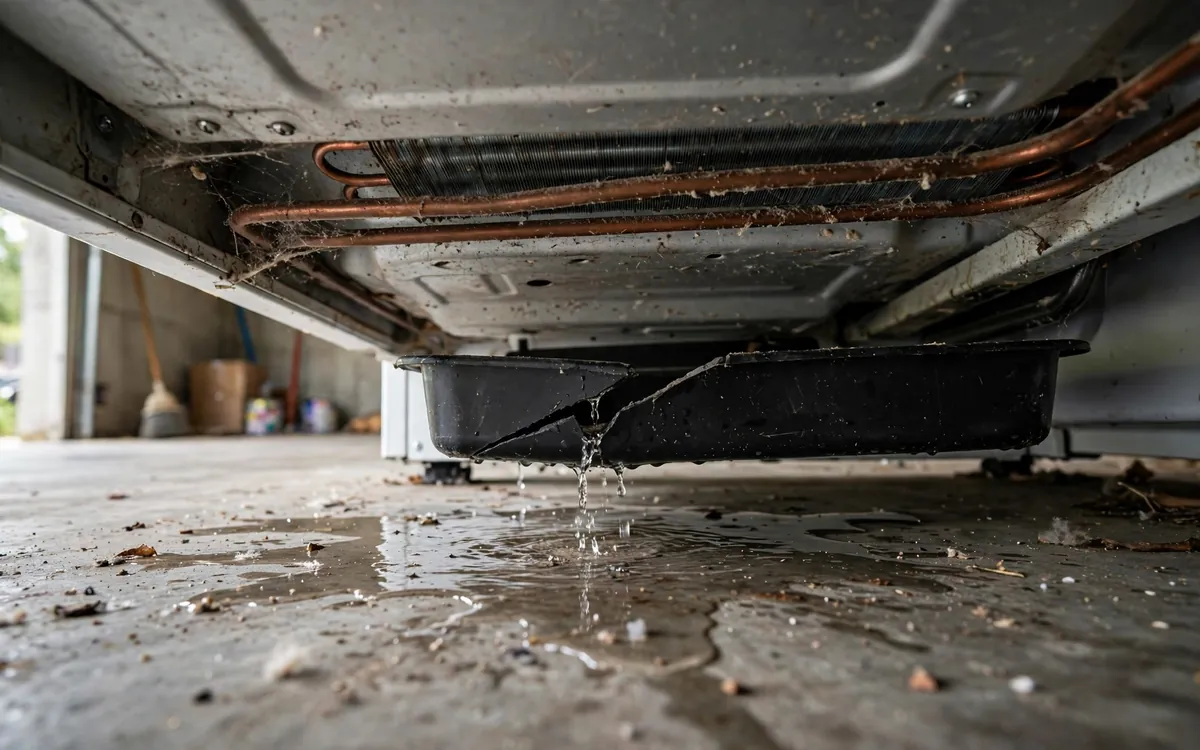
The drain pan is a shallow pan — usually plastic — that sits underneath the refrigerator near the compressor. Its job is to hold defrost water while compressor heat evaporates it. When the pan is cracked, bumped out of position, or overfilled, water spills onto the floor beneath the appliance.
How does a pan get damaged? Moving the refrigerator for cleaning can crack brittle plastic or knock the pan off its seat, and years of heat cycles make old pans brittle. And when the fridge is working overtime — poor door seals, heavy use — defrost water can arrive faster than it evaporates, overfilling the pan.
How to fix it. Pull the refrigerator out (protect the floor with a moving mat or cardboard), unplug it, and remove the lower access panel to reach the pan. Empty any standing water, then inspect the pan for cracks and check that it sits correctly in its channel. A cracked pan needs a model-specific replacement; a displaced one just needs reseating. If the pan is consistently overfull without damage, the excess water is coming from somewhere upstream — worn door seals, an overworked defrost cycle, or very humid indoor air — and that cause is what needs attention.
4. Leaking Water Supply Line or Inlet Valve
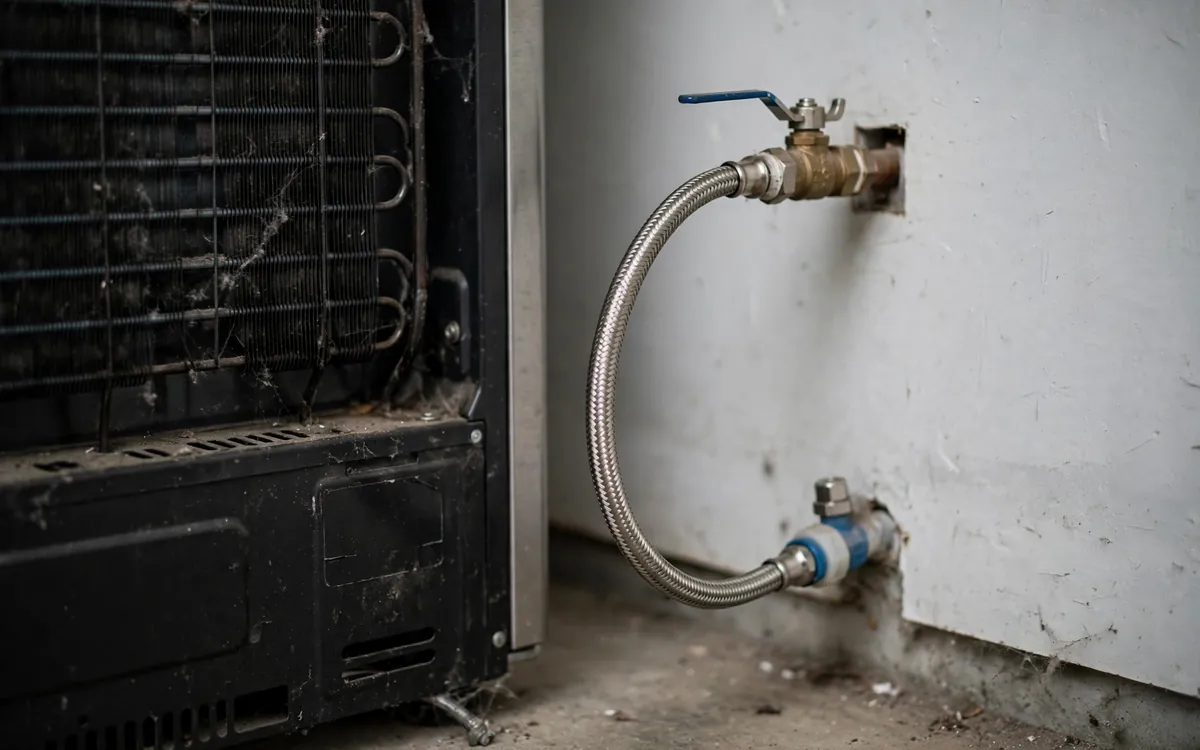
If the puddle is behind the refrigerator rather than inside or in front of it, the supply line or the water inlet valve is the prime suspect. The supply line runs from the household shutoff valve to the back of the fridge, where it connects to the inlet valve — the electrically operated valve that opens to fill the ice maker and dispenser. Leaks here drip quietly onto the floor behind the appliance, often going unnoticed until the water migrates out to the sides or soaks the baseboard.
Common failure points: a loose compression fitting where the line meets the valve, a kinked or cracked supply line (copper lines kink when the fridge is pushed back carelessly; plastic lines become brittle with age), and a valve that seeps because of wear or mineral scale holding it slightly open. A saddle valve feeding the line is a known weak point that clogs and leaks over time.
How to fix it. Shut off the water supply before touching anything, and unplug the refrigerator. Inspect every connection from the wall valve to the inlet valve: tighten compression fittings gently (over-tightening cracks them), replace any cracked or kinked line with a braided stainless steel line, and look for mineral crust around the inlet valve — that white or green buildup marks a slow seep. An inlet valve that seeps or has failed electrically needs replacement, which combines water connections with electrical components behind a heavy appliance: most homeowners are better served by professional service, since a slow leak behind the fridge can cause far more damage than the repair itself.
5. Leaking Ice Maker
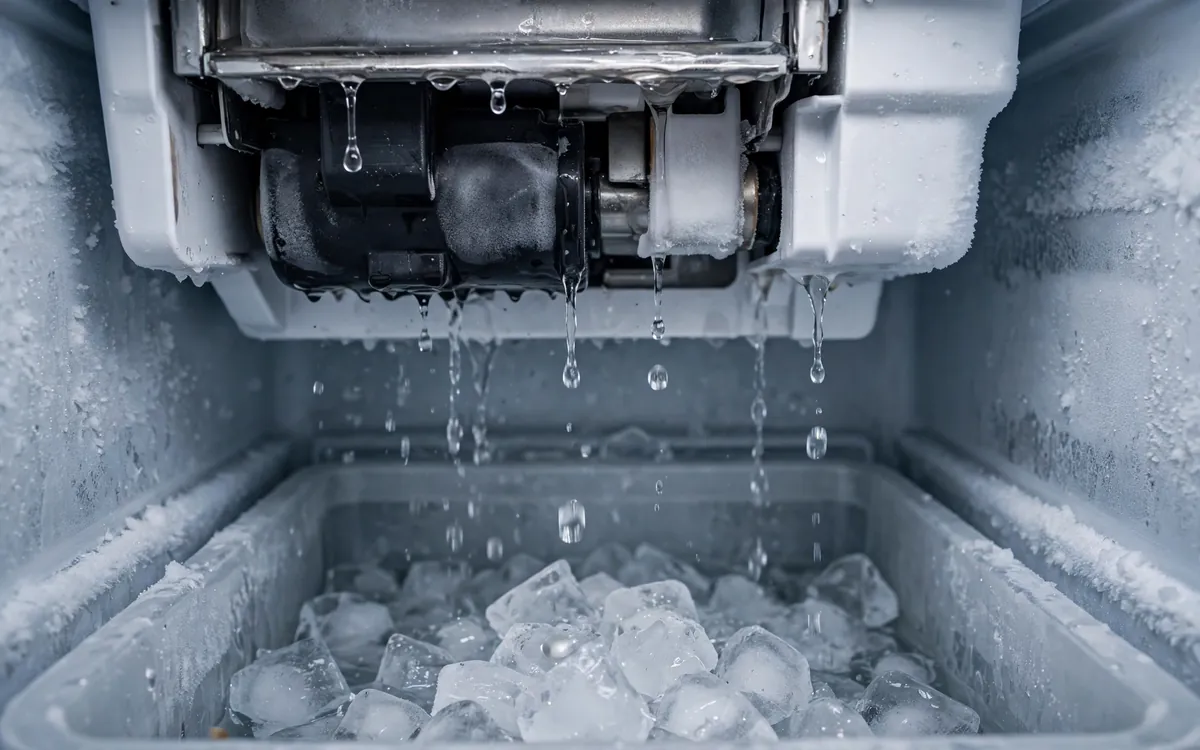
Ice makers can leak even when they are making ice normally. The usual suspects are a fill cycle that overflows the mould — often because the inlet valve seeps instead of sealing shut between fills — a misaligned or cracked ice tray, or a fill tube that has slipped out of position.
The signs: water dripping into the ice bin and refreezing into a fused mass, icicles hanging from the ice maker housing, or water on the freezer floor that refreezes into a sheet. If the ice maker leaks only during the fill cycle on a regular schedule, the inlet valve is the likely culprit; if the tray itself is cracked or tilted, you will see it on inspection.
How to fix it. Unplug the refrigerator and shut off the water supply. Remove the ice bin and inspect the ice maker: look for a cracked or tilted mould, a fill tube that has slipped out of its guide, and ice fused around the housing. Clear any buildup with warm water or a plastic utensil — never metal. If the mould is intact but water keeps dripping between cycles, the inlet valve is seeping and needs testing or replacement. For a deeper look at the ice-making cycle, see our ice maker troubleshooting guide.
6. Cracked or Poorly Seated Water Filter
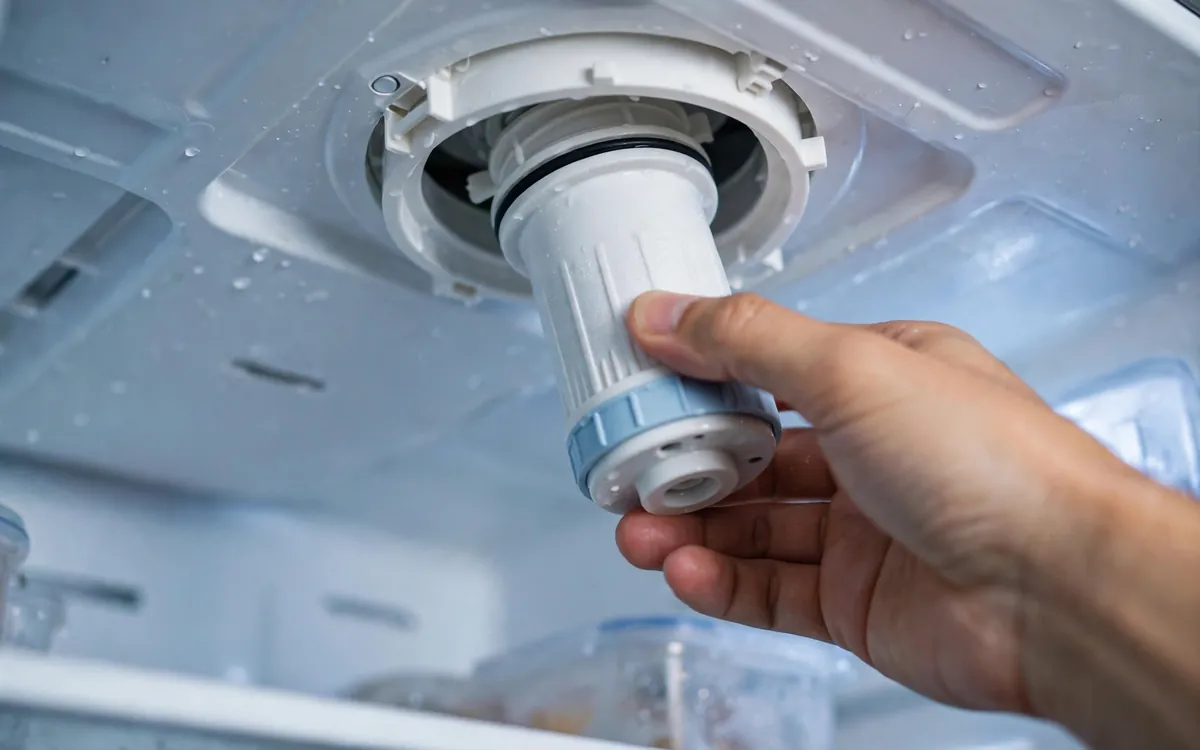
Water inside the fresh-food compartment — especially near the back wall or ceiling — can come from the water filter. The filter housing can crack (often during a filter change when the cartridge is forced), or the cartridge can be seated incorrectly: not locked fully into the housing, installed with protective caps still on, or the wrong cartridge for the model. Any of these lets pressurised water seep inside the refrigerator.
How to fix it. Shut off the water supply to the refrigerator. Remove the filter and inspect the housing for hairline cracks — shine a flashlight on it and look for wet trails. Confirm the cartridge matches your model number, remove any protective caps, and reinstall it firmly until it locks fully into place. Turn the water back on and watch the housing for several minutes. A housing that leaks under pressure needs replacement, not a glue-and-hope repair.
7. Worn or Damaged Door Gasket
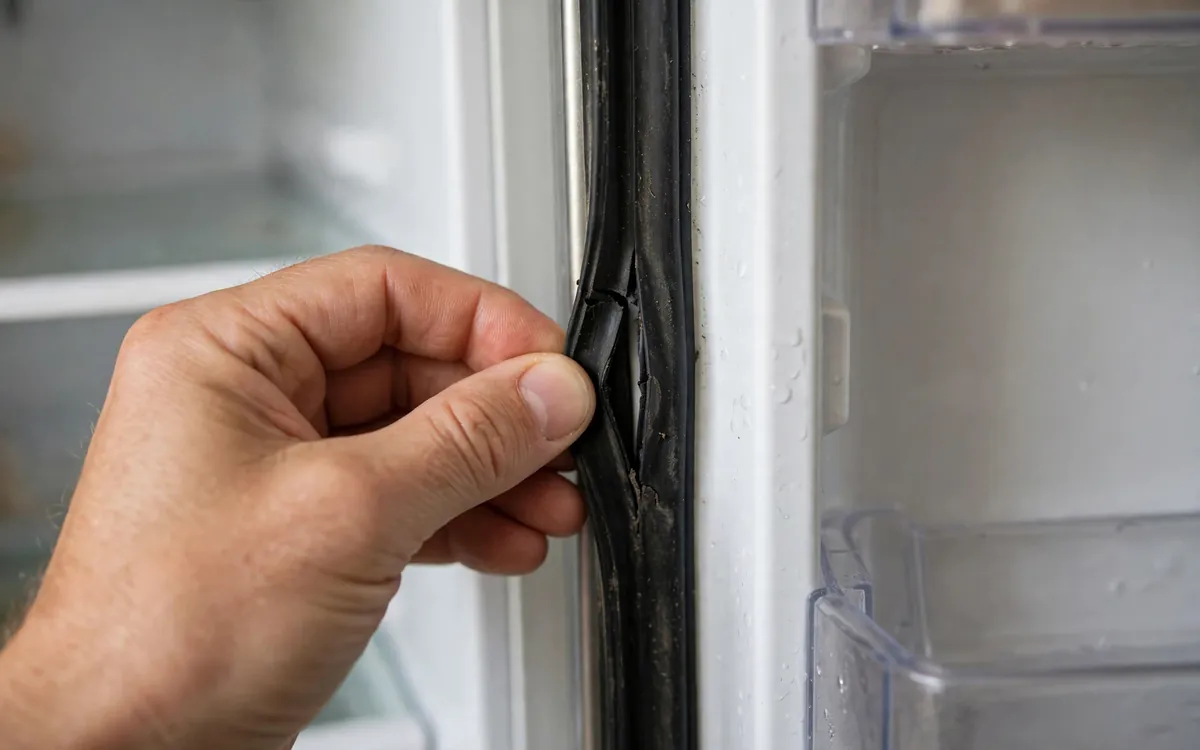
Door gaskets — the magnetic rubber seals around the door — keep warm, humid room air out of the cold compartment. When a gasket is torn, flattened, or hardened with age, warm air leaks in continuously. That moisture condenses on the cold interior walls and drips down as water, and a bad gasket forces the refrigerator to run longer and defrost more often, multiplying condensation and drain load.
The signs: water droplets beading on the interior back wall or shelves rather than a single pooled area, frost forming around the door frame, the door not closing with a firm pull, or visible tears or mould on the gasket itself. Try the paper test: close the door on a sheet of paper at several points around the seal. If the paper slides out easily in one spot, the seal is weak there.
How to fix it. Clean the gasket first with warm soapy water — grime alone can break the seal, and cleaning sometimes restores it. A torn, cracked, or permanently flattened gasket needs replacement: the part is model-specific and the job involves seating the new seal evenly, which takes patience but no special tools. If condensation problems persist after the gasket is addressed, check that the refrigerator is level — a fridge tilted forward can prevent the door from closing fully.
Diagnose Your Leak by Location
Where the water appears is the fastest clue to the cause — match your leak to the rows below before you start taking anything apart.
| Where the Water Is | Most Likely Causes | Check First |
|---|---|---|
| Inside, under the crisper drawers | Clogged defrost drain, frozen drain tube | Drain hole at the back of the freezer floor |
| Ice sheet on the freezer floor | Frozen defrost drain tube | Let the drain area thaw, then flush |
| Dripping from the back wall inside the fridge | Clogged drain, worn gasket, condensation | Drain, then the paper test on the gasket |
| Behind the refrigerator on the floor | Supply line, inlet valve, filter housing | Shut off water, inspect connections |
| Underneath the refrigerator | Drain pan, defrost drain overflow, supply line | Pull the fridge out, check pan and floor behind |
| Dripping from the dispenser area | Air in the line, filter not seated, dispenser valve | Filter installation, then the valve |
| Water in the ice bin, cubes fused | Leaking ice maker, seeping inlet valve | Ice maker alignment and fill cycle |
| Beads of water on interior walls | Worn door gasket, warm-air intrusion | Clean and paper-test the gasket |
How to Find the Source of a Refrigerator Leak
Follow these steps in order. Each one narrows the possibilities, so you do not waste time — or money on parts — chasing the wrong problem.
Step 1: Locate the Water
Mop up standing water and dry the area. Then check three places: inside the fridge (under drawers, on shelves, on the back wall), the freezer floor, and the floor behind and beneath the appliance. Where water reappears first is your primary lead.
Step 2: Check Behind the Refrigerator
Slide the fridge out carefully (use a moving mat on hard floors) and look at the floor behind it. Wet back there? Suspect the supply line, inlet valve, or filter connection — shut off the water supply valve now. Dry? Your problem is the defrost drain, the drain pan, the gasket, or the ice maker.
Step 3: Inspect the Defrost Drain
With the refrigerator unplugged, find the drain hole at the bottom of the freezer. Look for standing water, ice, or debris around it. Flush it with warm water using a turkey baster; if water drains freely to the pan below, this was likely your leak.
Step 4: Check the Drain Pan
While the fridge is out, empty the drain pan, inspect it for cracks, and confirm it sits correctly in its channel. A cracked or displaced pan explains water found directly underneath the appliance.
Step 5: Inspect Water Connections
With the water still off, inspect the supply line from the wall valve to the inlet valve for kinks, cracks, and loose fittings, and check the inlet valve and filter housing for mineral crust — a reliable marker of a slow seep. Tighten loose fittings gently; replace any damaged line.
Step 6: Check the Ice Maker and Filter
Remove the ice bin and look for a cracked or misaligned mould, a slipped fill tube, and water fused around the housing. Then remove and reinstall the water filter, confirming it is the correct cartridge and locks fully into place.
Step 7: Paper-Test the Door Gaskets
Close the door on a sheet of paper at several points around each seal. If the paper pulls out easily anywhere, the gasket is weak there. Clean the seals first; replace them if they are torn or permanently flattened.
Step 8: Confirm the Fix Before Pushing the Fridge Back
After your fix, leave the refrigerator pulled out for a few hours — or overnight — and check for new water behind and beneath it. A leak that stays dry for a full defrost cycle or two is fixed.
Tools Needed and Time Estimates per Fix
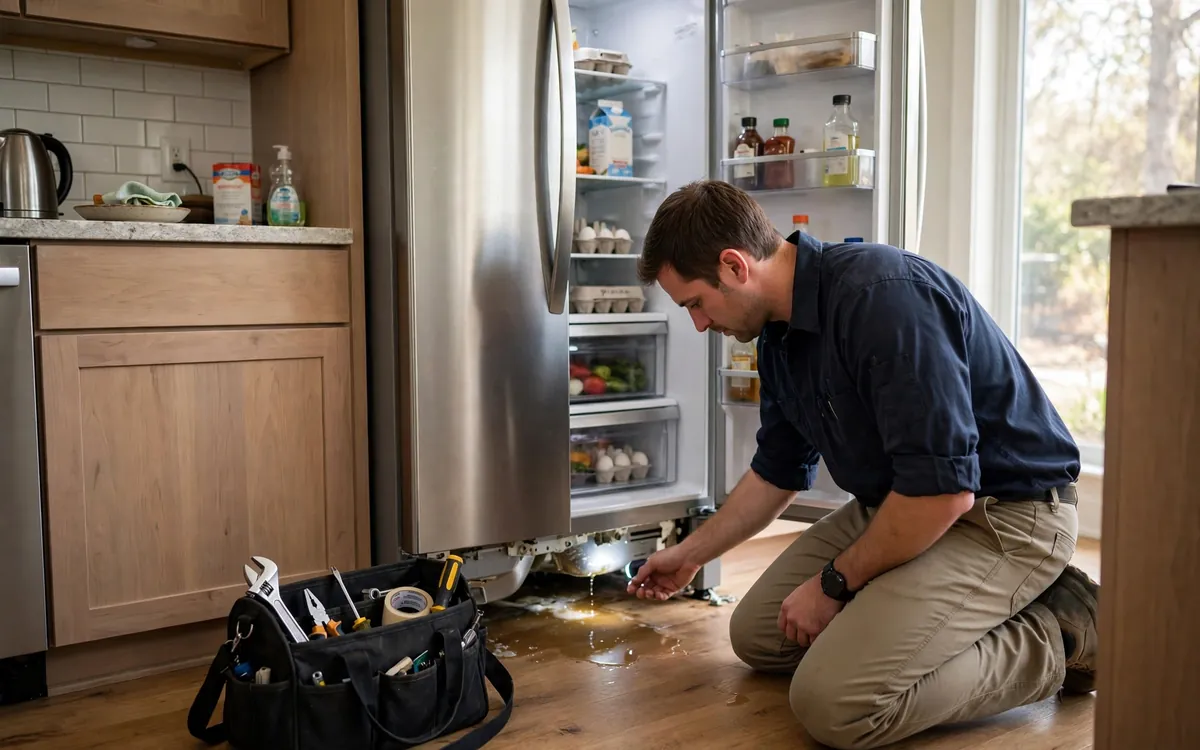
Knowing what each fix involves helps you decide what to attempt yourself and what to hand to a technician.
| Fix | Tools Needed | Typical Time |
|---|---|---|
| Locate and dry the leak area | Towels, flashlight, moving mat | 15 minutes |
| Flush a clogged defrost drain | Turkey baster, warm water, soft cloth | 15–20 minutes |
| Thaw a frozen drain tube | Coolers for food, towels | Several hours of thawing, minimal active time |
| Empty and reseat the drain pan | Sponge or turkey baster | 15–30 minutes |
| Replace a damaged supply line | Adjustable wrench, new braided line, bucket, towels | 30–45 minutes |
| Reinstall or replace the water filter | None (replacement cartridge) | 5–10 minutes |
| Clean and test door gaskets | Warm soapy water, paper for the test | 15–20 minutes |
| Replace a door gasket | Screwdriver (model-specific) | 45–90 minutes; patience required |
| Replace the water inlet valve | Nut driver, pliers, bucket, towels | 45–90 minutes; pro recommended |
| Replace the drain pan | None (model-specific part) | 20–30 minutes |
Time estimates assume a freestanding refrigerator with accessible rear and bottom panels. Built-in and counter-depth models can take longer because access is tighter.
Safety Warnings Before You Start
Refrigerator troubleshooting is safe when you respect two things: electricity and water. Follow these rules without exception.
- Unplug the refrigerator before removing any rear or bottom access panel. Line voltage is present at the inlet valve and control components even when the fridge seems idle.
- Shut off the water supply before disconnecting any water line, filter, or fitting. Keep towels and a bucket within reach — supply lines hold water even after the valve is closed.
- Never chip at ice with a knife, screwdriver, or other sharp tool. It is easy to puncture the plastic liner, the drain tube — or far worse, a refrigerant line. A punctured sealed system turns a minor leak repair into a major one.
- Use only warm water, never boiling water, when flushing the defrost drain. Boiling water can crack the plastic liner and warp the drain tube.
- Stop immediately if you smell burning plastic, see scorch marks, notice sparking, or find water near electrical outlets. Unplug the refrigerator and call a professional.
When in doubt, stop. There is no leak urgent enough to justify an electrical shock or a flooded kitchen. A technician can pick up the diagnosis exactly where you left off.
Central Oregon Factors That Cause Refrigerator Leaks
Refrigerators leak for the same mechanical reasons everywhere, but a few local conditions in the Bend area make certain causes more common here than the national averages suggest.
Hard Water and Mineral Scale
Much of Central Oregon’s water — municipal and well alike — runs hard with dissolved calcium and magnesium. Over time, those minerals deposit as scale inside the inlet valve, around filter housings, and at fittings: valves stick open and seep, housings develop crusty weak points, and connections that were fine for years start weeping. If leak problems recur every year or two, scale is a likely contributor. A strict six-month filter replacement schedule is the simplest defense.
Dry Air, Humid Kitchens
Central Oregon’s outdoor air is famously dry, but modern Bend kitchens — dishwashers, cooking steam, whole-home humidifiers fighting that dryness — can run surprisingly humid indoors. That indoor humidity condenses on cold refrigerator surfaces when door gaskets are weak. If your leak is condensation-style beading rather than a defined stream or pool, indoor humidity plus a tired gasket is a common combination here.
Garage and Vacation-Home Refrigerators
Second refrigerators in Bend garages, shops, and vacation homes face two leak-friendly conditions. In winter, a garage fridge can cycle oddly as ambient temperatures swing, producing extra frost that overwhelms the drain system during thaws. And in vacation homes that sit empty for weeks, slow supply-line seeps go undiscovered until floors are damaged — if you leave a second home unattended, shut off the refrigerator’s water supply valve before you go.
High-Desert Dust on Condenser Coils
Central Oregon’s dry, dusty air coats condenser coils quickly. Dusty coils make the refrigerator run longer and defrost more often, which increases both condensation and the volume of water the drain system must handle. Vacuuming the coils once or twice a year is one of the highest-value maintenance tasks for any refrigerator here — and it quietly reduces leak risk too.
How to Prevent Refrigerator Leaks
A few low-effort habits prevent most refrigerator leaks before they start:
These steps take minutes and address the root causes behind the majority of leak-related service calls.
Refrigerator Leak Repair: DIY or Professional Service?
Use this table to decide what to handle yourself and what to hand to a technician.
| Repair Task | DIY Suitability | Professional Help |
|---|---|---|
| Locate and mop up the leak | Good | Usually unnecessary |
| Flush a clogged defrost drain | Good | Helpful if it clogs repeatedly |
| Thaw a frozen drain tube | Good, with patience | Recommended if it refreezes |
| Empty, reseat, or replace the drain pan | Good | Helpful if the pan is inaccessible |
| Reinstall or replace the water filter | Good | Usually unnecessary |
| Clean and test door gaskets | Good | Usually unnecessary |
| Replace a door gasket | Moderate | Helpful to get the right part |
| Replace a damaged supply line | Good, with care | Recommended if access is tight |
| Replace the water inlet valve | Moderate | Recommended for most homeowners |
| Diagnose a recurring drain freeze | No | Yes — defrost system testing needed |
The key rule is simple: DIY the diagnosis and the simple fixes; let a professional handle water connections, electrical testing, and part replacement when you are unsure. A correct diagnosis from your own troubleshooting makes the service visit faster and cheaper.
When Should You Call a Refrigerator Repair Technician?
Call a technician when your own troubleshooting has ruled out the simple causes — the drain is clear, the pan is intact, the filter is seated, the gaskets pass the paper test — and water keeps appearing. The remaining suspects — a seeping inlet valve, a defrost system that keeps freezing the drain, or an ice maker fault — benefit from professional testing and correct part sourcing. Call sooner, without further DIY attempts, for water pouring from the back of the refrigerator, a burning smell, sparking, or water near electrical outlets. Shut off the water supply valve first if there is an active leak.
For homeowners in Bend, professional refrigerator repair starts with your symptoms: tell the scheduler what you have already checked — for example, “water keeps pooling under the crisper drawers after I flushed the drain” or “the floor behind the fridge is wet.” That detail helps the technician arrive with the right parts and often resolves the problem in a single visit.
Frequently Asked Questions About Refrigerators Leaking Water
Why is my refrigerator leaking water inside, under the crisper drawers?
Water pooling under the crisper drawers is the classic sign of a clogged or frozen defrost drain. Meltwater from the defrost cycle should flow down the drain at the back of the freezer into the drain pan; when the drain is blocked, the water backs up into the fresh-food compartment. Unplug the refrigerator and flush the drain with warm water using a turkey baster.
Is it normal for a refrigerator to leak a little water underneath?
No — a properly working refrigerator should not leave water on your floor. The drain pan catches defrost water and compressor heat evaporates it. Visible water underneath means the pan is cracked or misaligned, the defrost drain is overflowing, or a supply-line connection is leaking. Investigate rather than assuming it is normal.
Can a refrigerator leak water from the back?
Yes. On models with an ice maker or water dispenser, the water supply line and inlet valve sit at the back of the appliance. Loose fittings, a cracked or kinked line, or a valve that seeps instead of sealing will drip onto the floor behind the fridge. Shut off the water supply valve and inspect the connections before the water reaches your flooring.
How do I unclog a refrigerator defrost drain?
Unplug the refrigerator, locate the drain hole at the bottom of the freezer, remove visible debris, and flush it with warm (not boiling) water using a turkey baster until water flows freely into the drain pan. Never use sharp tools or boiling water, which can damage the liner. If the clog returns within weeks, the drain tube may be freezing over and needs professional diagnosis.
Why does my freezer have a sheet of ice on the bottom?
A sheet of ice on the freezer floor usually means the defrost drain has frozen over, so meltwater pools and refreezes instead of draining away. Unplug the unit, let the drain area thaw completely, then flush it. If the ice sheet keeps coming back, the defrost heater or thermostat may be failing — that is a technician job.
Can a bad door seal cause a refrigerator to leak water?
Yes. A worn, torn, or dirty door gasket lets warm, humid air into the cold compartment, where the moisture condenses on interior walls and drips down as water. It also forces the fridge to run longer, increasing defrost water. Try the paper test: close the door on a sheet of paper at several points — if it slides out easily, the seal is weak there.
Should I turn off the water supply to my fridge if it is leaking?
If the leak is behind the refrigerator or involves the ice maker, dispenser, or filter — yes, shut off the water supply valve immediately to stop further damage, then diagnose. If the leak is clearly a defrost-drain issue inside the fridge, the water supply is not involved and can stay on while you clear the drain.
Refrigerator Leak Repair in Bend, OR
A refrigerator leaking water is often an early warning — a drain starting to clog, a valve starting to seep, a gasket starting to fail. Catching it now usually means a simpler repair and no floor damage.
We serve homeowners throughout Bend — including Northwest Crossing, Awbrey Butte, Boyd Acres, Larkspur, River West, Mountain View, Summit West, Orchard District, and Southern Crossing — as well as appliance repair in Redmond, Oregon and the surrounding Central Oregon area. Tell the scheduler what you have already checked using the steps above; it helps the technician diagnose the problem faster, often in a single visit.
Final Takeaway
A refrigerator leaking water is almost always a drainage or water-connection problem, not a dead appliance. Start by locating the water — inside points to the defrost drain, behind points to the supply line, underneath points to the drain pan — then work the matching fix. Flush the drain carefully, take active leaks seriously, and do not chip at ice with sharp tools. When the simple checks do not resolve it, professional diagnosis is the sensible next step.
Fridge Still Leaking?
If the troubleshooting steps haven’t found the source, our technicians can track down the actual cause — drain, pan, valve, ice maker, or gasket — and give you a clear, upfront repair estimate before any work begins.