Ice Maker Not Working? Troubleshooting Guide for Bend, OR Homes
An ice maker not working is frustrating — especially when the rest of the refrigerator seems fine. This guide walks you through the most common causes, safe step-by-step checks you can do yourself, and how to tell when it is time to call a local technician.
Start Here: What to Check When Your Ice Maker Stops
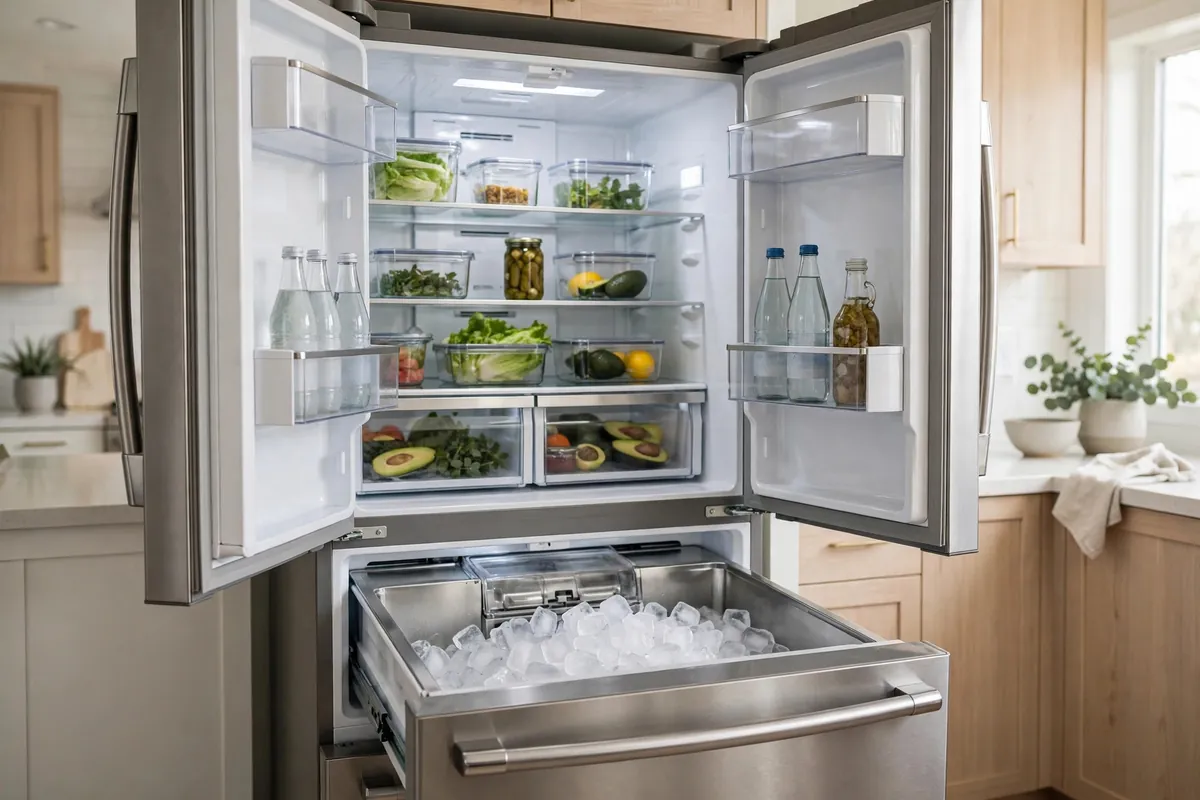
When your ice maker is not working, the first instinct is often to assume the worst — a dead refrigerator or an expensive repair. In practice, many ice maker problems turn out to be simple: the ice maker was accidentally switched off, the freezer is running a few degrees too warm, or the water filter is overdue. These are checks you can do yourself in minutes, with no tools and no risk.
That said, parts like the water inlet valve and the ice maker assembly do wear out — and Central Oregon’s hard water can shorten their lifespan. Knowing how to tell a simple problem from a failing part saves you time and money either way: you fix it yourself in minutes, or you call a technician already knowing what is wrong.
This guide is written for homeowners in Bend, Oregon and the surrounding Central Oregon area. It covers how an ice maker works, the eight most common reasons it stops, a step-by-step diagnosis you can follow in order, and clear guidance on when professional refrigerator repair in Bend is the right move.
Table of Contents — Tap to Jump to a Section
- 01 Introduction
- 02 Why It Stops Making Ice
- 03 How an Ice Maker Works
- 04 8 Common Causes
- 05 Ice Maker Switched Off
- 06 Freezer Too Warm
- 07 Water Supply Problem
- 08 Frozen Fill Tube
- 09 Failed Inlet Valve
- 10 Clogged Water Filter
- 11 Low Water Pressure
- 12 Worn Ice Maker Assembly
- 13 Step-by-Step Diagnosis
- 14 Tools & Time Estimates
- 15 Diagnose by Symptom
- 16 Safety First
- 17 Central Oregon Factors
- 18 Prevention
- 19 DIY or Pro?
- 20 When to Call a Pro
- 21 FAQ
- 22 Bend & Redmond Service
- 23 Final Takeaway
Why Is My Ice Maker Not Working?
The most common reasons an ice maker stops making ice are:
- The ice maker is switched off, or its shutoff arm is in the raised (off) position.
- The freezer is too warm — ice makers generally need 0°F to 5°F (−18°C to −15°C).
- The water supply is shut off, or the supply line is kinked or damaged.
- The fill tube that carries water into the ice mold is frozen or blocked.
- The water inlet valve has failed and no longer opens to fill the mold.
- The water filter is clogged, overdue, or installed incorrectly.
- Household water pressure is too low for the inlet valve to open fully.
- The ice maker assembly itself — motor, ejector arms, or thermostat — has worn out.
Always start with the simplest checks: the on/off setting, the freezer temperature, and the water filter age. Most take less than five minutes.
Safety first: unplug the refrigerator before removing any rear or interior access panels, and shut off the water supply before disconnecting any water line. Water and electricity are a dangerous combination — when in doubt, stop and call a professional.
How Does a Refrigerator Ice Maker Work?
Understanding the ice-making cycle makes troubleshooting much easier, because every failure happens at one specific step of that cycle. Here is what a normal cycle looks like:
First, the ice maker calls for water. An electrical signal opens the water inlet valve — usually for about seven seconds — and household water pressure pushes water up through the supply line and the fill tube into the ice mold. The valve then closes.
Next, the freezer does its part. As long as the freezer compartment is cold enough — around 0°F to 5°F — the water in the mold freezes solid. A thermostat attached to the mold monitors the temperature, and when the cubes are fully frozen, it signals the harvest cycle.
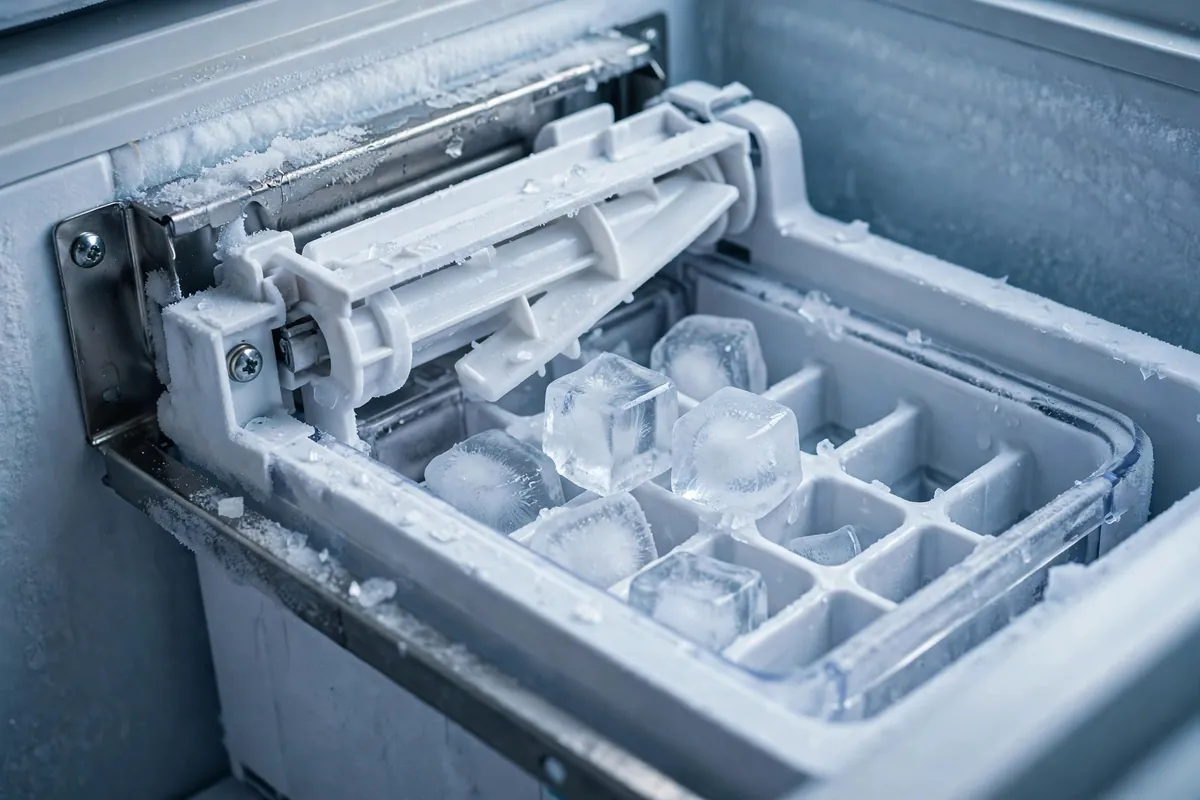
During harvest, a small heater under the mold warms it just enough to loosen the cubes, and ejector arms sweep them out into the ice bin. A shutoff arm (or an electronic sensor on newer models) detects when the bin is full and pauses production until you use some ice. When your ice maker is not working, the failure is at exactly one of these steps — and the diagnostic section below is designed to find which one.
Ice Maker Components and What Can Fail
The table below maps each part to its job and its most common failure. You will see these parts referenced throughout the troubleshooting steps.
| Component | What It Does | What Can Go Wrong |
|---|---|---|
| Shutoff arm / sensor | Pauses ice production when the bin is full | Stuck in the raised (off) position |
| Water inlet valve | Opens to let water into the ice mold | Electrical failure, scale buildup, stuck open or closed |
| Fill tube | Carries water from the valve into the mold | Frozen solid, blocked by scale, dislodged |
| Ice mold | Shapes the water into cubes | Cracked coating, mineral buildup |
| Mold thermostat | Senses when cubes are frozen, triggers harvest | Fails to sense temperature, harvest never starts |
| Ejector arms / motor | Push finished cubes into the bin | Jammed, stripped gears, burned-out motor |
| Water filter | Filters water before it reaches the valve | Clogged, overdue, or installed incorrectly |
| Control board | Sends voltage to the valve and ice maker | Failed relay or burned component |
Most ice maker failures involve the water supply side (valve, fill tube, filter, pressure) rather than the ice maker mechanism itself. That is good news, because supply-side problems are often cheaper to fix.
8 Common Reasons an Ice Maker Stops Working
The sections below walk through each cause in detail, ordered from the simplest checks to the problems most likely to need a technician. Work through them in order — do not skip ahead to part replacement before ruling out the easy causes.
| Common Cause | Main Symptom | Difficulty |
|---|---|---|
| Ice maker switched off | No ice at all, everything else normal | Easy — 2 minutes |
| Freezer too warm | No ice, food soft or frost buildup | Easy — 5 minutes |
| Water supply shut off or kinked line | Empty ice mold, no refill sound | Easy — 15 minutes |
| Frozen or blocked fill tube | Mold stays empty between cycles | Moderate — 30 minutes |
| Failed water inlet valve | Dispenser may work, ice maker does not | Moderate to pro |
| Clogged or overdue water filter | Slow ice, small cubes, bad taste | Easy — 10 minutes |
| Low household water pressure | Small or hollow cubes, slow fill | Easy to check |
| Worn ice maker assembly or control board | Grinding, jammed arms, no harvest | Professional |
1. The Ice Maker Is Switched Off
This is the most common — and most embarrassing — cause, which is exactly why it is worth checking first. Ice makers get switched off more often than people realize: during cleaning, after a move, by a curious child, or by a houseguest who bumped the control panel.
There are two designs to check. Older and mid-range models use a metal shutoff arm that pivots up and down — raised means off, lowered means on. Make sure the arm moves freely and is fully lowered; a bin jammed with clumped ice can hold the arm up even when the bin looks only half full.
Newer models use an electronic on/off switch or control-panel setting. Check both the switch on the ice maker housing and the refrigerator’s main display, and confirm no vacation or Sabbath mode is pausing production.
If the ice maker was off, lower the arm or switch it on and wait a full 24 hours before judging the result. A newly restarted ice maker needs time to fill, freeze, and harvest its first batches.
2. The Freezer Is Too Warm
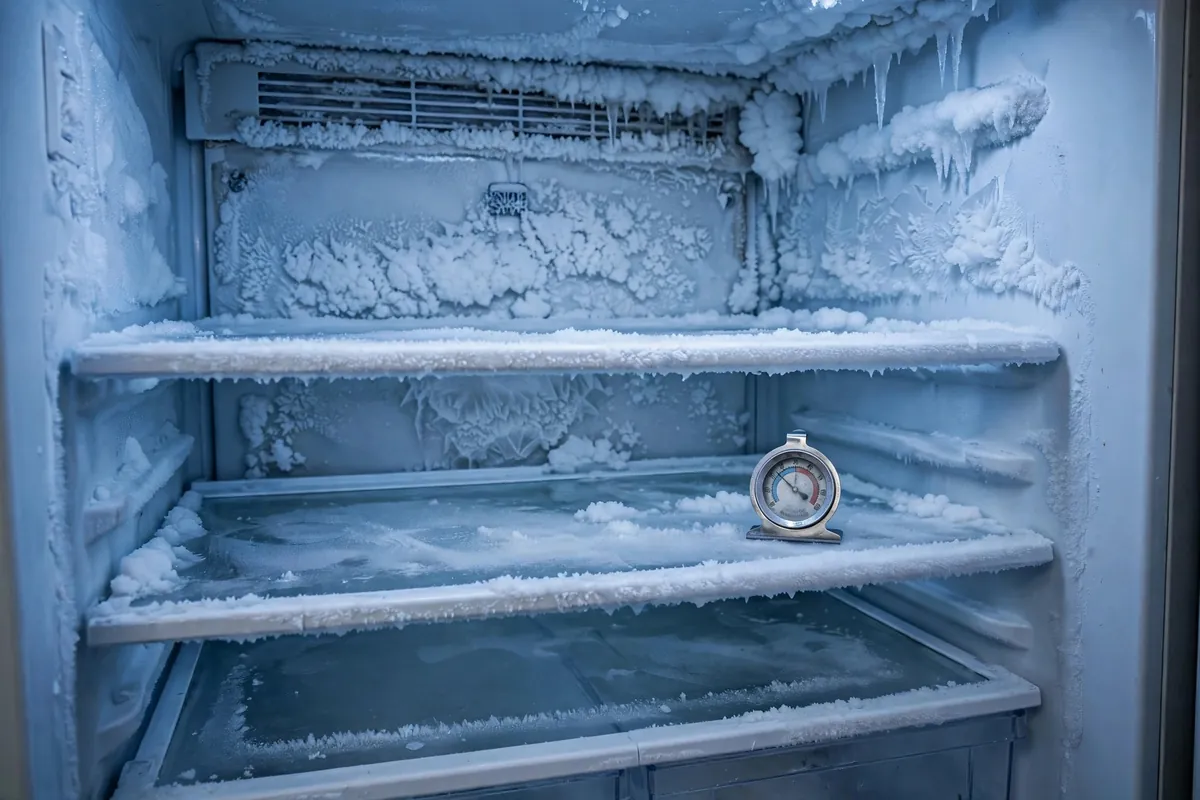
An ice maker is entirely dependent on freezer temperature. Most manufacturers design the ice maker to operate only when the freezer is between 0°F and 5°F (−18°C to −15°C). If the freezer climbs above roughly 10°F, the mold thermostat never gets cold enough to trigger the harvest cycle — and ice production stops completely, even though your frozen food may still feel acceptably cold.
Check the actual temperature with an inexpensive freezer thermometer placed inside for several hours, rather than trusting the display alone. If it reads above 5°F, clear blocked vents, inspect the door gasket for gaps or frost, and lower the freezer setting — then allow a full 24 hours for the temperature to stabilize before rechecking.
While you wait, look for the usual reasons a freezer runs warm: blocked air vents from food pushed against the back wall, a damaged door gasket, and dusty condenser coils underneath or behind the refrigerator. In Central Oregon’s high-desert environment, fine dust coats condenser coils quickly — vacuuming them once or twice a year helps the whole refrigerator, not just the ice maker.
3. The Water Supply Is Shut Off or the Line Is Kinked
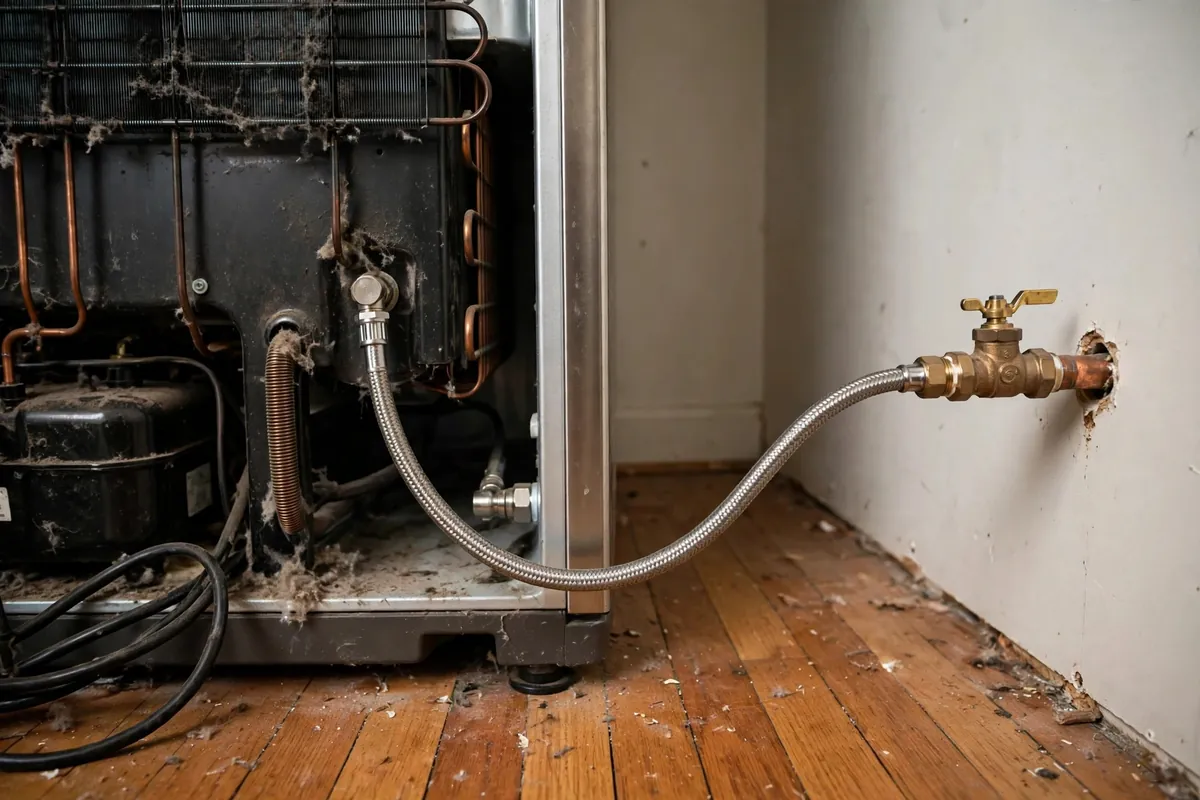
No water in means no ice out. The refrigerator’s water supply starts at a shutoff valve — usually under the sink, in the basement or crawlspace below, or behind the refrigerator itself — and runs through a supply line to the inlet valve at the back of the fridge.
Confirm the shutoff valve is fully open. These valves get closed during kitchen remodels, flooring work, or leak scares and are sometimes only reopened halfway, which restricts flow. Turn it fully open, then check behind the refrigerator for a kinked, crushed, or pinched supply line — this is especially common when the refrigerator has been pushed back against the wall after cleaning. Copper lines can kink permanently and may need replacement; braided stainless lines are more forgiving but can still be crushed.
Pay special attention to saddle valves — the small clamp-on valves sometimes used to tap into a water pipe. They are a known weak point: the piercing needle clogs with minerals over time, and the valve can fail to deliver adequate flow even when it appears open. If your refrigerator is fed by a saddle valve and ice production is weak or intermittent, replacing it with a proper quarter-turn shutoff valve is a worthwhile upgrade.
After restoring the supply, listen for the inlet valve’s brief buzz or click during the next fill cycle — that sound confirms water is being called for.
4. The Fill Tube Is Frozen or Blocked
The fill tube is the short plastic tube that carries water from the inlet valve into the ice mold, usually entering through the back of the freezer just above the ice maker. Because it sits in the coldest part of the appliance while only carrying water intermittently, it can freeze solid — and once it does, no water reaches the mold at all.
The classic symptom: the ice mold is completely empty, yet the ice maker keeps cycling as if it is trying. You may also find a small icicle or ice plug visible at the tube opening. To confirm, unplug the refrigerator, pull it away from the wall, and locate the fill tube where it enters the freezer. If it is opaque with ice or you cannot see through it, you have found the problem.
To thaw it, use a hair dryer on low heat held at a safe distance, with towels underneath to catch drips — typically 20 to 40 minutes. Never use high heat, a heat gun, or a sharp object to chip the ice; the tube is thin plastic and easy to damage.
Important pattern to watch: a fill tube that freezes once can be a fluke, but a fill tube that freezes repeatedly is telling you something. The most common underlying reason is a failing water inlet valve that dribbles or leaks slightly instead of sealing shut — that slow seep freezes in the tube between cycles. If you thaw the tube and it freezes again within days or weeks, have the inlet valve tested rather than thawing the tube a third time.
5. The Water Inlet Valve Has Failed
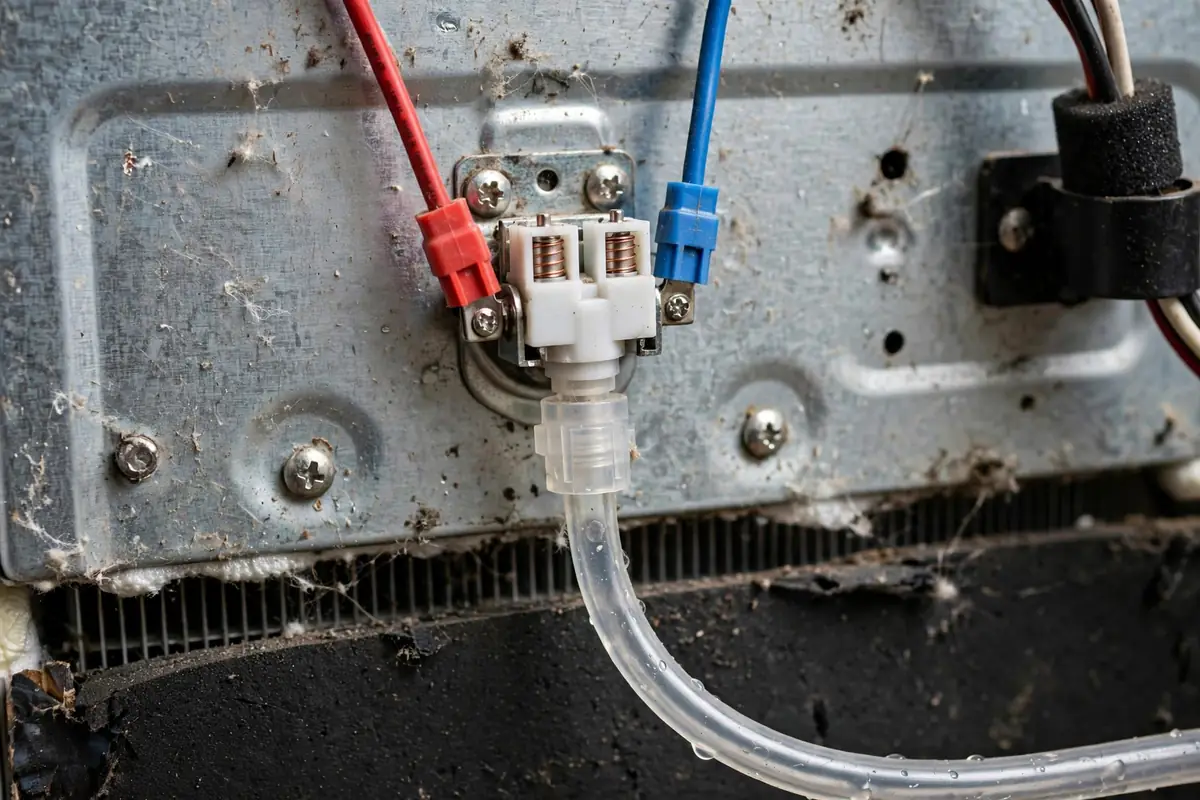
Across all major refrigerator brands, the water inlet valve is the single most commonly replaced part in ice maker repairs — usually a dual valve with one side feeding the dispenser and the other feeding the ice maker, mounted where the supply line connects at the back of the fridge.
This explains a confusing symptom: the water dispenser works fine, but the ice maker gets nothing. The dispenser side can be healthy while the ice-maker side has failed electrically or clogged with sediment.
Signs pointing to the inlet valve include: the ice mold stays empty even though the supply line has water, the fill tube freezes repeatedly (the valve seeps instead of sealing), or you hear no buzz or click from the back of the refrigerator during what should be a fill cycle. The valve needs adequate household water pressure — roughly 20 psi minimum — to open fully, so pressure should be ruled out before condemning the valve.
Replacing an inlet valve is a moderate repair: shut off the water, disconnect the supply line and electrical connectors, swap the valve, and check carefully for leaks afterward — typically 45 to 90 minutes of work. Because it combines water connections with electrical components behind a heavy appliance, many homeowners reasonably choose professional service for this one — a slow leak behind the refrigerator can cause far more damage than the repair itself.
6. The Water Filter Is Clogged, Overdue, or Installed Incorrectly
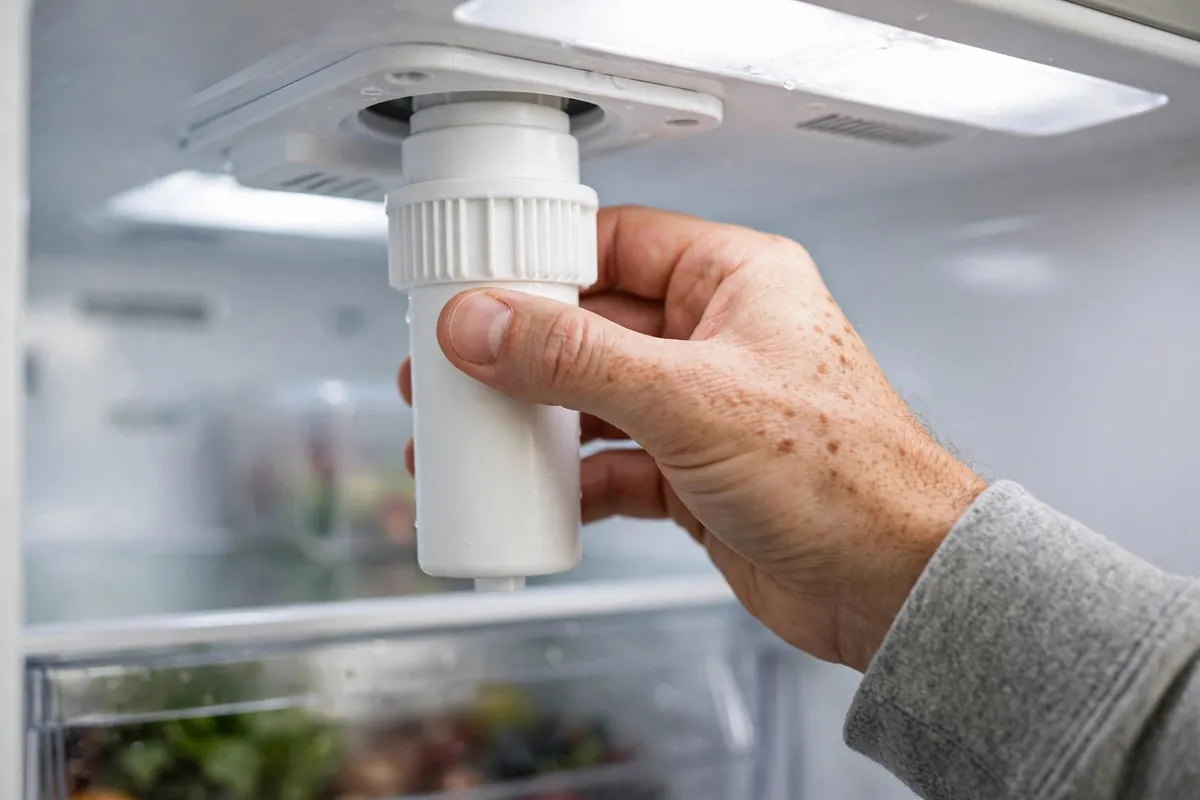
The water filter sits upstream of the inlet valve, so a restricted filter starves the entire ice-making process. A filter older than six months can clog badly enough to stop ice production entirely — and in Central Oregon, where municipal and well water tend to run hard with dissolved minerals, filters can load up even faster than the calendar suggests.
Check the age of your filter first. If you cannot remember when it was changed, it is overdue. Replace it with the correct cartridge for your model and discard the first couple of batches of ice afterward; they can be discolored until the system flushes the air from the line.
Also verify the installation. A recently replaced filter that is not locked fully into its housing — or still has protective caps on — restricts flow just as badly as a clogged one. Remove it, check the seals and caps, and reinstall firmly until it seats fully.
7. Household Water Pressure Is Too Low
The inlet valve is designed to open against normal household water pressure. If pressure at the refrigerator drops too low — generally below about 20 psi — the valve may open only partially or not at all, producing small, hollow, or misshapen cubes, very slow ice production, or nothing at all.
Low pressure has a few common sources: a partially closed shutoff valve, a clogged saddle valve, a failing home pressure regulator, or — relevant for some Central Oregon homes — a private well system not maintaining adequate pressure. A quick sanity check: if faucets throughout the house also run weakly, the problem is household-wide and a plumber is the right call.
8. The Ice Maker Assembly or Control Board Has Worn Out
If the water supply side checks out — the mold fills with water but cubes never get ejected, or nothing happens at all despite water reaching the mold — the problem is in the ice maker mechanism itself or the electronics controlling it.
Start with a visual inspection: remove the ice bin and look at the ice maker. Jammed ejector arms (often blocked by a clump of fused ice), a cracked or peeling mold coating, or a burnt smell from the ice maker housing all point to assembly failure. Clear any visible ice jam with a plastic utensil — never metal — and see whether normal cycling resumes.
Deeper failures need electrical testing. The mold thermostat must sense freezing temperatures to trigger harvest; if it has failed, the ice maker fills and freezes but never ejects. The main control board supplies voltage to both the inlet valve and the ice maker — a failed relay or burned component there can kill ice production while everything else works normally. Testing these parts requires a multimeter and comfort working around live components, which puts this firmly in professional territory.
How to Diagnose an Ice Maker That Is Not Working
Follow these steps in order. Each one rules out a cause before you move to the next, so you do not waste time — or money on parts — chasing the wrong problem.
Step 1: Confirm the Ice Maker Is On
Lower the shutoff arm fully or switch the ice maker on at the control panel. Make sure the ice bin is seated correctly — a misaligned bin can hold the shutoff arm up. Wait 24 hours before concluding anything further.
Step 2: Check the Freezer Temperature
Place a freezer thermometer inside for several hours. You need 0°F to 5°F. If it reads higher, clear blocked vents, inspect the door gasket, lower the freezer setting, and allow 24 hours to stabilize.
Step 3: Check the Water Filter Age
If the filter is older than six months, replace it with the correct cartridge and make sure it locks fully into place.
Step 4: Verify the Water Supply
Confirm the shutoff valve is fully open, then pull the refrigerator out and inspect the supply line for kinks or damage. Treat any saddle valve as suspect.
Step 5: Inspect the Fill Tube
With the refrigerator unplugged, find the fill tube where it enters the freezer above the ice maker. If frozen, thaw gently with a hair dryer on low heat. Repeated refreezing points to a failing inlet valve.
Step 6: Run the Water-Pour Test
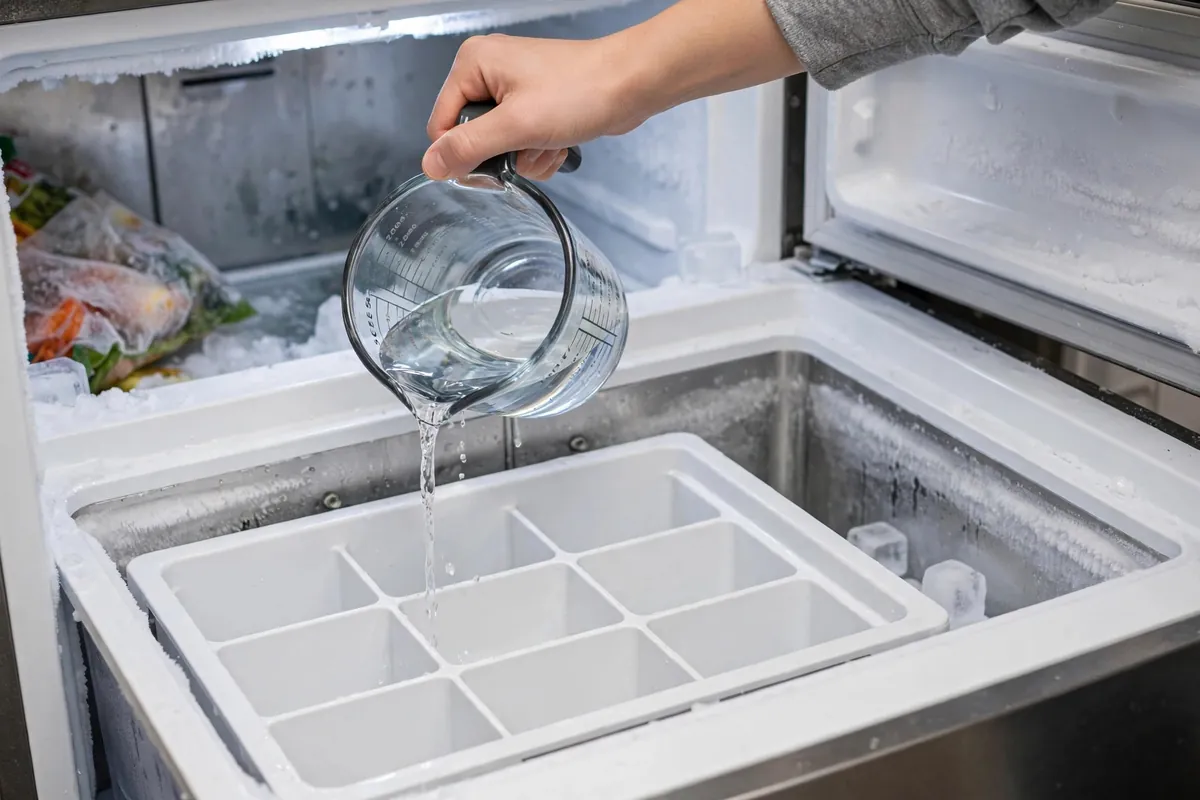
This is the single most useful diagnostic step: it separates an ice maker failure from a water supply failure. Remove the ice bin and pour about half a cup of water directly into the ice mold, then wait two to three hours.
If the ice maker harvests and dumps that ice, the mechanism works — your problem is on the water supply side (fill tube, inlet valve, filter, pressure, or supply line).
If the water freezes but is never ejected, the ice maker assembly — thermostat, motor, ejector arms, or control board — is the problem, and professional diagnosis is the next step.
Step 7: Listen for the Fill Cycle
Listen at the back of the refrigerator for the inlet valve’s brief buzz during a fill cycle. Silence when the mold should be filling, combined with an empty mold, points to a failed valve or a control board not sending voltage.
Step 8: Decide Between Repair and a Service Call
If you have reached this step, you have ruled out settings, temperature, filter, supply, and the fill tube. Remaining suspects — the inlet valve, ice maker assembly, and control board — involve water connections, model-specific parts, and electrical testing. This is the point where most homeowners are better served by a professional diagnosis.
Tools Needed and Time Estimates per Fix
Knowing what each fix involves helps you decide what to attempt yourself and what to hand to a technician.
| Fix | Tools Needed | Typical Time |
|---|---|---|
| Switch ice maker on / lower shutoff arm | None | 2 minutes, plus 24 hours to confirm ice |
| Check and adjust freezer temperature | Freezer thermometer | 5 minutes active, 24 hours to stabilize |
| Replace water filter | None (replacement cartridge) | 5–10 minutes |
| Open shutoff valve / straighten supply line | Adjustable wrench, flashlight, towels | 15–30 minutes |
| Water-pour diagnostic test | Measuring cup | 5 minutes active, 2–3 hours waiting |
| Thaw frozen fill tube | Hair dryer (low heat), towels | 20–40 minutes |
| Replace water inlet valve | Nut driver, pliers, bucket, towels | 45–90 minutes; pro recommended |
| Replace ice maker assembly | Screwdriver / nut driver (model-specific) | 30–60 minutes; correct part critical |
| Diagnose control board | Multimeter, electrical experience | Professional service |
Time estimates assume a straightforward installation. Built-in and counter-depth models can take longer because access to the back of the refrigerator is tighter.
Ice Maker Troubleshooting by Symptom
Match what you are seeing to the most likely causes. Start with the easiest explanation in each row before moving to part replacement.
| What You Notice | Most Likely Causes | Check First |
|---|---|---|
| No ice at all, bin completely empty | Switched off, freezer too warm, water supply off | On/off setting, then freezer temperature |
| Ice maker cycles but mold stays empty | Frozen fill tube, failed inlet valve, kinked line | Fill tube, then supply line and valve |
| Water dispenser works, ice maker does not | Failed ice-maker side of dual inlet valve | Inlet valve (professional test) |
| Small, hollow, or misshapen cubes | Low water pressure, clogged filter | Filter age, then household pressure |
| Ice tastes or smells bad | Old filter, dirty bin, stale cubes | Replace filter, empty and wash bin |
| Water leaking into the bin or onto the floor | Inlet valve stuck open, cracked line | Shut off water supply, call a pro |
| Grinding or clicking during harvest | Jammed ejector arms, failing motor | Clear visible ice jams, then pro |
| Ice clumps into one solid mass | Infrequent use, freezer temperature swings | Break up clumps, check temperature |
Safety Warnings Before You Start
Ice maker troubleshooting is safe when you respect two things: electricity and water. Follow these rules without exception.
- Unplug the refrigerator before removing any rear access panel or interior cover. Line voltage is present at the inlet valve and control board even with the ice maker switched off.
- Shut off the water supply before disconnecting any water line or fitting. Keep towels and a bucket within reach — supply lines hold water even after the valve is closed.
- Never chip at ice with a knife, screwdriver, or other sharp tool. It is easy to puncture the fill tube, the mold coating, or — far worse — a refrigerant line. A punctured sealed system turns a minor repair into a major one.
- Use only low heat when thawing a frozen fill tube. High heat can melt the plastic tube and nearby wiring insulation.
- Stop immediately if you smell burning plastic, see scorch marks, or notice sparking. Unplug the refrigerator and call a professional.
When in doubt, stop. There is no ice maker problem urgent enough to justify an electrical shock or a flooded kitchen. A technician can pick up the diagnosis exactly where you left off.
Central Oregon Factors That Affect Ice Makers
Ice makers fail for the same mechanical reasons everywhere, but a few local conditions in the Bend area make certain failures more common here than the national averages suggest.
Hard Water and Mineral Scale
Much of Central Oregon’s water — municipal and well alike — runs hard with dissolved calcium and magnesium. Over time, those minerals deposit as scale inside the inlet valve, the fill tube, and the ice mold: valves stick, tubes narrow, and cubes turn cloudy. If ice maker problems recur every year or two, scale is a likely contributor. A strict six-month filter replacement schedule is the simplest defense.
Refrigerators in Garages and Outbuildings
Second refrigerators in Bend garages and shops often stop making ice each winter: the fresh-food compartment stays cold from ambient air, so the compressor rarely runs — and the freezer section slowly warms. If a garage fridge quits making ice in winter but works in summer, ambient temperature is the likely explanation, not a failed part. A garage-rated model is the long-term fix.
High-Desert Dust on Condenser Coils
Central Oregon’s dry, dusty air coats condenser coils quickly. Dusty coils make the sealed system work harder and can push freezer temperatures marginally higher — sometimes just enough to stall ice production while food still seems frozen. Vacuuming the coils once or twice a year is one of the highest-value maintenance tasks for any refrigerator here.
How to Keep Your Ice Maker Working
A few low-effort habits prevent most ice maker failures.
These steps take minutes and address the root causes behind the majority of service calls for ice makers.
Ice Maker Repair: DIY or Professional Service?
Use this table to decide what to handle yourself and what to hand to a technician.
| Repair Task | DIY Suitability | Professional Help |
|---|---|---|
| Switch ice maker on / lower shutoff arm | Good | Usually unnecessary |
| Check and adjust freezer temperature | Good | Usually unnecessary |
| Replace water filter | Good | Usually unnecessary |
| Straighten or inspect supply line | Good | Helpful if line needs replacing |
| Water-pour diagnostic test | Good | Usually unnecessary |
| Thaw frozen fill tube | Good, with care | Recommended if it refreezes |
| Replace water inlet valve | Moderate | Recommended for most homeowners |
| Replace ice maker assembly | Model-dependent | Helpful to get the right part |
| Diagnose control board | No | Yes |
The key rule is simple: DIY the diagnosis and the simple fixes; let a professional handle water connections, electrical testing, and part replacement when you are unsure. A correct diagnosis from your own troubleshooting makes the service visit faster and cheaper.
When Should You Call an Ice Maker Repair Technician?
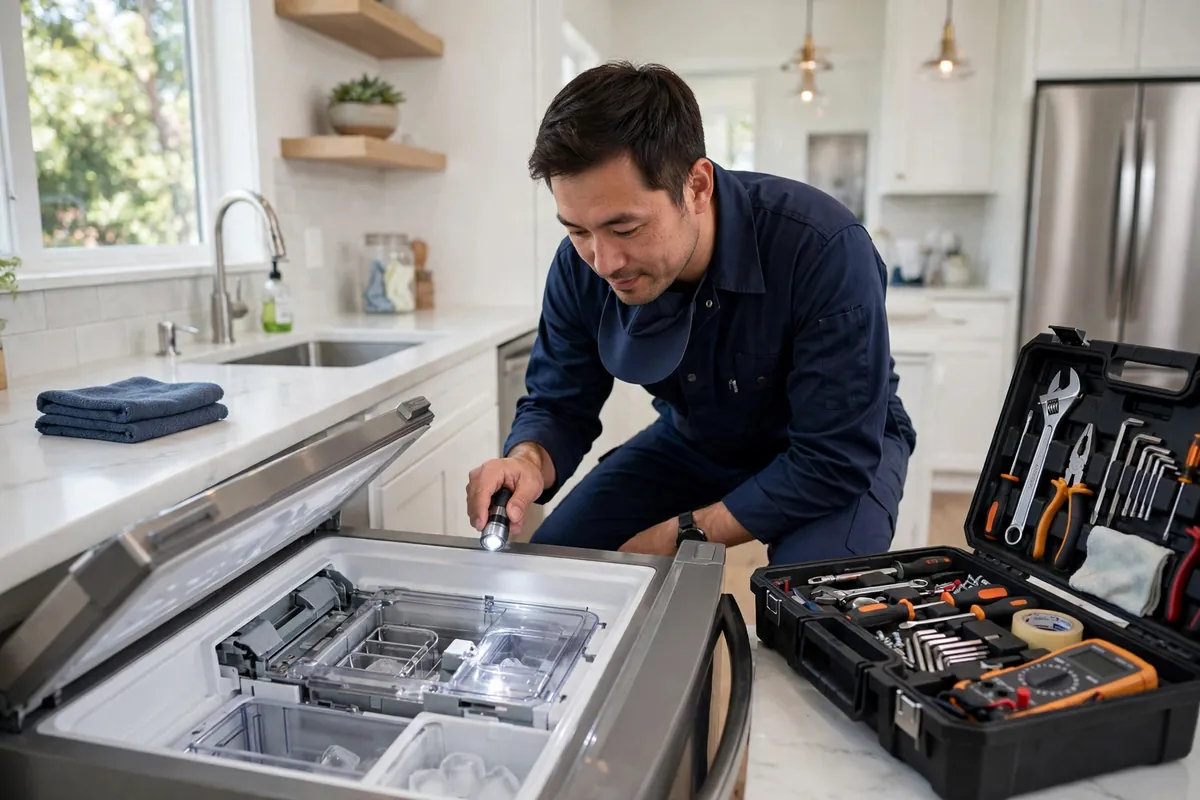
Call a technician when your own troubleshooting has ruled out the simple causes — setting, temperature, filter, supply line, and fill tube — and the ice maker still does not produce. The remaining suspects are the inlet valve, the ice maker assembly, and the control board, all of which benefit from professional testing and correct part sourcing.
Call sooner — without further DIY attempts — for water leaking from the back of the refrigerator, a burning smell, sparking, or a fill tube that keeps refreezing. Shut off the water supply valve first if there is an active leak.
For homeowners in Bend, professional refrigerator repair starts with your symptoms: tell the scheduler what you have already checked — for example, “the mold fills but never harvests” or “the dispenser works but the ice maker gets no water.” That detail helps the technician arrive with the right parts and often resolves the problem in a single visit.
Frequently Asked Questions About Ice Makers Not Working
How long should it take a new refrigerator to start making ice?
Allow 24 hours after installation to reach operating temperature, then 24 to 72 hours for the bin to fill — ice makers harvest in small batches. If there is still no ice after 72 hours with the freezer at 0°F to 5°F, work through the diagnostic steps in this guide.
Why is my ice maker not working but the water dispenser works fine?
Most refrigerators use a dual water inlet valve with separate sides for the dispenser and the ice maker. The ice-maker side can fail electrically or clog with sediment while the dispenser side keeps working normally. This symptom points strongly at the inlet valve or the fill tube, rather than the household water supply.
How do I reset my ice maker?
Many models have a small reset or test button on the ice maker housing — usually pressed and held for 3 to 10 seconds until you hear a chime or the ejector arms begin to turn. If your model has no reset button, unplug the refrigerator for 1 to 5 minutes to power-cycle the control board. Check your owner’s manual for the exact procedure, since it varies by brand and model.
Can a dirty water filter really stop ice production completely?
Yes. A severely clogged filter can restrict flow enough that the inlet valve cannot fill the mold. Replace the filter every six months — sooner with hard water or shrinking cubes.
Why are my ice cubes small, hollow, or misshapen?
Small or hollow cubes almost always mean the mold is not filling completely: low household water pressure, a clogged or overdue filter, a partially closed shutoff valve, or a failing inlet valve. Check the filter age and the shutoff valve first, since those are the quickest fixes, then investigate pressure and the valve.
Should I turn off the ice maker if I am not using it?
Yes — especially if the refrigerator is not connected to a water supply. An ice maker left on with no water connected will keep energizing the inlet valve, which can make a loud chattering noise and eventually burn the valve out. Lower the shutoff arm or switch it off at the control panel until the water supply is connected.
How often should I replace the water filter in Bend, OR?
Every six months is the standard recommendation, and it matters more than average in Central Oregon because local water tends to run hard with dissolved minerals that load filters faster. Homes on private wells should be especially diligent. Mark the replacement date on the filter housing or set a phone reminder so it does not slip.
Ice Maker and Refrigerator Repair in Bend, OR
A refrigerator that will not make ice is often the first sign of a developing problem with the water supply or the appliance’s controls — catching it early usually means a simpler repair.
We serve homeowners throughout Bend — including Northwest Crossing, Awbrey Butte, Boyd Acres, Larkspur, River West, Mountain View, Summit West, Orchard District, and Southern Crossing — as well as appliance repair in Redmond, Oregon and surrounding Central Oregon communities. Describe what you have already checked using the steps above; it helps the technician diagnose the problem faster, often in a single visit.
Final Takeaway
An ice maker not working is usually a water supply or temperature problem, not a dead refrigerator. Start with the switch, the freezer temperature, and the filter age — then use the water-pour test to determine whether the issue is the water supply or the ice maker mechanism.
Thaw a frozen fill tube carefully, take water leaks and burning smells seriously, and do not open sealed electrical compartments without training. When the simple checks do not resolve it, professional diagnosis is the sensible next step.
Ice Maker Still Not Working?
If the troubleshooting steps haven’t solved the problem, our technicians can diagnose the actual cause — valve, fill tube, assembly, or control board — and give you a clear, upfront repair estimate before any work begins.