Dryer Making a Loud Noise? Causes and Fixes for Bend, OR Homes
A dryer making a loud noise is telling you something — the exact sound points to the failing part. This guide matches thumping, squeaking, grinding, and rattling to their most likely causes. It includes safe checks you can do yourself, plus clear guidance on when to call a local technician.
Start Here: Your Dryer’s Noise Is a Diagnostic Clue
A dryer making a loud noise rarely fails silently — it warns you first. A dryer has a short list of moving parts: rollers, a belt, a pulley, a blower wheel, and glides. When one wears out, it makes a specific sound. Learning to read that sound turns a confusing racket into a short list of suspects.
This matters because continuing to run a noisy dryer can turn a small repair into a big one. A worn roller can wear a groove into the drum. A fraying belt can snap and leave clothes half-dried. Catching the problem at the noise stage keeps the fix small and the cost down.
This guide is written for homeowners in Bend and Redmond, Oregon. It covers how to identify your dryer’s sound and the seven most common causes of dryer noise. You also get a safe step-by-step diagnosis routine. It also covers local factors that make dryers noisier in Central Oregon. Finally, it explains exactly when professional dryer repair in Bend is the right call.
Table of Contents — Tap to Jump to a Section
- 01 Introduction
- 02 Quick Answer
- 03 Diagnose by Sound
- 04 7 Common Causes
- 05 Foreign Objects
- 06 Unbalanced Load & Leveling
- 07 Worn Drum Rollers
- 08 Worn Drive Belt
- 09 Failing Idler Pulley
- 10 Clogged Blower Wheel
- 11 Worn Drum Glides & Seals
- 12 Step-by-Step Diagnosis
- 13 Tools & Time Estimates
- 14 Safety First
- 15 Central Oregon Factors
- 16 Prevention
- 17 DIY or Pro?
- 18 When to Call a Pro
- 19 FAQ
- 20 Bend & Redmond Service
- 21 Final Takeaway
Why Is My Dryer Making a Loud Noise?
A dryer making a loud noise is almost always a mechanical problem, not an electronic one. The sound tells you which part is failing:
- Thumping or banging: uneven load, dryer not level, or worn drum support rollers.
- Squeaking or squealing: worn idler pulley, worn drum glides, or a glazed drive belt.
- Grinding or scraping: worn drum glides or seals letting metal rub on metal, or a foreign object in the drum.
- Rattling or clinking: coins, buttons, or other loose items — or a loose blower wheel.
- Rumbling: worn drum rollers, a wobbly blower wheel, or an unlevel dryer.
- Loud humming with a drum that barely turns: broken drive belt or motor trouble — stop using the dryer and call for service.
Before you look for a failing part, rule out the free fixes. Empty your pockets, balance the load, and confirm the dryer sits level. Those three checks solve a large share of dryer noise complaints in minutes.
Safety first: unplug the dryer before removing any panel or reaching into the drum area. On gas models, shut off the gas supply before working behind the dryer. If you smell burning or see sparking, stop the dryer immediately and call a professional.
Match the Sound to the Cause
Use this table to match your dryer’s noise to the most likely cause before reading the detailed sections below. Start with the easiest explanation in each row.
| The Sound | Most Likely Cause | Check First |
|---|---|---|
| Thumping — rhythmic, repeats every few seconds | Worn drum rollers, flat-spotted roller, unbalanced load | Rebalance the load, then check roller condition |
| Squeaking — high-pitched, throughout the cycle | Failing idler pulley, worn drum glides, glazed belt | Listen with the drum empty; squeak gets worse as the dryer heats up |
| Grinding — harsh, constant, worsens over time | Worn glides or seals, failing rear bearing, trapped object | Stop and inspect — grinding means metal contact |
| Rattling — random, loose and clinky | Coins or buttons, debris in blower wheel, loose panel screw | Empty pockets, then inspect blower housing |
| Rumbling — low, heavy, louder on startup | Worn drum rollers, wobbly blower wheel, dryer not level | Confirm the dryer sits level on all four feet |
| Slapping — rhythmic, with each drum rotation | Frayed or cracked drive belt | Inspect the belt for damage |
| Loud humming — motor runs, drum barely moves | Broken drive belt, seized motor, stuck drum | Stop using it — call a professional |
7 Common Causes of a Noisy Dryer
The sections below walk through each cause in detail. They run from the simplest checks to the repairs most likely to need a technician. Work through them in order — do not open the cabinet before ruling out the easy causes.
| Common Cause | Main Symptom | Difficulty |
|---|---|---|
| Foreign objects in the drum | Rattling, clinking, occasional thump | Easy — 5 minutes |
| Unbalanced load or unlevel dryer | Thumping, rumbling, vibration | Easy — 10 minutes |
| Worn drum support rollers | Rhythmic thumping, rumbling | Professional |
| Worn or damaged drive belt | Squealing, slapping, thumping | Professional |
| Failing idler pulley | Squeaking or chirping throughout the cycle | Professional |
| Clogged or loose blower wheel | Rattling, scraping, weak airflow | Professional |
| Worn drum glides or seals | Scraping, grinding, squeaking | Professional |
1. Foreign Objects in the Drum
The most common reason for a dryer making a loud noise is simple. Something that does not belong in the drum is inside. Coins, buttons, keys, bra underwires, screws, and pet tags tumble against the metal drum. That makes rattling, clinking, or intermittent thumping sounds.
The fix takes minutes. Empty every pocket before loading the dryer, and check inside cuffs and hoods where small items hide. Then look carefully around the drum. Run your fingers along the seam between the drum and the front bulkhead. Coins and underwires commonly slip in and get trapped there.
A coin or wire wedged at the drum edge can also cause a sharp scraping sound as the drum turns. If you hear scraping rather than rattling, inspect the drum edges closely before running another cycle. A trapped underwire can wear a groove into the drum. Left in place, it can also tear the felt seal.
Make it a habit: check pockets before every load, not just when the dryer gets noisy. Zip up zippers and fasten bra hooks too. Hooks that catch on the drum lifters turn quiet loads into loud ones.
2. Unbalanced Load or an Unlevel Dryer
A dryer making a loud noise during one particular load often just has a balance problem. Heavy items like bath mats, comforters, and jeans bunch up on one side of the drum. That unbalanced mass slams around as the drum turns. The rhythmic thumping and shaking can walk the dryer across the floor.
The quick test: pause the cycle, redistribute the load evenly, and restart. If the noise disappears, you found it. For heavy items, adding a couple of towels helps balance the drum. And do not overload — an overstuffed dryer cannot tumble clothes freely, which adds noise and doubles drying time.
If every load is noisy, check the leveling. A dryer that rocks on its feet bangs against the floor with every rotation. Place a spirit level across the top of the dryer. Check front to back and side to side, then adjust the leveling feet until the bubble centers. On the tile and laminate floors common in Bend laundry rooms, even a small tilt amplifies vibration into loud thumping.
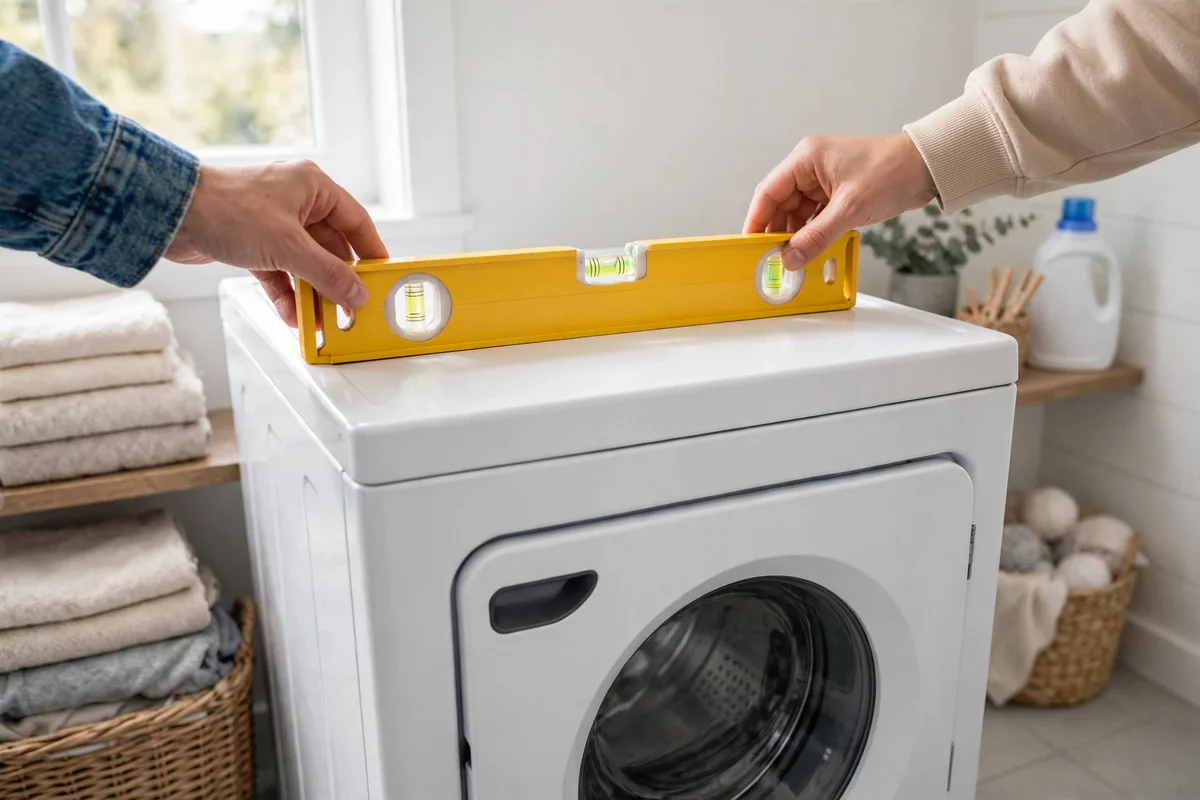
Recheck after moving: dryers shift when pulled out for cleaning or vent work. Leveling that was perfect a year ago may be off now. A two-minute level check belongs in every dryer diagnosis.
3. Worn Drum Support Rollers
When load and leveling check out but the thumping persists, the drum support rollers are the prime suspect. Most dryers ride the drum on two to four rubber-coated rollers at the back of the cabinet. They spin constantly with the drum and wear down over thousands of cycles.
Worn rollers cause a rhythmic thumping that repeats with every drum rotation — once or twice per revolution, depending on the model. A roller that has developed a flat spot hits the drum like a bad tire on pavement. You may also hear rumbling that gets louder as the load heats up. Hot rubber deforms more around the worn spot.
Rollers wear as a set, so technicians replace all of them at once. They usually replace the roller axles too, even when only one roller looks bad. Mixing a new roller with old ones brings the noise back quickly. Getting to the rollers requires opening the cabinet and lifting the drum. That is why this repair belongs with a professional, not a weekend project.
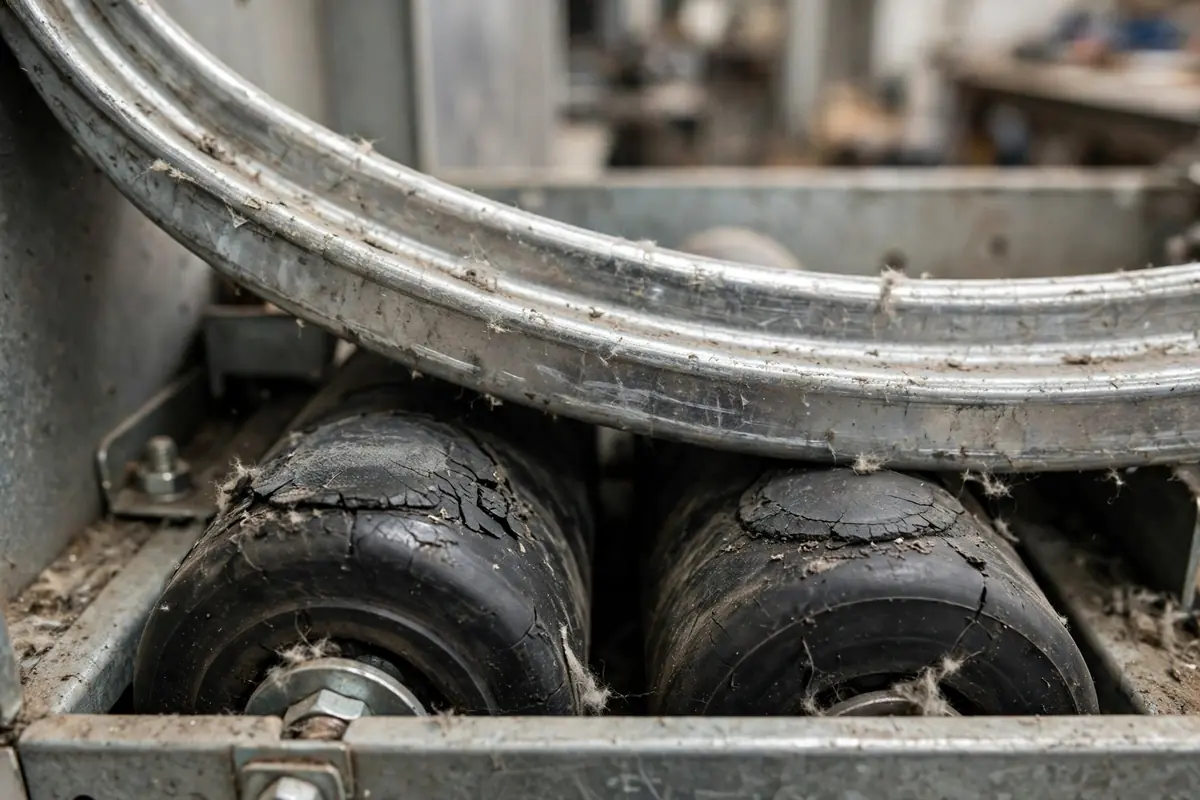
Do not ignore roller thumping. A worn roller lets the drum sit crooked, which accelerates belt wear, chews up glides, and strains the motor. A small roller job now prevents a three-part repair later.
4. Worn or Damaged Drive Belt
The drive belt is a long rubber band. It wraps around the drum, loops through the idler pulley, and drives off the motor. It stretches and cracks with age — and when it does, the dryer starts talking.
A glazed or stretched belt squeals as it slips on the drum. A frayed or cracked belt slaps once per rotation as the damaged section passes over the pulley. A belt with a chunk missing can produce a heavy thumping that mimics a worn roller. Belt noise often starts quiet and gets steadily louder over weeks. That slow pattern separates belt wear from a sudden problem like a trapped coin.
Here is the urgent part: a failing belt eventually snaps. When it breaks, the drum stops turning while the motor and heater keep running. Or the motor hums loudly and strains. If your dryer hums but the drum does not turn, stop using it immediately. Continued operation can overheat the motor and is a fire risk with lint around.
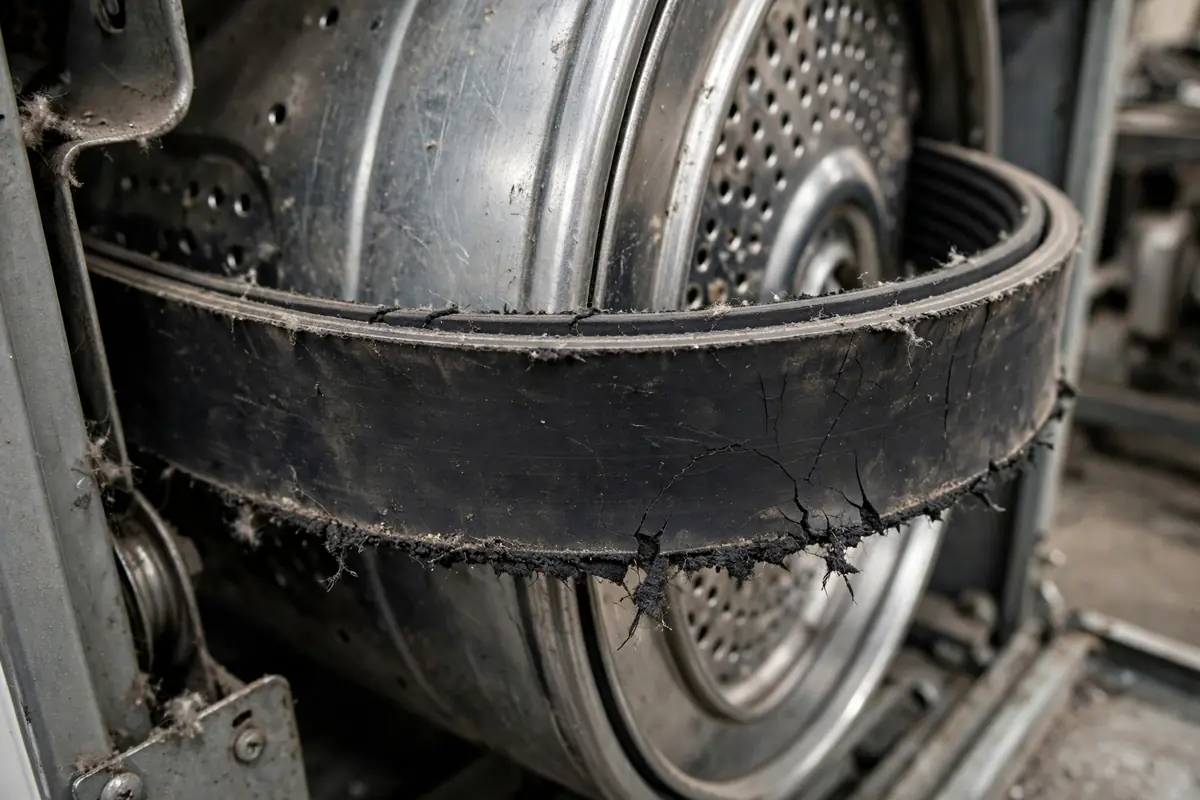
Tip for diagnosis: belt noise usually changes with load weight — heavier loads make a slipping belt squeal louder. If the noise tracks with load size, the belt is high on the suspect list.
5. Failing Idler Pulley
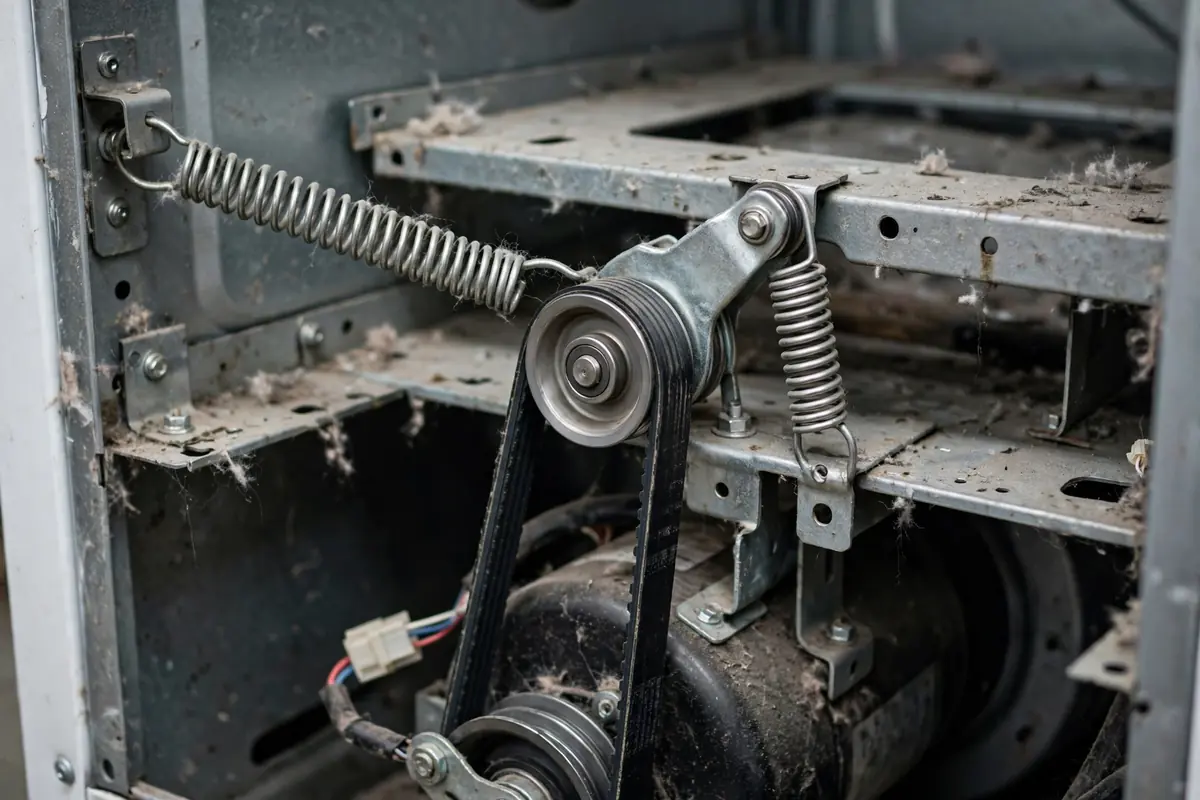
The idler pulley is the small wheel on a spring-loaded arm that keeps the drive belt under tension. Its bearings spin at high speed for every minute of every cycle. When those bearings dry out, the pulley announces itself. Expect a high-pitched squeak or chirp that repeats through the entire cycle.
Idler pulley noise has a signature. It often starts when the dryer is cold and fades as parts warm and expand. Or the reverse happens: it starts quiet and gets louder as heat thins the remaining grease. Either pattern points at the pulley rather than the belt. That is especially true when the squeak tracks drum rotation speed rather than load weight.
A seized idler pulley is also dangerous for the motor. If the pulley stops spinning freely, the belt drags across it. That creates extra friction and heat, and the extra load can burn out the drive motor. Squeaking that gets worse week after week deserves attention before it escalates.
6. Clogged or Loose Blower Wheel
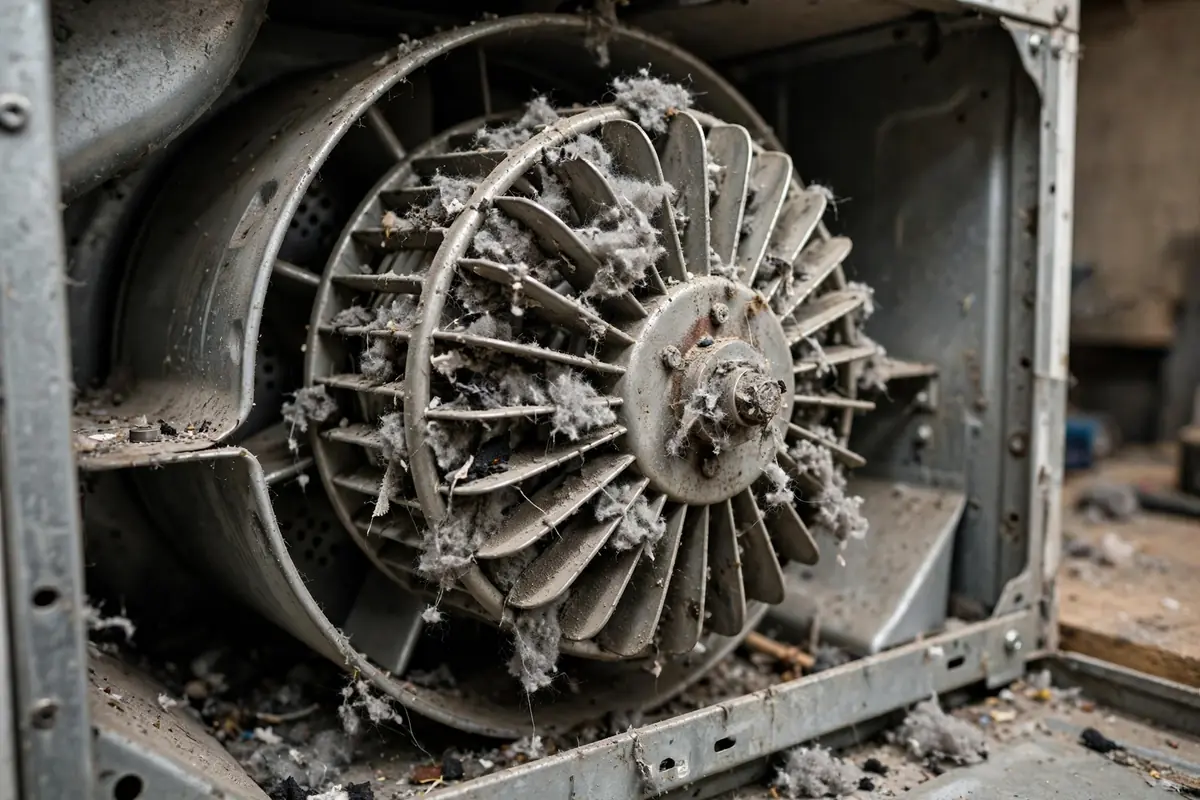
The blower wheel is the fan that pulls hot air through the drum and pushes it out the vent. It sits in a housing at the front or rear of the cabinet. Anything that gets past the lint screen can end up there. Lint buildup, socks, dryer sheets, and small garments wrap around the wheel or wedge in the housing.
A clogged blower wheel makes rattling, scraping, or rumbling sounds, often loudest during startup and spin-down. A wheel that has cracked or worked loose on its shaft wobbles. It can sound like a failing roller. But blower noise usually comes with a second clue: weak airflow and slow drying. A compromised wheel cannot move air properly. Weak airflow plus noise is the giveaway. Strong airflow with noise points away from the blower. Suspect rollers, belt, pulley, or glides instead.
Reaching the blower wheel means opening the cabinet and removing the blower housing. The wheel is often seized onto the motor shaft with age. That makes removal tricky without the right technique. This one is best left to a technician. While the machine is open, they can also check the vent line for blockages.
7. Worn Drum Glides or Seals
The front of the drum rests on plastic glides (also called slides) set into the front bulkhead, backed by a felt seal that keeps hot air from leaking out. The glides are a wear surface by design. The drum slides over them every cycle, and they eventually wear thin.
When glides wear through, the sound changes character: a light squeak becomes scraping or grinding as the drum’s metal edge starts riding directly on the bulkhead. A worn felt seal lets the drum shift slightly, adding squeak and rattle. You might also notice brown or gray streaks on clothes where they drag against the damaged seal area.
Grinding is the sound you should never ignore. Metal-on-metal contact wears grooves into the drum and bulkhead quickly, and the extra friction adds heat near accumulated lint. If your dryer grinds, stop using it until the glides and seals are replaced. This is the one noise where “wait and see” causes real damage.
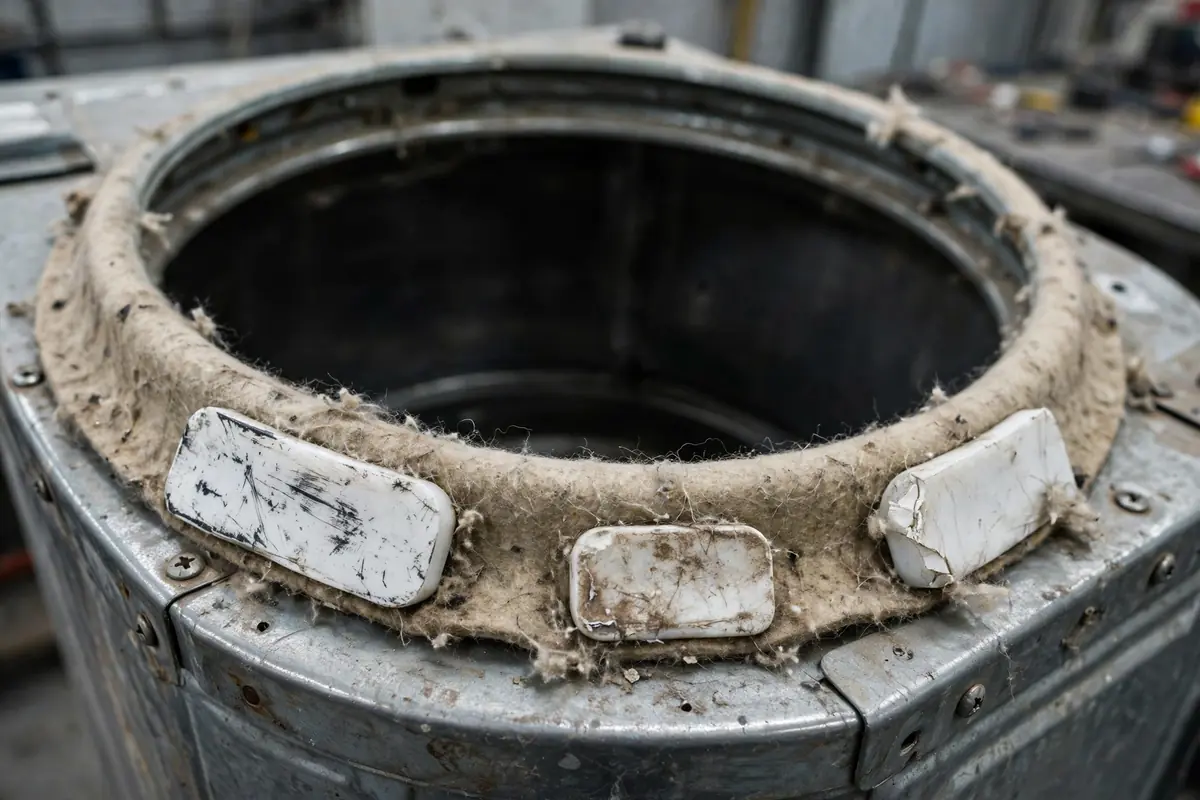
Which sound is it? Glide noise is steady and tied to drum rotation, squealing at first and grinding later. Roller noise is a rhythmic thump, once per revolution. That difference tells a technician which parts to bring.
How to Diagnose a Dryer Making a Loud Noise
Follow these steps in order. Each one rules out a cause before you move to the next. That way you do not open the cabinet for a problem that lives in the load.
Step 1: Characterize the Sound
Run the dryer briefly and listen carefully. Is it thumping, squeaking, grinding, rattling, or rumbling? Note whether it happens throughout the cycle or only at startup and shutdown. Match what you hear to the sound table above. An accurate description is the most valuable thing you can bring to a technician.
Step 2: Check Pockets and the Drum
Stop the dryer and remove everything. Check every pocket, cuff, and hood. Then run your fingers along the drum edges and baffles for trapped coins, underwires, screws, or buttons. Remove anything that does not belong.
Step 3: Run It Empty
Start the dryer with nothing inside for two to three minutes. If the noise continues with an empty drum, the load is not the cause. The problem is mechanical and lives in the machine itself.
Step 4: Test the Load Theory
If the empty drum is quiet, the issue is load-related. Reload with a medium, evenly distributed load — mix heavy and light items, and do not overstuff. If a heavy item like a comforter was the culprit, the noise should be gone.
Step 5: Check Leveling
Place a spirit level across the top of the dryer, front to back and side to side. Adjust the leveling feet until the bubble centers on both axes. Then rock the machine gently. All four feet should stay planted with no wobble.
Step 6: The Hand-Spin Test
With the dryer unplugged, open the door and spin the drum by hand. Listen and feel: grinding or roughness points to glides, bearings, or trapped objects. A squeak you can hear by hand points to rollers or the idler pulley. Heavy resistance or a drum that barely turns points to the belt or motor.
Step 7: Check Airflow
Go outside and feel the exterior vent while the dryer runs. Weak airflow plus rattling or rumbling points toward the blower wheel or a blocked vent line. Strong airflow with noise points away from the blower and toward rollers, belt, pulley, or glides.
Step 8: Decide Between Monitoring and a Service Call
If the noise is gone after steps 2 through 5, monitor the next few loads. If it persists after the empty-drum test, it is time for professional diagnosis. The same applies if you heard grinding or humming with a stalled drum, or smelled burning. Write down the sound, when it happens, and what you already checked.
Tools Needed and Time Estimates per Fix
Knowing what each fix involves helps you decide what to attempt yourself and what to hand to a technician.
| Fix | Tools Needed | Typical Time |
|---|---|---|
| Empty pockets, remove trapped objects | Flashlight | 5–10 minutes |
| Rebalance loads, avoid overloading | None | 5 minutes |
| Level the dryer, adjust feet | Spirit level, adjustable wrench | 10–15 minutes |
| Clean lint screen and exterior vent | Vacuum, lint brush | 10–20 minutes |
| Empty-drum and hand-spin diagnosis | None (dryer unplugged) | 10 minutes |
| Replace drum support rollers | Nut driver, putty knife (panel clips) | 60–90 minutes; pro recommended |
| Replace drive belt | Nut driver, patience for belt routing | 45–75 minutes; pro recommended |
| Replace idler pulley | Nut driver, work gloves | 45–60 minutes; pro recommended |
| Clean or replace blower wheel | Nut driver, vacuum, brush | 60–90 minutes; pro recommended |
| Replace drum glides and felt seals | Nut driver, adhesive (model-specific) | 60–90 minutes; pro recommended |
Time estimates assume a standard freestanding dryer. Stacked and compact models can take longer because access to the cabinet interior is tighter.
Safety Warnings Before You Start
Dryer noise diagnosis is safe when you respect three things: electricity, heat, and — on gas models — fuel. Follow these rules without exception.
- Unplug the dryer before removing any panel, reaching into the drum area, or touching internal parts. Line voltage is present at the motor and controls even when the cycle ends.
- On gas dryers, shut off the gas supply before doing anything behind the machine. If you smell gas at any point, leave the area and call your gas utility — do not troubleshoot further.
- Stop the dryer immediately if you smell burning, see scorch marks, or notice sparking. Unplug it and call a professional — these are fire warning signs, not wear patterns.
- Never reach into a running dryer. All listening tests can be done with the door closed; all touch tests with the dryer unplugged.
- Do not run a grinding dryer “to see if it gets better.” Metal-on-metal contact and a dragging belt both get worse fast. Both add heat near lint, which is exactly how dryer fires start.
When in doubt, stop. There is no dryer noise urgent enough to justify an electrical shock or a gas risk. A technician can pick up the diagnosis exactly where you left off.
Central Oregon Factors That Make Dryers Noisier
Dryers fail for the same mechanical reasons everywhere. But a few local conditions in the Bend area make noise problems more common here. Some make them louder than the national averages suggest.
High-Desert Dust in Vents and Cabinets
Central Oregon’s dry, dusty air carries fine grit into laundry rooms and dryer vents. That dust mixes with lint inside the blower housing and vent line. It adds weight and imbalance to the blower wheel, and imbalance is noise. Clean the exterior vent termination and the transition duct here. Do it more often than the generic “once a year” advice suggests.
Low Humidity and Static-Heavy Loads
Bend’s low humidity means more static cling, and static-heavy loads tangle into dense balls that throw the drum off balance. If thumping started with winter’s dry air, static-balled loads may be the trigger. Try dryer balls or a shorter cycle before suspecting the rollers.
Hard Floors That Amplify Vibration
Tile, laminate, and concrete floors are common in Bend laundry rooms and garage installs. They transmit vibration far better than carpet. A dryer that seemed fine on carpet can sound dramatically louder on a hard floor. Nothing may be wrong at all. Leveling matters more on these surfaces, and rubber anti-vibration pads under the feet are a cheap improvement.
Pets, Juniper, and Vent Blockages
Central Oregon homes run dryers hard. Pet hair, juniper pollen season, and outdoor dust load up lint screens and vents faster than average. A partially blocked vent makes the blower work harder and noisier, and restricted airflow is also a fire hazard. Check the exterior vent flap regularly; if it barely opens during a cycle, the line needs cleaning.
How to Keep Your Dryer Quiet
A few low-effort habits prevent most dryer noise problems before they start.
These steps take minutes and address the root causes behind the majority of noisy-dryer service calls.
Dryer Noise Repair: DIY or Professional Service?
Use this table to decide what to handle yourself and what to hand to a technician.
| Repair Task | DIY Suitability | Professional Help |
|---|---|---|
| Empty pockets, remove trapped objects | Good | Usually unnecessary |
| Rebalance loads, avoid overloading | Good | Usually unnecessary |
| Level the dryer, adjust feet | Good | Usually unnecessary |
| Clean lint screen and exterior vent | Good | Usually unnecessary |
| Empty-drum and hand-spin diagnosis | Good, with care | Usually unnecessary |
| Replace drum support rollers | No — cabinet disassembly | Yes |
| Replace drive belt | No — routing and tension are model-specific | Yes |
| Replace idler pulley | No | Yes |
| Clean or replace blower wheel | No | Yes |
| Replace drum glides and felt seals | No | Yes |
The key rule is simple: DIY the diagnosis and the free fixes: pockets, balance, leveling, lint. Let a professional handle everything inside the cabinet. A correct sound diagnosis from your own troubleshooting makes the service visit faster and cheaper.
When Should You Call a Dryer Repair Technician?
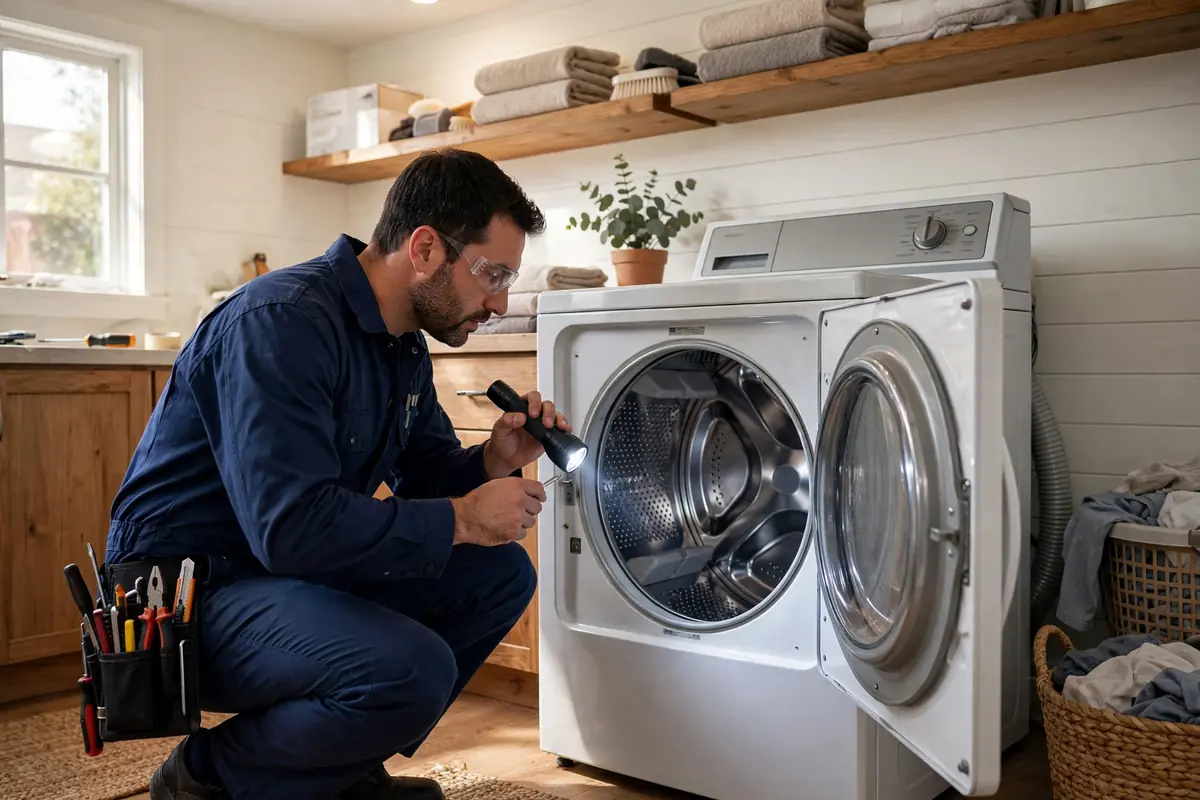
Call a technician when your own troubleshooting has ruled out the simple causes. If pockets, load balance, leveling, and lint all check out and the dryer is still noisy, get help. Persistent thumping, squeaking, grinding, or rumbling with an empty drum points to a worn part. Rollers, belt, pulley, blower wheel, or glides all require opening the cabinet and the correct replacement parts.
Call sooner for grinding sounds, a burning smell, or sparking. Skip further DIY attempts if the dryer hums while the drum does not turn. On gas dryers, any gas smell means leaving the area and calling the gas utility first.
For homeowners in Bend, professional dryer repair starts with your symptoms. Tell the scheduler what the noise sounds like and when it happens. Mention what you already checked. Examples: “rhythmic thumping with an empty drum” or “squeaking that gets louder as it heats up.” That detail helps the technician arrive with the right parts. It often resolves the problem in a single visit.
Frequently Asked Questions About Dryers Making Loud Noise
Why is my dryer making a loud thumping noise?
A rhythmic thump is usually an unbalanced load, a dryer that is not level, or worn drum support rollers. Redistribute the load and check the leveling first. If the thumping continues with an empty drum, the rollers are the most likely cause.
What causes a dryer to squeak every cycle?
Persistent squeaking throughout the cycle usually means a failing idler pulley, worn drum glides, or a glazed drive belt. A squeak tied to drum rotation speed — rather than load weight — points most strongly at the idler pulley.
Is it safe to use a dryer that is making grinding noises?
No. Grinding means metal is rubbing on metal, typically from worn drum glides or a trapped object. It damages the drum and bulkhead quickly. Stop using the dryer and have it inspected before running another cycle.
Why does my dryer make noise only when it starts up?
Startup-only noise often comes from flat spots on drum rollers. The spots smooth out as the rubber warms up. A cold idler pulley bearing can cause it too. It is an early warning: the part is wearing out, and the noise will eventually last the whole cycle.
Can a clogged dryer vent make the dryer louder?
Yes. A restricted vent makes the blower wheel work harder, which adds rattling and rumbling. Lint packed around the blower housing can also throw the wheel off balance. It also raises fire risk, so check the exterior vent flap regularly.
Why is my dryer loud all of a sudden after moving it?
Moving a dryer almost always changes its leveling, and a tilted dryer bangs and vibrates on hard floors. Re-level all four feet and confirm the vent duct did not kink or pull loose during the move.
How do I know if the noise is the belt or the rollers?
Belt noise usually changes with load weight. Heavier loads make a slipping belt squeal louder, and a frayed belt slaps once per rotation. Roller noise is a rhythmic thump that stays the same regardless of load and persists with an empty drum.
How long can a noisy dryer keep running before it breaks?
It depends on the sound. Squeaks and thumps can run for weeks while wearing parts further. But grinding, a humming motor with a stalled drum, or any burning smell can fail suddenly. They can damage other parts, so do not keep running a dryer with those symptoms.
Dryer Repair in Bend, OR
A dryer making a loud noise is usually warning you early. Catching a worn roller, belt, or glide at the noise stage keeps the repair small. Waiting lets it cascade into drum or motor damage.
We serve homeowners throughout Bend. Neighborhoods include Northwest Crossing, Awbrey Butte, Boyd Acres, Larkspur, and River West. We also serve Mountain View, Summit West, Orchard District, and Southern Crossing. Plus appliance repair in Redmond, Oregon and surrounding Central Oregon communities. If your dryer’s noise survived the checks in this guide, our dryer repair technicians in Bend will pinpoint the exact failing part and give you an upfront flat price before any work begins.
Final Takeaway
A dryer making a loud noise is giving you a diagnosis, not a death sentence. Thumping means rollers or balance. Squeaking means the pulley or belt. Grinding means worn glides. Every one of those is cheaper to fix at the noise stage than after a breakdown.
Rule out the free fixes first: pockets, load balance, leveling, and lint. Then use the empty-drum and hand-spin tests to narrow the field. Take grinding, burning smells, and a stalled drum seriously, and bring your sound description to the technician.
Dryer Still Making Noise?
If the troubleshooting steps haven’t quieted your dryer, our technicians can help. They will identify the exact cause — rollers, belt, pulley, blower wheel, or glides. Then you get a clear, upfront repair estimate before any work begins.