Garbage Disposal Humming But Not Working? Fixes for Bend, OR Homes
A garbage disposal humming but not working is almost always jammed — not broken. This guide explains what that hum means, how to safely unjam the unit with a hex wrench, when to press the reset button, and when the motor is truly done.

Start Here: That Hum Is Actually Good News
You flip the switch. Instead of the familiar grinding roar, you hear a low hum — the motor is running, but nothing is spinning. Your first thought might be that the disposal is dead. In most cases, it is not. That hum is actually good news: it means the motor is getting power and trying to work. Something is simply stopping the grinding plate from turning.
A garbage disposal humming but not working is one of the most common disposal problems, and it is also one of the easiest to fix. The usual culprit is a jam — a bone fragment, a fruit pit, or a wad of fibrous food wedged between the spinning plate and the grinding ring. Free the jam, press the reset button, and the disposal typically roars back to life in under ten minutes.
The critical rule: do not let it hum. A humming motor is a stalled motor, and a stalled motor overheats fast. Every second it hums against a jam, it is cooking its own windings. Turn it off the moment you hear that sound, then work through the steps below. This guide is written for homeowners in Bend, Oregon — the fix is the same everywhere, but the advice on when to replace includes our local hard-water reality.
One more reassurance before we start: this is genuinely a beginner-level fix. You are not opening the motor, touching wiring, or disassembling anything. The hex socket on the bottom exists specifically for homeowners to clear jams — the manufacturer put it there because jams are expected and normal. If you can turn a wrench and press a button, you can do this. The only hard rule is the safety one: hands stay out of the chamber, always, and power stays off while you work.
Table of Contents — Tap to Jump to a Section
Diagnose It by the Sound
What you hear tells you exactly what is wrong. Match your symptom before you start fixing.
| What You Hear | Likely Cause | What to Do |
|---|---|---|
| Steady hum, no grinding | Jammed grinding plate | Turn off, free the jam with a hex wrench, press reset |
| Hum, then silence | Overload protector tripped | Let the motor cool, then press the reset button |
| Nothing at all — dead silent | No power or tripped reset | Check the breaker, press reset, test the wall switch |
| Hum with slow draining | Partial jam or drain blockage | Clear the jam; check the drain line past the disposal |
| Loud rattling or clanking | Hard object loose inside | Turn off, remove the object with tongs |
| Hum returns after every reset | Motor windings failing | Stop resetting — the motor needs professional assessment |
The golden rule: a humming disposal gets turned OFF immediately. Every second of humming overheats the motor. Fix first, then test — never the other way around.
Why a Disposal Hums Instead of Grinding
Inside your disposal, an electric motor spins a flat metal plate — the flywheel — studded with small impellers. Food waste drops onto the plate, the impellers fling it outward against a stationary grinding ring, and the ground particles wash down the drain. It is a simple, brutal mechanism with essentially one moving part.
When something wedges between the plate and the ring — a bone chip, a bottle cap, a tangle of fibrous vegetable — the plate cannot turn. But the motor does not know that. It keeps trying, drawing full power against a locked rotor. That locked-rotor strain is the hum you hear: the motor vibrating at line frequency while going nowhere.
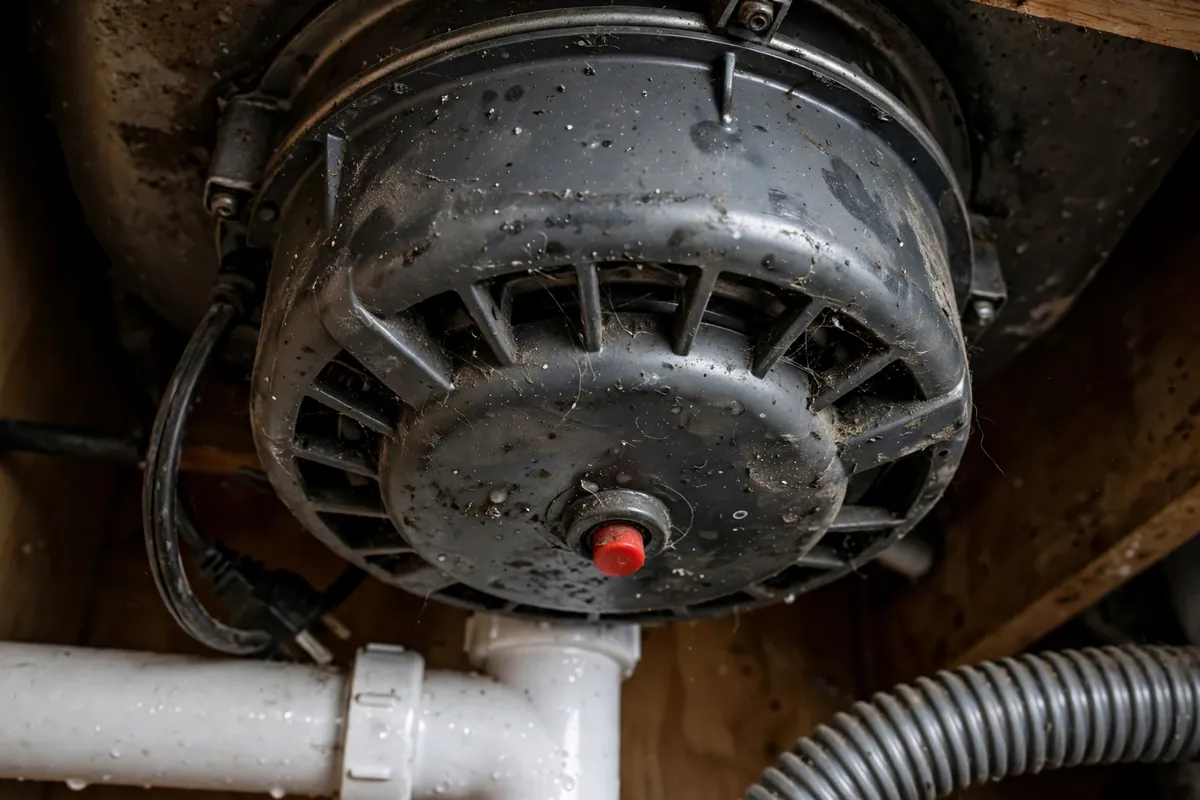
A locked motor draws far more current than a spinning one, which is why it overheats so quickly. To prevent fires, every disposal has a built-in thermal overload protector — a small circuit breaker that trips when the motor gets too hot. That is the little red reset button on the bottom of the unit. When it trips, the disposal goes silent. Pressing it after the motor cools restores power.
Understanding this sequence matters because it tells you the order of operations. The hum means power is reaching a jammed motor. The silence after means the protector tripped. Neither one means the disposal is dead — they are both the machine protecting itself while it waits for you to clear the jam.
Anatomy of a Garbage Disposal: What Is Inside
Knowing the parts helps you understand every sound your disposal makes — and fix problems with confidence instead of guesswork.
The motor. At the bottom of the unit sits an electric motor, typically 1/3 to 1 horsepower in residential models. It spins the grinding mechanism at around 1,700 revolutions per minute. The motor is the most expensive component and the one you are protecting every time you turn off a humming unit quickly.
The flywheel and impellers. Mounted on the motor shaft, the flywheel is a flat metal disc with two small impellers — sometimes called lugs — attached to it. These are not blades; they do not cut. They spin with the plate and fling food outward by centrifugal force. When people say “disposal blades,” they mean these impellers.
The grinding ring. The stationary shredder ring lines the inside wall of the grinding chamber. Food flung outward by the impellers gets smashed against this ring’s rough surface until the particles are small enough to wash through the holes in the ring and down the drain. Jams happen when something wedges between the spinning flywheel and this fixed ring.
The overload protector and reset button. A thermal switch wired into the motor circuit. When the motor overheats — from a jam, from running dry too long, from age — the switch opens and cuts power. The red button on the bottom is the manual reset for that switch. It is a safety device, not a fix: if it trips repeatedly, something is wrong.
The splash guard. The rubber flaps at the drain opening. They keep food and water from flying back up into the sink during grinding, and they muffle sound. A torn or missing splash guard makes the disposal noticeably louder and lets debris splash out.
The drain connections. The disposal connects to the sink drain above and the drain pipe (and usually the dishwasher) on the side. Leaks at these connections are plumbing repairs — gaskets, putty, or clamps — and are completely separate from motor problems. Knowing which kind of leak you have determines whether you need a wrench or a new unit.
Why this matters for the hum: when you understand that the hum is the motor straining against a locked flywheel, the fix becomes obvious — free the flywheel, don’t fight the motor. Every step in the fix section targets the mechanical jam, not the electrical system, because the electrical system is working exactly as designed.
Step-by-Step: Unjam Your Disposal Safely
Follow these steps in order. The whole process takes about ten minutes, and you need only a hex wrench, tongs, and a flashlight.
Turn off the power — completely. Flip the wall switch off. Then, for real safety, unplug the disposal from the outlet under the sink, or turn off its circuit breaker at the panel. The wall switch alone is not enough when you are about to work on the mechanism. Confirm it is dead by flipping the switch once — silence means safe.
Look inside with a flashlight. Shine a light down the drain opening and look for the obstruction. You will often see it: a bone fragment, a piece of glass, a bottle cap, a wad of fibrous material. Do not reach in yet — just identify what you are dealing with so you know what to expect when you free it.
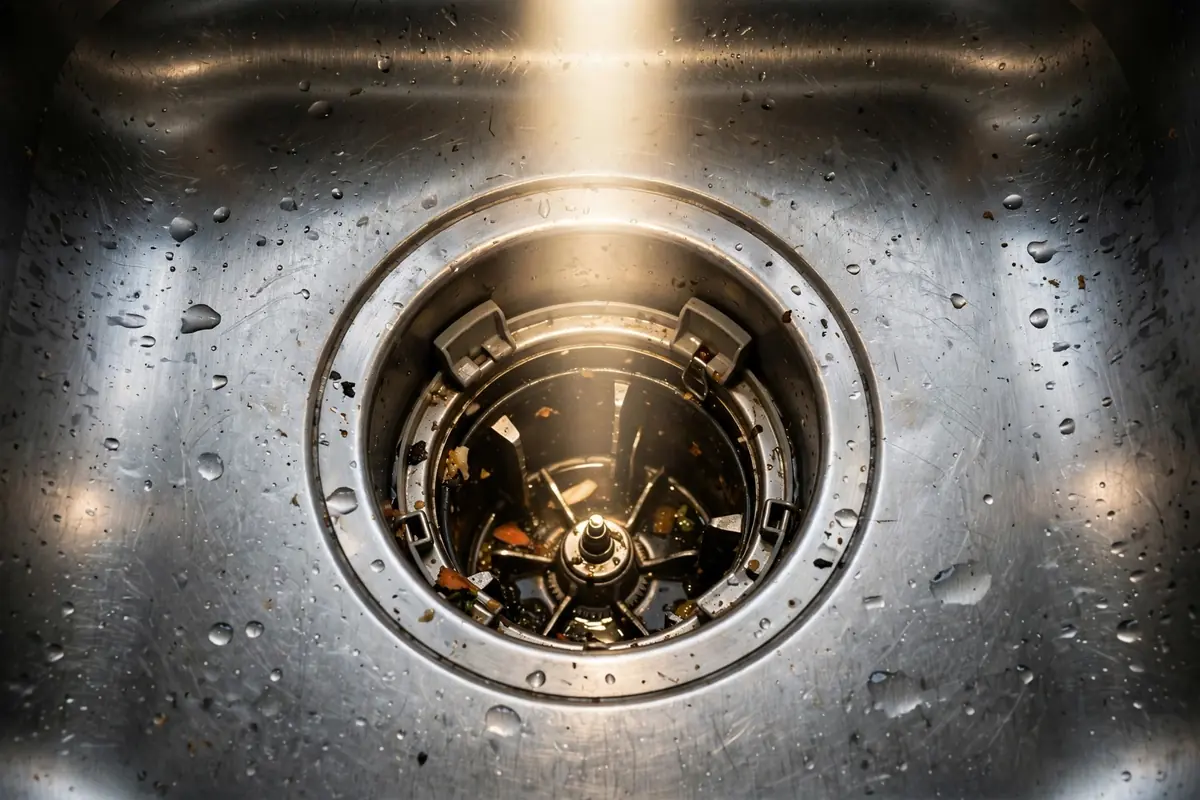
Free the flywheel with a hex wrench. On the very bottom center of the disposal, under the sink, there is a hexagonal socket. Insert a 1/4-inch hex key (Allen wrench) — most disposals shipped with one taped to the unit, so check there first. Work the wrench firmly back and forth in both directions. You will feel resistance at first; keep working it until the flywheel turns freely through a full rotation. That free rotation is your confirmation the jam is broken.

Remove the debris with tongs. Go back to the top, shine the flashlight in again, and use kitchen tongs or needle-nose pliers to pull out whatever was jamming the plate. Never use your fingers — the impellers are sharp even with the power off, and the flywheel can shift unexpectedly. Get everything out, including small fragments.
Press the reset button. On the bottom of the unit, find the small button — usually red — at or near the center of the underside. If the overload protector tripped, the button will be popped out slightly. Press it firmly until it clicks and stays in. If it was hot from straining, wait a few minutes for the motor to cool before pressing. If the button pops right back out, the jam is not fully clear or there is an electrical fault — do not force it.
Restore power and test with cold water. Plug the unit back in or flip the breaker on. Run cold water into the sink for ten seconds, then flip the wall switch. If it grinds normally, the fix is complete — run the water another thirty seconds to flush everything through. If it hums again immediately, turn it off: the flywheel is still partially jammed, or the motor itself needs professional assessment.
Safety, stated plainly: never put your hand inside a garbage disposal — not while it is humming, not while it is silent, not with the power off. The impellers are sharp blades. Tongs and pliers exist for this job. Every year, emergency rooms treat thousands of hand injuries from disposals, and nearly all of them started with “the power was off.”
What Causes Jams (and What Never Belongs in a Disposal)
Most jams come from a short list of usual suspects. Knowing them prevents the next jam before it happens.
Bones and pits. Chicken bones, fruit pits, and other hard objects do not grind — they wedge. Even small bones can lock the plate. They belong in the trash, always.
Fibrous vegetables. Celery, asparagus, artichoke leaves, and corn husks wrap around the impellers instead of grinding. The fibers tangle tighter with every rotation until the plate locks. Compost them or trash them.
Starchy foods. Potato peels, rice, pasta, and bread expand with water and turn into a thick paste that packs the grinding chamber. A few peels are fine; a full pot of potato peels is a jam waiting to happen.
Coffee grounds. In small amounts they are harmless, but large quantities settle into a dense sludge in the chamber and the drain line. If you brew a full pot daily, most of those grounds should go in the trash or compost.
Grease and oil. The worst offender of all. Grease coats the grinding chamber, traps every food particle that follows, and slowly restricts the mechanism until the motor strains. Wipe pans with a paper towel before washing, and collect cooking grease in a jar for the trash.
Non-food objects. Bottle caps, twist ties, small utensils, and broken glass slip in unnoticed and jam instantly. A quick glance down the drain before running the disposal catches most of these.

The habits that prevent jams: run cold water before, during, and after grinding — cold keeps grease solid so it washes through. Feed waste in small amounts instead of stuffing the chamber. Let the disposal run a few seconds after the grinding sound stops to clear the chamber fully. And run it regularly; a disposal that sits unused for weeks is more likely to seize.
When Humming Means the Motor Is Truly Dead
Sometimes the jam clears but the hum remains — or the hum keeps coming back. Here is how to tell the difference between a stubborn jam and a finished motor.
The flywheel turns freely, but it still hums. If you worked the hex wrench until the plate spins freely in both directions, removed all debris, pressed reset — and it still just hums — the problem is electrical, not mechanical. The motor windings may have burned out during an earlier jam, or the start capacitor has failed. Either way, this is beyond DIY.
The reset button will not stay in. A reset button that pops back out immediately, with no jam present, indicates the motor is drawing excessive current the moment power is applied — a classic sign of shorted windings. Do not keep pressing it. Repeated resets on a shorted motor are a fire risk.
It hums, trips, and repeats. If the disposal runs for a few seconds, trips the reset, and repeats that cycle every time, the motor is overheating under normal load. That means the windings are damaged or the bearings are seizing. Each cycle does more damage.
It is past its typical lifespan and struggling. Disposals last about 10 to 12 years. A unit at year eleven that needs frequent resets, jams constantly, or leaks from the bottom housing is not worth nursing along. The internal seals and motor are both at end of life, and each will fail in turn.
It leaks from the bottom of the housing. This one is definitive. A leak from the unit’s own housing — not a hose connection, not the sink flange — means the internal seal has failed. There is no repair for that. The disposal is done, and running it risks water damage under your sink.

Stop resetting a dead motor. If you have cleared the jam twice and it still will not run, further resets only overheat damaged windings. Unplug it or leave the breaker off until it is assessed or replaced.
Repair or Replace Your Disposal?
Disposals are inexpensive as appliances go, which shifts the repair math. Use this guide.
| Situation | Usually the Right Call | Why |
|---|---|---|
| Single jam, unit under 8 years old | DIY unjam | The fix is free and takes ten minutes |
| Leaking from sink flange or hose connection | Repair | Plumber’s putty, gaskets, or a hose clamp fixes it |
| Leaking from the bottom housing | Replace | Failed internal seal — no repair exists |
| Motor hums with a freely spinning plate | Replace | Burned windings or failed capacitor; replacement costs less than the service call |
| Unit over 10 years old with any major issue | Replace | At end of typical lifespan; other failures will follow |
| Frequent jams needing weekly resets | Replace | Worn mechanism; consider a more powerful unit |
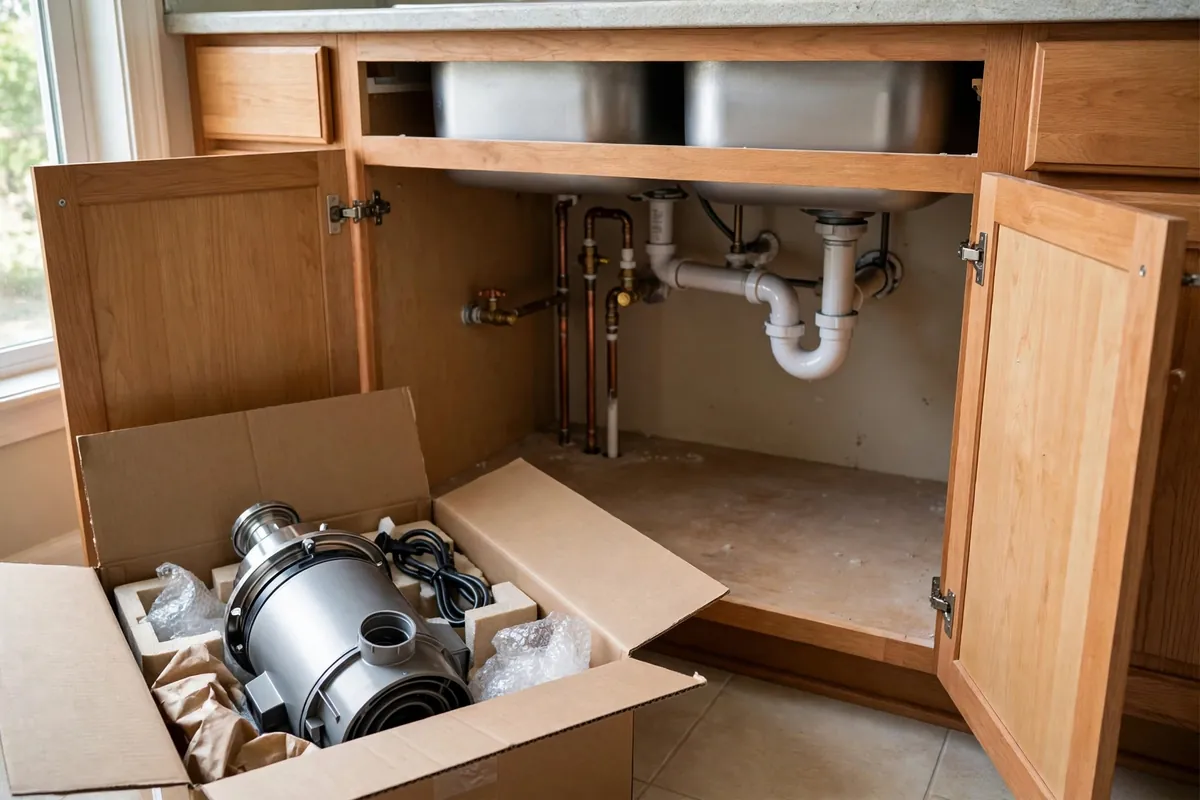
If you do replace, consider stepping up in power. Most builder-grade disposals are 1/3 horsepower, which jams easily. A 1/2 or 3/4 horsepower unit with stainless steel grinding components handles real kitchen waste far better and jams less often. The price difference is modest, and the frustration difference is large. Also check the warranty — better units often carry five to seven year warranties versus one or two on the cheapest models.
Sound matters too, and it is worth paying attention to when you shop. Disposals vary enormously in noise level. Better-insulated models with sound baffles run dramatically quieter than basic units — a difference you will appreciate every single day, since the disposal sits right under where you stand to cook. If your current unit’s roar has always bothered you, treat the replacement as an upgrade, not just a repair.
Installation is straightforward for a professional but fiddly for a first-timer: the mounting assembly, the drain connections, the dishwasher knockout plug, and the electrical hookup all have to be right. A common DIY mistake is forgetting to knock out the dishwasher drain plug on a new unit — the symptom is a dishwasher that will not drain, which sends people chasing a dishwasher problem that is really a disposal installation problem. If you replace it yourself, double-check that plug. If you would rather not deal with it, professional installation is quick.
One Central Oregon note: our hard water leaves scale in the grinding chamber over time, just as it does in dishwashers. Running ice cubes and cold water monthly scours that buildup out. On well water with heavy mineral content, do it every couple of weeks.
Disposal Maintenance Through the Year
A disposal asks very little. This light calendar keeps it grinding for its full lifespan.
Weekly: run the disposal for a few seconds with cold water, even if you have nothing to grind. Regular motion keeps the mechanism from seizing and flushes settled debris. This matters most in households that rarely use the disposal — idle units are the ones that lock up.
Monthly: grind a tray of ice cubes with cold water running. The ice scours the grinding chamber, knocks mineral scale loose, and sharpens nothing — but it does clean everything. Follow with a few lemon or citrus peels for freshness if you like; the citric acid helps cut grease film. In Central Oregon’s hard water, make this twice monthly to stay ahead of scale.
Quarterly: check under the sink for moisture. Feel the bottom of the disposal housing and look at the cabinet floor. Early seepage from a failing internal seal shows up as dampness long before it becomes a drip. Catching it early means replacing on your schedule, not during a flood.
Annually: inspect the splash guard for tears, check the mounting assembly for looseness (a wobbly disposal vibrates and leaks), and confirm the dishwasher drain connection is secure if your dishwasher drains through the disposal. Tighten the mounting ring if the unit has developed play.
What not to do: do not pour chemical drain cleaners through the disposal. Do not grind large quantities of anything at once. Do not run it dry — always with cold water flowing. And do not ignore new sounds; a disposal that starts rattling or humming differently is telling you something changed inside.
Beyond the Hum: Other Disposal Problems
Not every disposal problem hums. Here are the other common symptoms and what they mean.
Completely dead — no sound at all. Start with power. Check the circuit breaker — disposals share a kitchen circuit that trips more often than people expect. Press the reset button on the bottom of the unit. Test the wall switch itself; switches wear out, and a dead switch looks exactly like a dead disposal. If the outlet under the sink has a GFCI reset, check that too. Only after all of those check out should you suspect the motor.
Water not draining through the disposal side. If the disposal runs fine but water backs up in that side of the sink, the clog is past the unit in the drain line. The disposal is not a drain cleaner — it grinds food, but it cannot push through a grease clog ten feet down the pipe. This needs drain clearing, not disposal work. Do not keep running the disposal against standing water; it will overheat the same way a jam does.
Bad smells from the disposal. A smelly disposal is a dirty disposal, not a broken one. Food particles coat the splash guard, the grinding chamber walls, and the drain baffle. Grind ice cubes and citrus peels with cold water running, then scrub the underside of the splash guard with a brush and dish soap — that rubber flap is the number one source of disposal odor, and most people never clean it. For persistent smells, a cup of baking soda followed by vinegar, left to fizz for fifteen minutes, then flushed with hot water, handles the rest.
Leaking from the top. Water dripping from where the disposal meets the sink is a mounting flange problem — usually failed plumber’s putty or a loose mounting ring. This is a re-seal job, not a replacement. Turn off the disposal’s breaker, disconnect the drain pipes, drop the unit, clean off the old putty, and re-seat it with fresh putty. It is a messy afternoon but a cheap fix.
Leaking from a side pipe. Drips at the dishwasher inlet or the main drain connection are hose and clamp issues. Tighten the clamp, replace the hose if it is cracked, and check that the dishwasher knockout plug was removed if a dishwasher was recently connected. Side leaks are plumbing, not appliance failure.
Excessive vibration. A disposal that shakes the whole sink is usually loose in its mounting assembly. The mounting ring has three lugs that lock into the sink flange — if one has slipped, the unit hangs crooked and vibrates violently. Turn off the breaker, support the unit’s weight, and re-seat the mounting ring. Also check that the splash guard is intact; a torn guard changes the internal acoustics and makes normal operation sound alarming.
Slow grinding. A disposal that runs but grinds poorly is usually dull from age or packed with scale and grease. The ice-cube scour helps. But if a ten-year-old unit grinds slowly even when clean, the motor is weakening — start planning for replacement rather than waiting for the failure.
Five Habits That Keep a Disposal Jam-Free
When Should You Call a Professional?

Call a professional when the DIY steps do not resolve it: the flywheel spins freely but the motor still hums, the reset button will not stay in, or the unit trips repeatedly. Those are electrical failures, not jams, and they need proper diagnosis.
Also call for anything involving the plumbing or electrical connections — replacing a disposal means working with both water lines and hardwired or outlet power under the sink. If you are not comfortable with both, a professional installation is fast and guarantees the mounting, connections, and dishwasher drain knockout are all correct.
And call sooner rather than later for leaks. Water under the sink damages cabinets fast, and a disposal leaking from its housing will not stop on its own. If you see water pooling under the unit, turn off its breaker and get a free estimate — we will tell you honestly whether it is a connection fix or a replacement.
Frequently Asked Questions About Humming Garbage Disposals
Why is my garbage disposal humming but not working?
The motor is getting power but the grinding plate is jammed and cannot turn. Turn it off immediately, free the jam with a hex wrench through the bottom socket, remove the debris, press the reset button, and test with cold water running.
Where is the reset button on a garbage disposal?
On the bottom of the unit, under the sink — a small button, usually red, at or near the center of the underside. It pops out when the motor overheats. Press it firmly until it clicks and stays in.
Can I unjam a disposal without a hex wrench?
The hex socket is the designed method and the safest one. In a pinch, a wooden broom handle from the top can sometimes lever the plate — but never use your hands, and the hex wrench approach is far more effective. A 1/4-inch hex key costs very little.
Is it safe to put my hand in the disposal to clear a jam?
No — never, even with the power off. The impellers are sharp and the plate can shift unexpectedly. Use tongs or needle-nose pliers for everything inside the chamber.
Why does my disposal keep tripping the reset button?
Repeated trips mean the motor is overheating under load — either jams keep recurring or the windings are failing. If the chamber is clear and it still trips, the motor needs professional assessment or replacement.
How long should a garbage disposal last?
Typically 10 to 12 years. Frequent jams, weekly reset trips, or leaking from the bottom housing are end-of-life signs. Hard water scale shortens that range without regular ice-and-water flushing.
Can I use chemical drain cleaner in my disposal?
It is not recommended. Chemical cleaner pools in the grinding chamber where it can splash the next person who works near the sink, and repeated use damages older pipes. Use mechanical clearing and cold water instead.
My disposal hums and the sink is not draining — what now?
You likely have both a jam and a drain blockage past the disposal. Clear the jam first with the steps above. If water still will not drain with the disposal running freely, the clog is in the drain line beyond the unit and needs drain clearing.
Garbage Disposal Service in Bend, OR
Most humming disposals are ten-minute DIY fixes — but when the motor is truly done, or you would rather not wrestle with plumbing and wiring under the sink, we are here. We diagnose disposal problems honestly, replace units when replacement is the smarter money, and install the new one correctly the first time.
We serve homeowners throughout Bend — including Northwest Crossing, Awbrey Butte, Boyd Acres, Larkspur, River West, Mountain View, Summit West, Orchard District, and Southern Crossing — as well as appliance repair in Redmond, Oregon and surrounding Central Oregon communities. Same-day appointments available, upfront pricing, 90-day warranty.
Final Takeaway
A garbage disposal humming but not working is a jammed machine asking for ten minutes of your time — not a dead machine asking for your wallet. Turn it off, work the hex wrench until the plate spins free, pull the debris with tongs, press reset, and test with cold water.
When the jam clears but the hum stays, or the unit is past its decade of service and failing repeatedly, replacement is the honest answer. And whatever you do, never put your hand inside — that rule has no exceptions.
Disposal Still Humming After the Fix?
If the jam is clear and it still will not run, the motor is likely done. We will confirm it fast, give you an upfront replacement estimate, and install the new unit correctly.